 Domain NamesFind and register your ideal domain name instantly.
 Web HostingEasy-to-use hosting powered by cPanel — ideal for managing websites in Nigeria.
 Windows HostingRun .NET apps with Windows-optimized hosting
 Affiliate ProgramMake money promoting our services
 Reseller HostingMake money by reselling our hosting products under your own brand
 .COM Domains
 All DomainsExplore all supported tld domains in Nigeria
 WhoisFind out who owns any domain, as well as verify your registration details
 VPS Hosting in Nigeria
 Dedicated ServersReimagine your site speed with your own complete server
 AI Website BuilderDesign your site with drag-and-drop tools
 Online Store BuilderStart your online shop without code
 SSLs
SSLs Support PortalFind answers or get expert help
 Contact UsReach our team via chat or email
 BlogRead our extensive guides on web hosting and more
Installing OpenClaw on Windows 10 and 11 isn’t always straightforward.
PowerShell quirks, WSL2 setup, and Node version mismatches trip up a lot of Nigerian users before the agent even goes live.
Here’s the direct answer. There are two reliable ways to do it.
You can run a fast native PowerShell install. Or you can set up OpenClaw inside WSL2, which is the more stable option and the one we recommend.
This guide walks you through both methods, step by step.
You’ll get the exact commands to run, the correct default port (18789, not the 3000 you’ll see in some outdated guides), and the security setup most tutorials skip.
We checked every step against the official OpenClaw documentation. That means you won’t get stuck halfway through, debugging a wrong command or a wrong port.
If you’d rather skip the local maintenance altogether, Truehost’s OpenClaw hosting gets you running in minutes. It’s built for the Nigerian market, no power cuts, no Windows update surprises.
The Requirements
Before you install OpenClaw on Windows 10 or 11, check your system against this list.
- RAM: 16GB
- Free disk space: 20GB
- Node.js: version 22.22.3 or higher (24.15+ is the current recommended target). If you’ve seen a guide telling you Node 18 works, ignore it. That version is outdated and no longer supported.
- Git, installed and up to date
- PowerShell, run as Administrator
- Windows 10 or 11, fully updated
One more thing. OpenClaw can execute commands and access files on your machine.
That’s powerful. It’s also a risk if you set it up carelessly.
We recommend running it under an isolated user account, or inside a virtual machine. Don’t install it on your main admin account and walk away.
Two Installation Paths
You have two options for getting OpenClaw running on Windows.
- Native PowerShell: fast, beginner-friendly, but less stable
- WSL2: takes a little longer to set up, but far more reliable (recommended)
Both paths get you to the same place. Your choice depends on how much you value speed versus stability.
If you’re just testing OpenClaw out, native PowerShell works fine. If you plan to run it daily, go with WSL2.
Here’s why the difference is important. OpenClaw was built and tested primarily on Linux.
WSL2 gives you a real Linux kernel running inside Windows, so the agent behaves the way its developers intended.
Native PowerShell support exists and works for most tasks. But it’s newer, less battle-tested, and more likely to hit an edge case that hasn’t been fixed yet.
Method 1: Native Windows via PowerShell
This is the quickest way to get OpenClaw running on Windows 10 or 11.
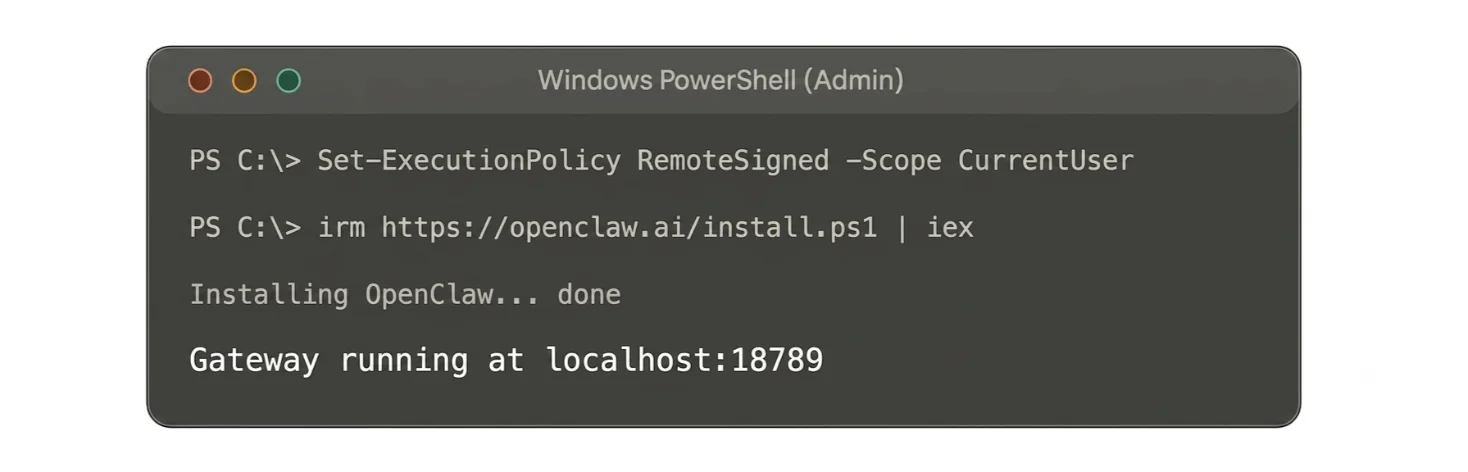
- Open PowerShell as Administrator. Right-click the Start menu, select “Windows PowerShell (Admin).”
- Set your execution policy. Windows blocks script execution by default. Run this command to allow it for your user account:
Set-ExecutionPolicy RemoteSigned -Scope CurrentUser
- Run the installer. This single command downloads OpenClaw, checks your Node version, and starts the setup wizard:
irm https://openclaw.ai/install.ps1 | iex
- Complete the onboarding wizard. You’ll choose your AI model provider (Anthropic, OpenAI, or others), your messaging channel (WhatsApp, Telegram, and more), and any skills you want enabled from the start.
- Launch the gateway. Once setup finishes, grab your Control UI URL from the terminal output. This is where you’ll manage your agent going forward.
Pros and cons of native PowerShell:
| Pros | Cons |
|---|---|
| Fast to set up | Less stable long-term |
| No Linux environment needed | Fewer troubleshooting resources online |
| Works on both Windows 10 and 11 | Some Windows-specific bugs are harder to trace |
Method 2: WSL2 Installation (Recommended)
If you want the most stable OpenClaw setup on Windows, use WSL2. It runs a real Linux environment inside Windows, which is what OpenClaw was built for.
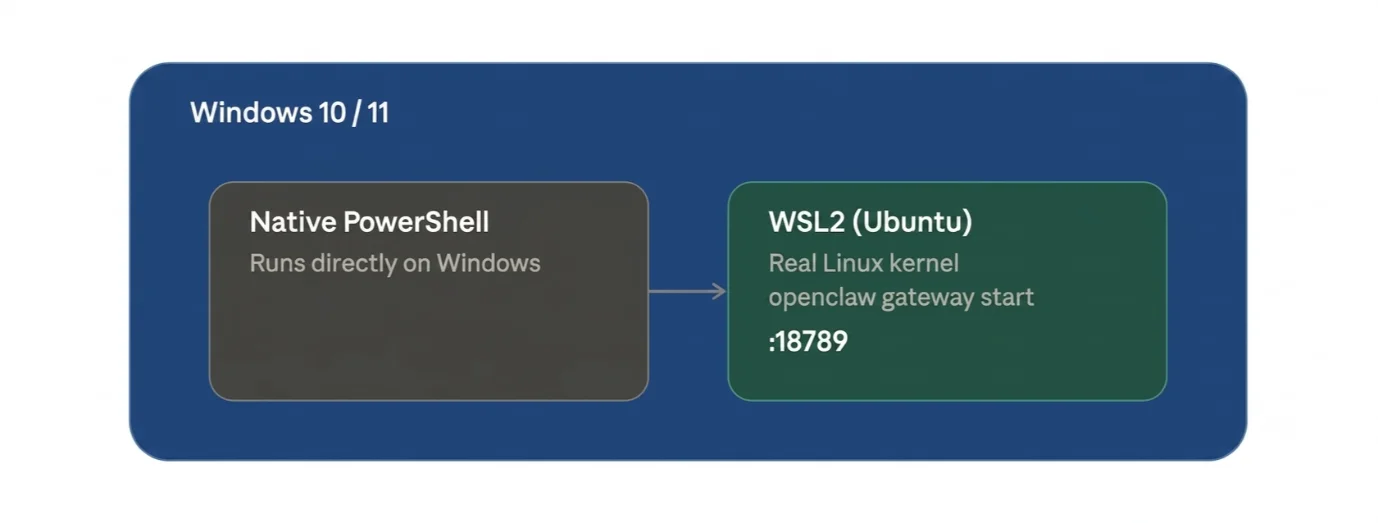
- Install WSL2. Open PowerShell as Administrator and run:
wsl --install
Restart your computer when prompted. Once it’s back up, confirm the install with:
wsl --list -v
- Set up Ubuntu. WSL2 installs Ubuntu by default. On first launch, you’ll create a Linux username and password. Keep these somewhere safe.
- Install Node.js inside WSL. Use NVM (Node Version Manager) to install and manage Node cleanly, without touching your Windows system files.
- Install OpenClaw. Run the official one-liner inside your WSL terminal:
curl -fsSL https://openclaw.ai/install.sh | bash
- Onboard your agent. Run:
openclaw onboard
Connect your model provider and messaging channel the same way you would in Method
- Set OpenClaw to run as a service. Install and start the gateway with:
openclaw gateway install
openclaw gateway start
This keeps OpenClaw running in the background, and lets it auto-start on boot. WSL2 also gives you clean file integration between Windows and Linux, so you can access your OpenClaw config files from either side without extra setup.
Post-Installation Setup
Once OpenClaw is installed, take a few minutes to confirm everything is working correctly.
- Verify your install. Run
openclaw --versionto confirm the CLI is available. Then runopenclaw doctorto check for config issues. - Connect your LLM and messaging channel. For most Nigerian SMB use cases, WhatsApp or Telegram integration is very important. Set this up during onboarding, or add it later from the dashboard.
- Access your dashboard. Once the gateway is running, open
http://localhost:18789in your browser. This is your Control UI. - Run OpenClaw as a persistent Windows service. Use
openclaw gateway install(or a tool like NSSM for native Windows setups) so the agent keeps running after you close your terminal or restart your PC.
Securing Your Setup
OpenClaw can read your files and run commands on your behalf. Treat it with the same caution you’d give any tool with that level of access.
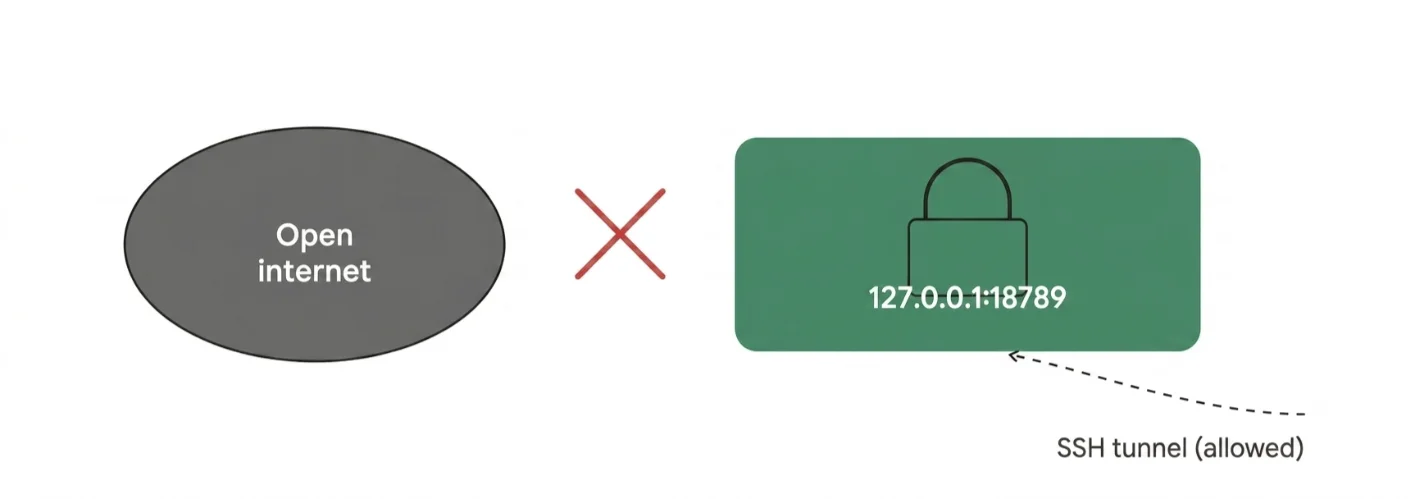
- Keep the gateway off the open internet. By default, OpenClaw binds to
127.0.0.1, the loopback interface. This means only your own machine can reach it. Leave it that way unless you have a specific reason not to. - Use SSH tunnels for remote access. If you need to reach your agent from another device, tunnel through SSH instead of exposing the port directly.
- Set Windows Firewall rules. Block inbound connections to your OpenClaw port from outside your machine.
- Use a dedicated user account. Don’t run OpenClaw under your main admin profile.
- Back up your config file. Your setup, API keys, and preferences live in one file. Losing it means starting over.
Here’s an example of why this is important. If you bind your gateway to 0.0.0.0 instead of 127.0.0.1, your OpenClaw instance becomes reachable from any device on your network, and possibly beyond it, depending on your router setup.
That’s a risk most home and small-office setups don’t need to take. Keep loopback binding on unless you have a specific, authenticated reason to open it up.
If you do need remote access, say, you’re managing your agent from your phone or another laptop, tunnel through SSH rather than exposing the port.
It’s a few extra minutes of setup, and it closes off a real attack surface.
Troubleshooting Common Issues
Most OpenClaw installation problems on Windows fall into a handful of categories.
- Command not found / PATH issues. This is almost always because npm’s global bin directory isn’t in your system PATH. Check with
npm prefix -g, then confirm that path is listed when you runecho $PATH(WSL2) or$env:PATH(PowerShell). - Node version mismatch. Run
node -vto confirm you’re on Node 22.22.3 or higher. If not, reinstall Node before touching OpenClaw again. - WSL2 systemd issues. Some Ubuntu images ship with systemd disabled. Enable it in
/etc/wsl.conf, then restart WSL withwsl --shutdown. - Permission errors. These usually mean you’re not running PowerShell as Administrator, or your WSL user lacks sudo access.
- Gateway not starting. Run
openclaw gateway statusto see what’s happening. If the port is already in use, another OpenClaw process may still be running, check withopenclaw doctor.
Nigeria-Specific Considerations
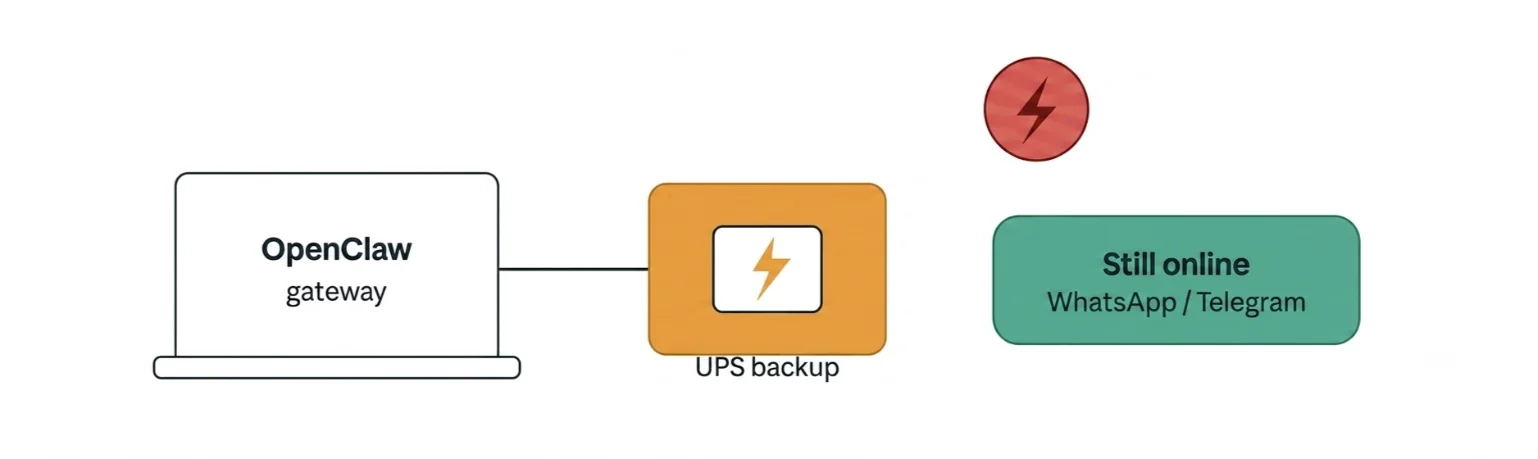
Running OpenClaw locally in Nigeria comes with a few extra things to plan around.
- Power interruptions. NEPA outages can kill your agent mid-task, or corrupt a config file during a write. If you’re running OpenClaw for anything business-critical, invest in a UPS to keep it online.
- Data costs. Model downloads and npm installs can pull several gigabytes. Schedule these during off-peak or discounted data bundle windows to save on cost.
- ISP latency. Local internet speeds affect how fast your messaging channels, WhatsApp, Telegram, respond. If you notice lag in your agent’s replies, check your connection before assuming OpenClaw itself is slow.
These aren’t dealbreakers. But they’re the kind of maintenance burden that pushes a lot of our Nigerian clients toward hosted OpenClaw instead of running it on a home PC.
Think about what happens if your agent handles customer replies on WhatsApp for your business. A power cut at 9pm shouldn’t mean customers get no response until morning.
That single scenario is often the deciding factor for SMB owners choosing between a local install and a hosted plan.
Install OpenClaw on Windows FAQs
What is the best OS for OpenClaw?
Linux offers the most native compatibility, since OpenClaw was built and tested primarily in Linux environments. On Windows, WSL2 gets you the closest thing to that same experience, which is why we recommend it over native PowerShell for anyone running OpenClaw long-term.
What is the best OpenClaw setup?
For most users, WSL2 with a dedicated, non-admin user account is the safest and most stable setup. Pair it with loopback binding, SSH tunnels for remote access, and a UPS if you’re in an area with unstable power.
Can OpenClaw run on Windows without WSL2?
Yes. The native PowerShell method installs and runs OpenClaw directly on Windows, no Linux layer required. It’s faster to set up, but it’s less tested for edge cases than the WSL2 path.
Does OpenClaw run natively on Windows, or does it need WSL2?
Both are valid. OpenClaw runs natively on Windows through the PowerShell installer. WSL2 isn’t required, but it’s the officially recommended path for the most stable, Linux-compatible experience.
Install OpenClaw with a Reliable Provider
Everything above works. But it comes with a maintenance burden.
Windows updates can interrupt your gateway mid-task. Power cuts can corrupt your setup. Your own hardware has to stay on, and stay healthy, for your agent to stay online.
That’s a lot to manage for a tool that’s supposed to save you time.
If you’d rather not deal with any of that, try Truehost’s OpenClaw hosting in Nigeria.
We host it on Nigeria-based, low-latency infrastructure, priced in Naira, with free SSL included on every plan.
You also get 24/7 support and your own private API keys and configuration; nobody else touches your setup.
If your workflow later grows beyond OpenClaw alone, we also run VPS plans, dedicated servers, AI Workers, and N8n hosting, so you can scale your automation stack without moving providers.
Open an account with us, and let your agent run without worrying about the next power cut or Windows update.