 Domain NamesFind and register your ideal domain name instantly.
 Web HostingEasy-to-use hosting powered by cPanel — ideal for managing websites in Nigeria.
 Windows HostingRun .NET apps with Windows-optimized hosting
 Affiliate ProgramMake money promoting our services
 Reseller HostingMake money by reselling our hosting products under your own brand
 .COM Domains
 All DomainsExplore all supported tld domains in Nigeria
 WhoisFind out who owns any domain, as well as verify your registration details
 VPS Hosting in Nigeria
 Dedicated ServersReimagine your site speed with your own complete server
 AI Website BuilderDesign your site with drag-and-drop tools
 Online Store BuilderStart your online shop without code
 Support PortalFind answers or get expert help
 Contact UsReach our team via chat or email
 BlogRead our extensive guides on web hosting and more
Debian is one of the cleanest Linux bases you can run OpenClaw on.
Thank you for reading this post, don't forget to subscribe!It’s lean, battle-tested, and available on nearly every VPS provider worth using, and because it’s the upstream parent of Ubuntu, most Linux documentation applies directly.
There’s no OS-level friction with OpenClaw on Debian, as long as Node.js is installed correctly.
If you don’t have a VPS yet, Truehost’s OpenClaw Hosting plans come pre-configured and ready in under a minute. But if you want full control of every layer, that is, Node, Nginx, systemd, and the works, this guide walks you through the entire manual Debian path.
Before installing OpenClaw, make sure your server and accounts are ready.
You’ll need:
- A Debian server with at least 2 GB RAM, 2 vCPU cores, and 10 GB of available storage.
- Root or sudo SSH access so you can install software and configure system services.
- An API key from a supported AI model provider such as Anthropic, OpenAI, or Google.
- Node.js 22.19+, 23.11+, or 24+. If Node.js isn’t installed or the version is unsupported, the OpenClaw installer will take care of it automatically.
- A domain name and SSL certificate if you plan to make OpenClaw accessible over the internet. This allows you to serve the Gateway securely over HTTPS in a production environment.
If you’re comparing plans, our Truehost OpenClaw Starter gives you 1 vCPU, 2 GB RAM, 50 GB NVMe, and 4 TB bandwidth, enough to run OpenClaw comfortably for a single business or team.
Steps to Install and Configure OpenClaw on Debian
Step 1: Install Node.js on Debian
Before installing OpenClaw, you need a supported version of Node.js on your Debian server. This is because Debian’s official repository doesn’t keep up with the Node.js release cycle.
If you run apt install nodejs directly, Debian may install an older Node.js version that doesn’t meet OpenClaw’s requirements. Instead, install Node.js through NodeSource so you can use a current supported release.
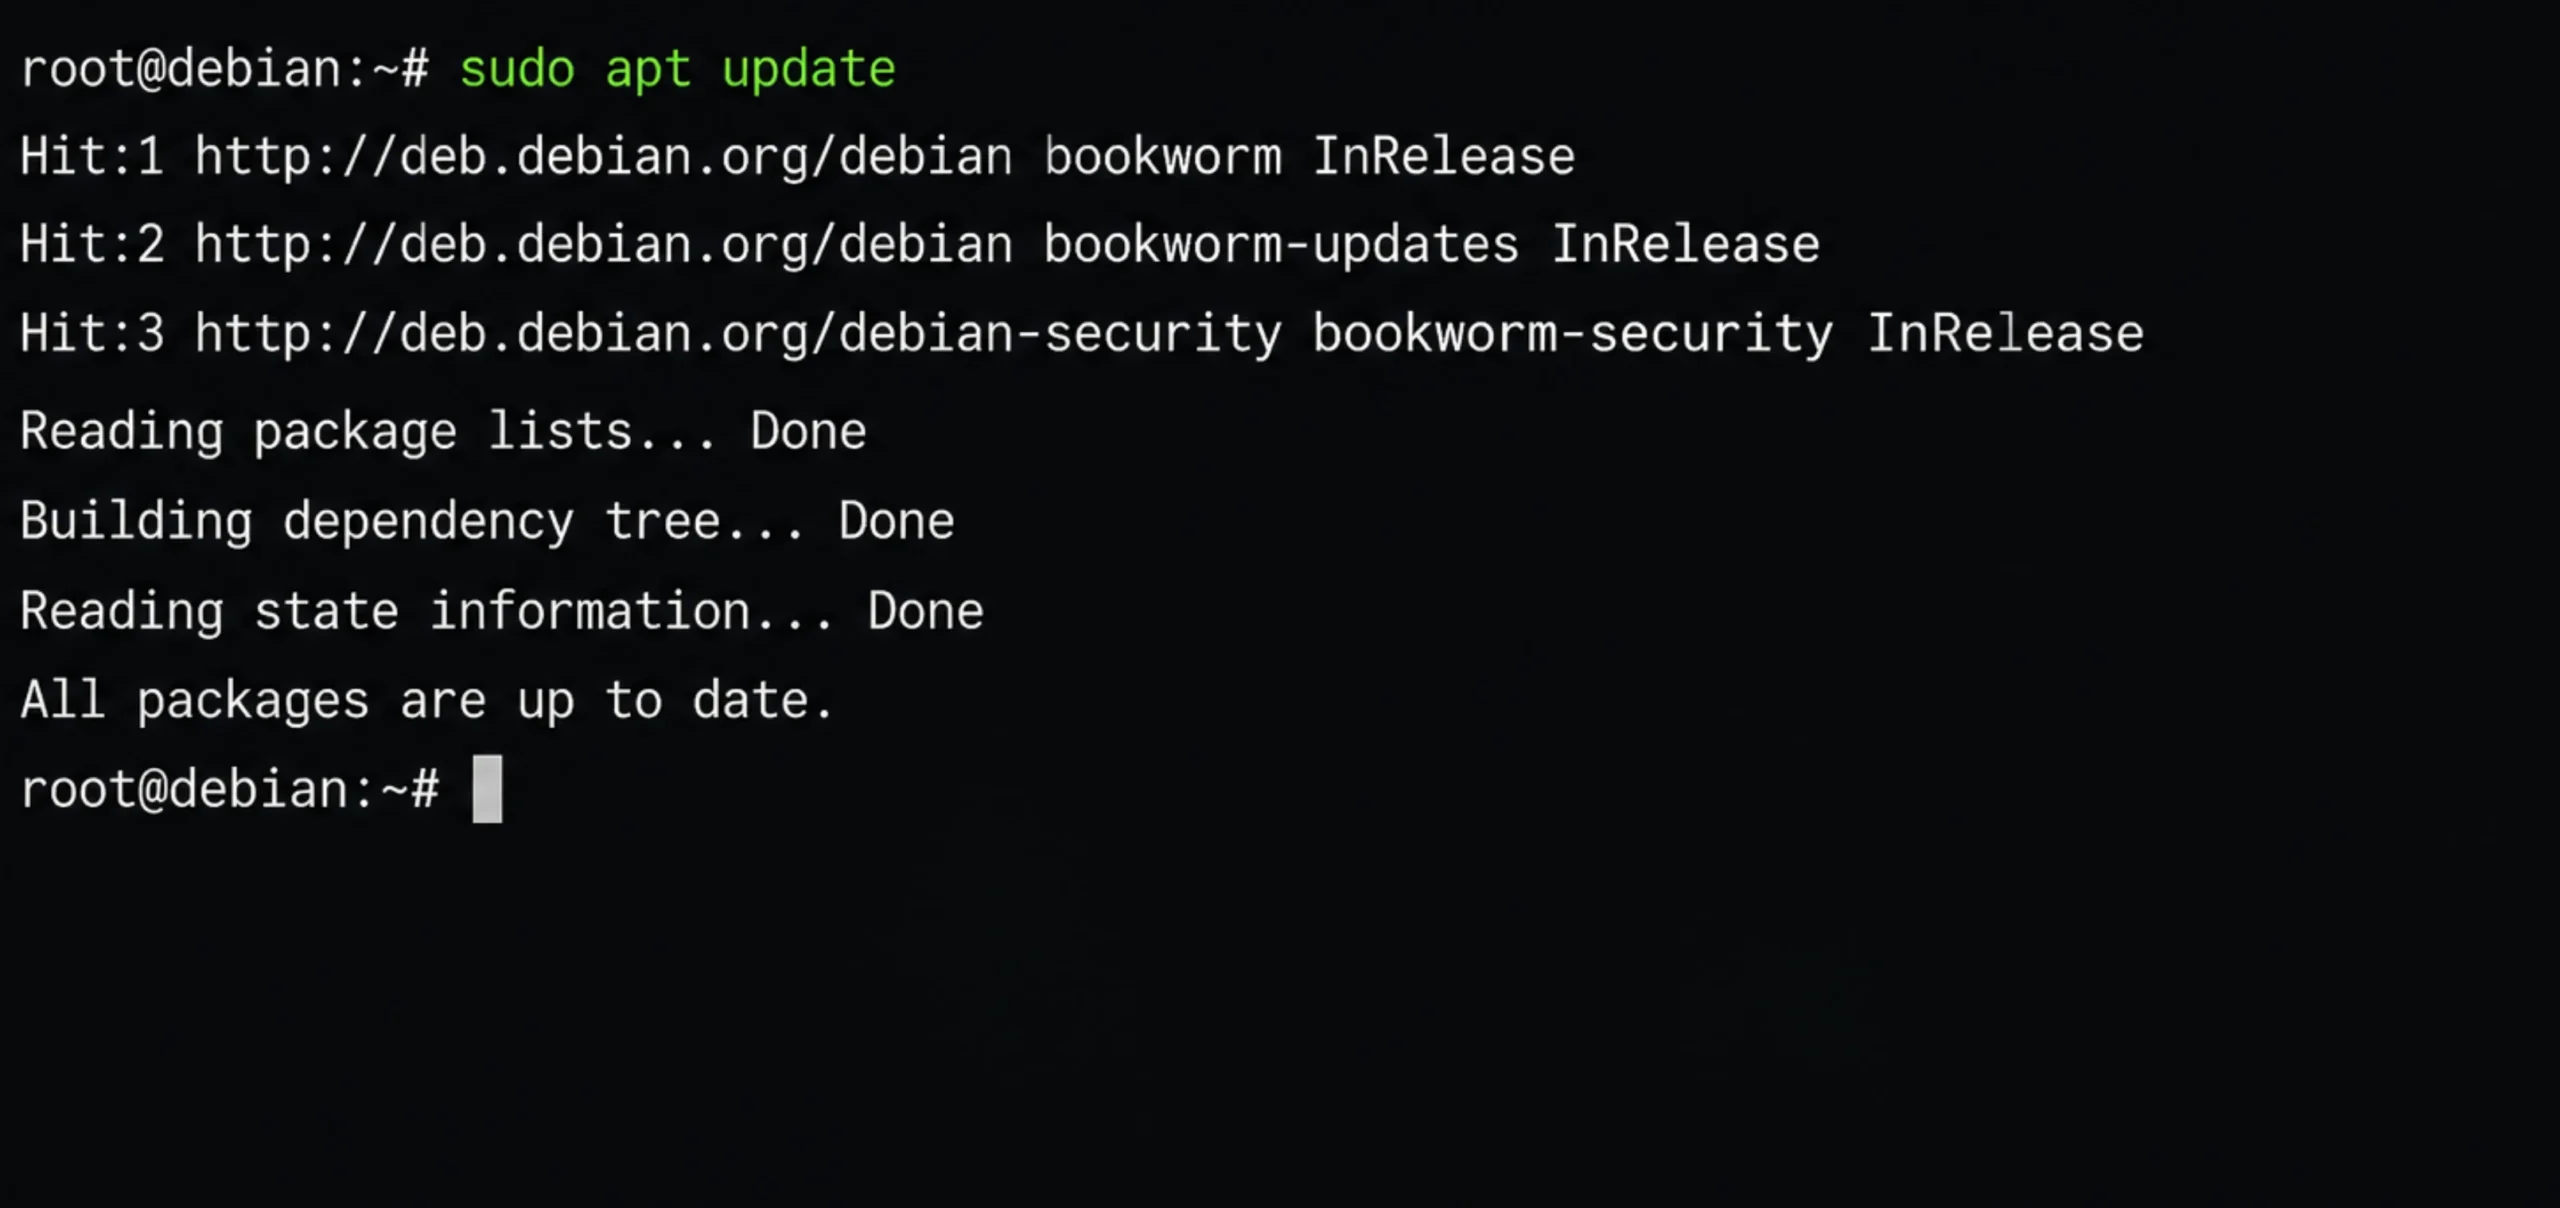
Start by updating your package list:
sudo apt updateThen install the packages needed to add the NodeSource repository:
sudo apt install -y ca-certificates curl gnupgAdd the Node.js 24 repository:
curl -fsSL https://deb.nodesource.com/setup_24.x | sudo bash -Now install Node.js:
sudo apt install -y nodejsCheck the installed version:
node --versionYou should see a version in the supported Node.js range, such as v24.x.x. You can also check npm while you’re here:
npm --versionOnce Node.js is installed correctly, you’re ready to install OpenClaw.
Step 2: Install OpenClaw on Debian
OpenClaw provides an installation script that handles the main installation process for you. It detects your operating system, checks for Node.js, installs OpenClaw, and starts the onboarding process.
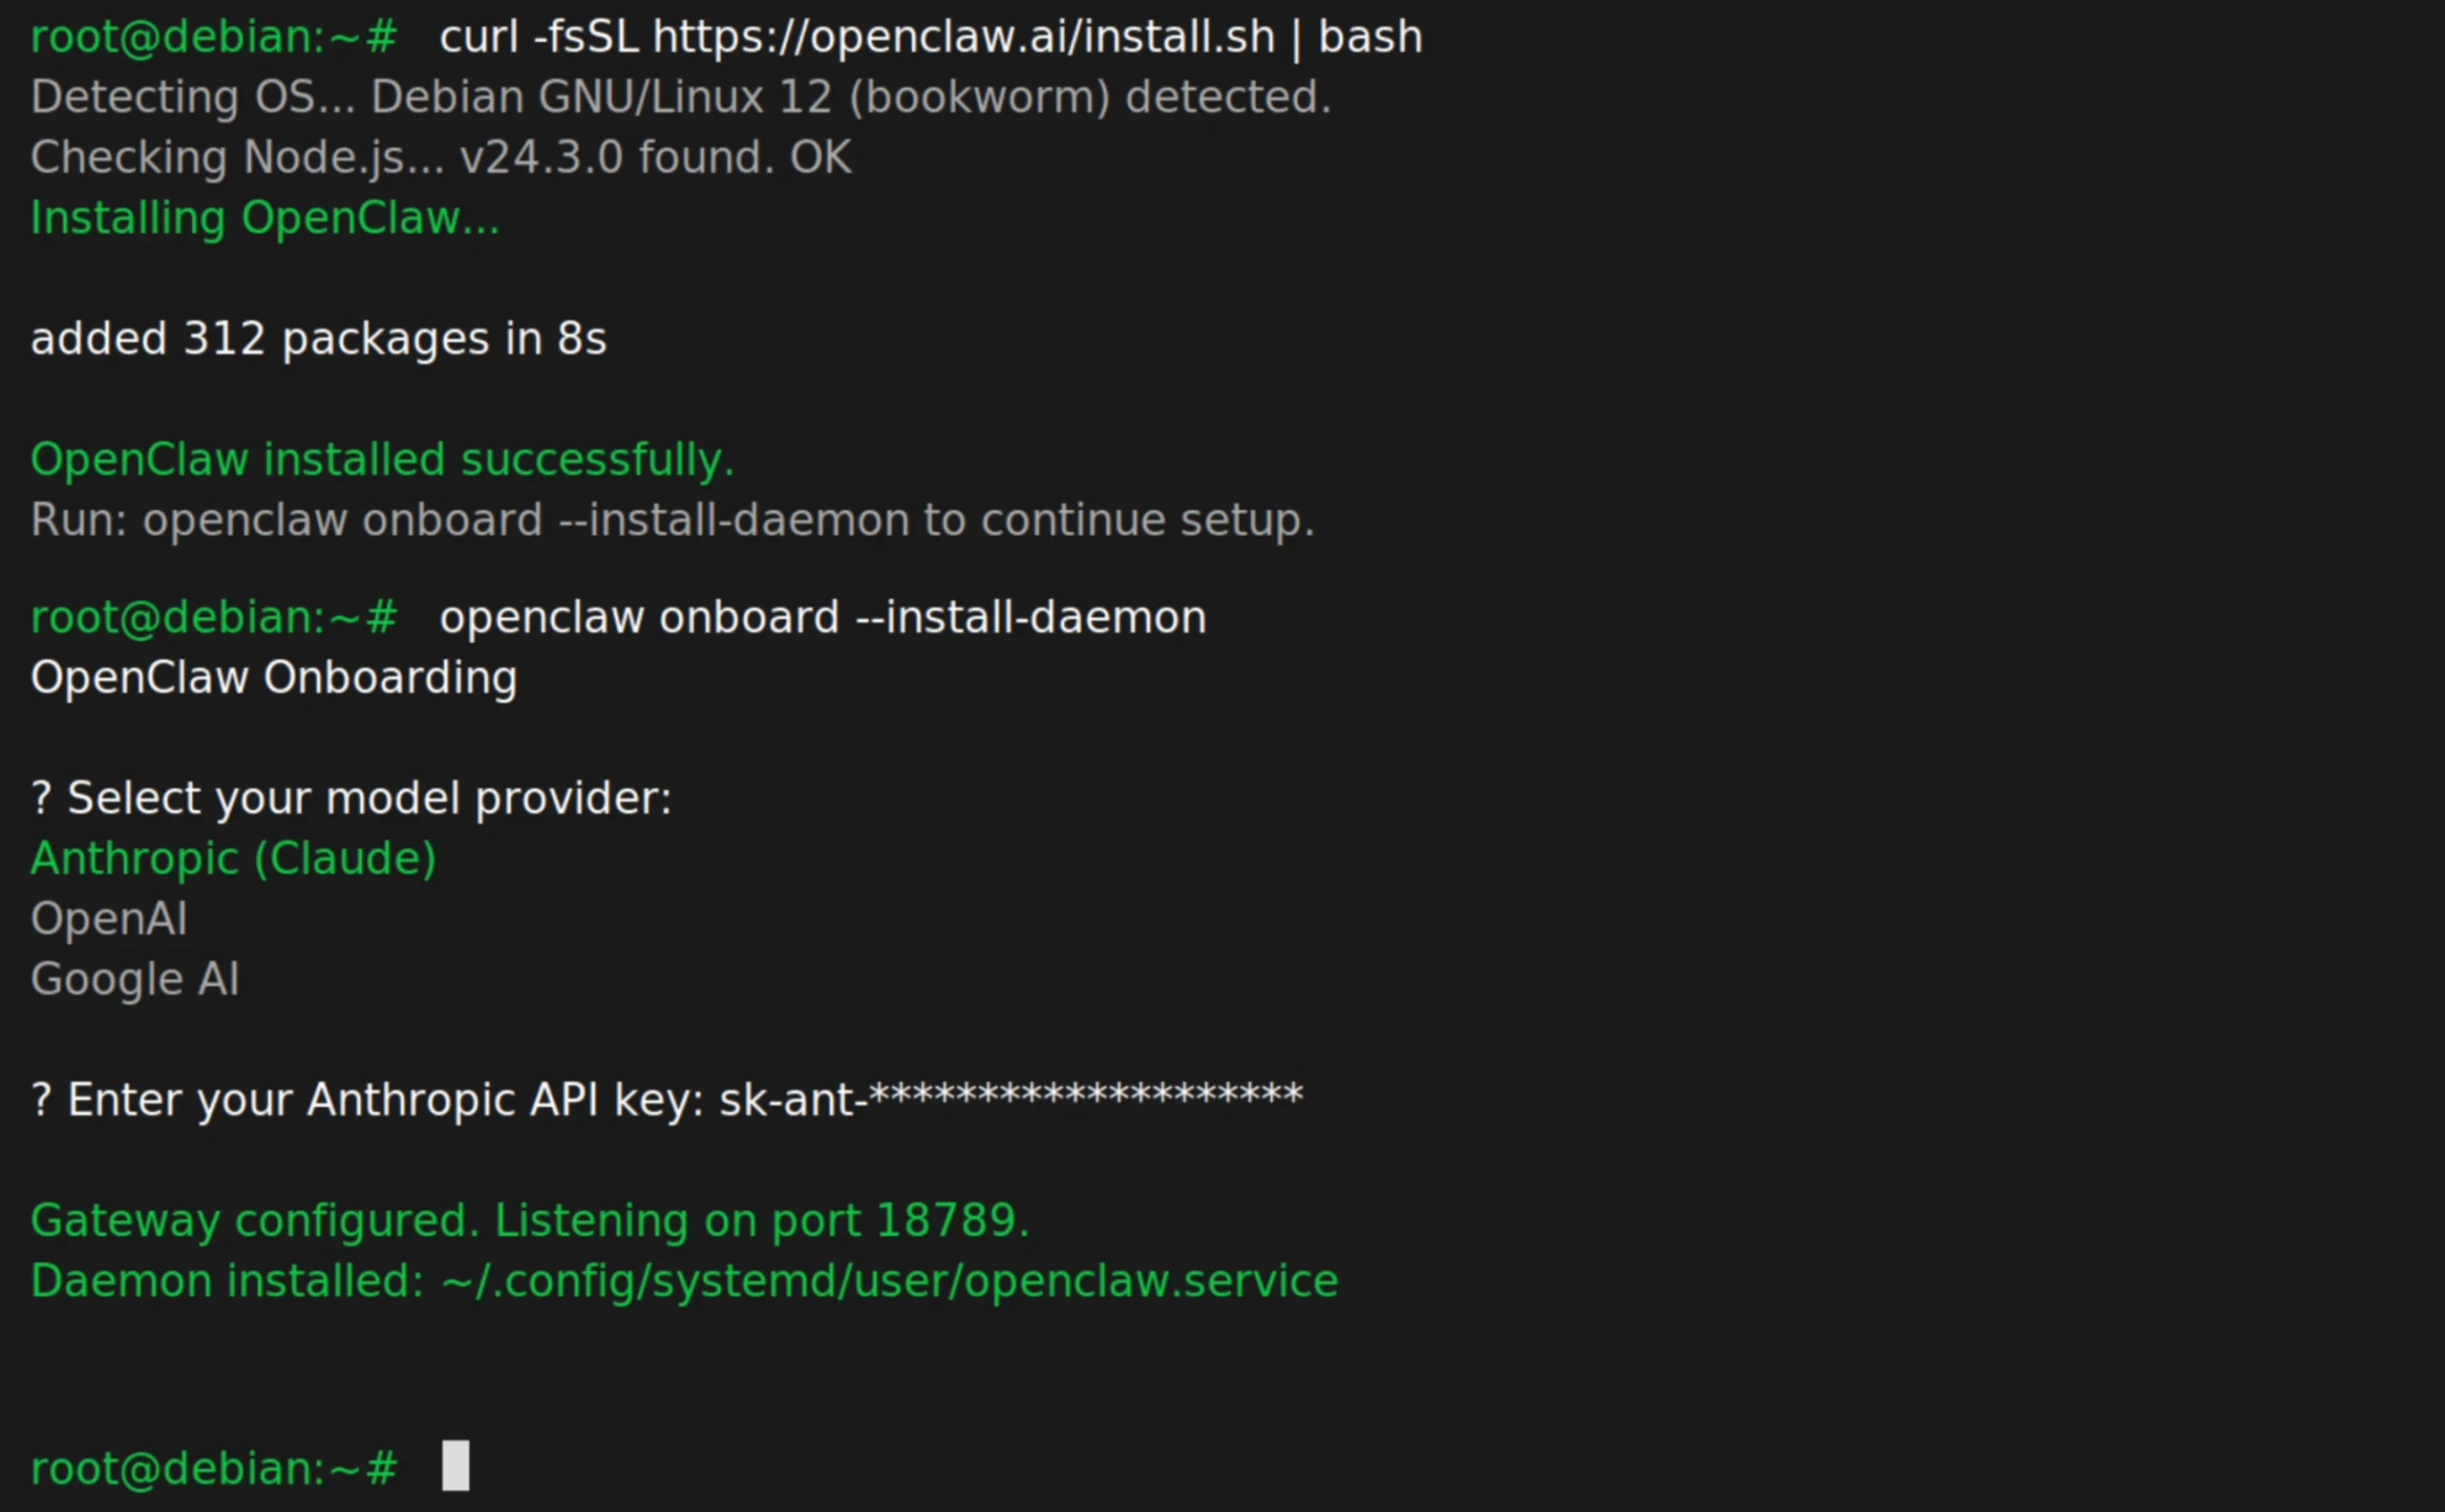
Run:
curl -fsSL https://openclaw.ai/install.sh | bashAfter the installation finishes, start the OpenClaw onboarding process:
openclaw onboard --install-daemonThe onboarding process takes you through the important initial settings. You’ll be asked to select your model provider, enter the relevant API key, and configure the OpenClaw Gateway.
Depending on your setup, you may also configure channels and other options during onboarding.
Once you’ve completed the prompts, verify that OpenClaw was installed correctly:
openclaw --versionThen run the diagnostic check:
openclaw doctorFinally, check the Gateway:
openclaw gateway statusThe Gateway normally listens on port 18789. If the status command shows that the Gateway is running and listening, the core installation is working.
You can also open the OpenClaw dashboard with:
openclaw dashboardThis gives you access to the Control UI, where you can interact with your OpenClaw instance and continue configuring it.
Step 3: Configure OpenClaw on Debian for Production
Getting OpenClaw running is only the beginning. If the server will run continuously and handle real workloads, you’ll want to configure the service, protect the gateway, and put HTTPS in front of it.
There’s an important detail to address first.
When you run:
openclaw onboard --install-daemonOpenClaw installs a user-level systemd service at:
~/.config/systemd/user/openclaw.serviceA user-level service is useful for development and testing, but it isn’t the right setup for a production VPS that needs to run continuously.
User services normally start when the associated user session starts and can stop when that session ends. You can use loginctl enable-linger to allow a user service to continue running without an active login session, but for a dedicated production VPS, a system-level service under:
/etc/systemd/system/is the cleaner approach.
For production, distinguish between the two:
- User-level systemd service: suitable for development, testing, or personal environments.
- System-level systemd service: suitable for a production VPS that needs OpenClaw running continuously.
You should also keep your API credentials out of publicly accessible configuration files. Store sensitive environment variables securely and load them through the service configuration rather than placing keys directly in commands or application code.
Next, put Nginx in front of the OpenClaw Gateway. Nginx acts as the reverse proxy, allowing you to expose your domain over HTTPS while keeping the gateway itself bound to its internal port.
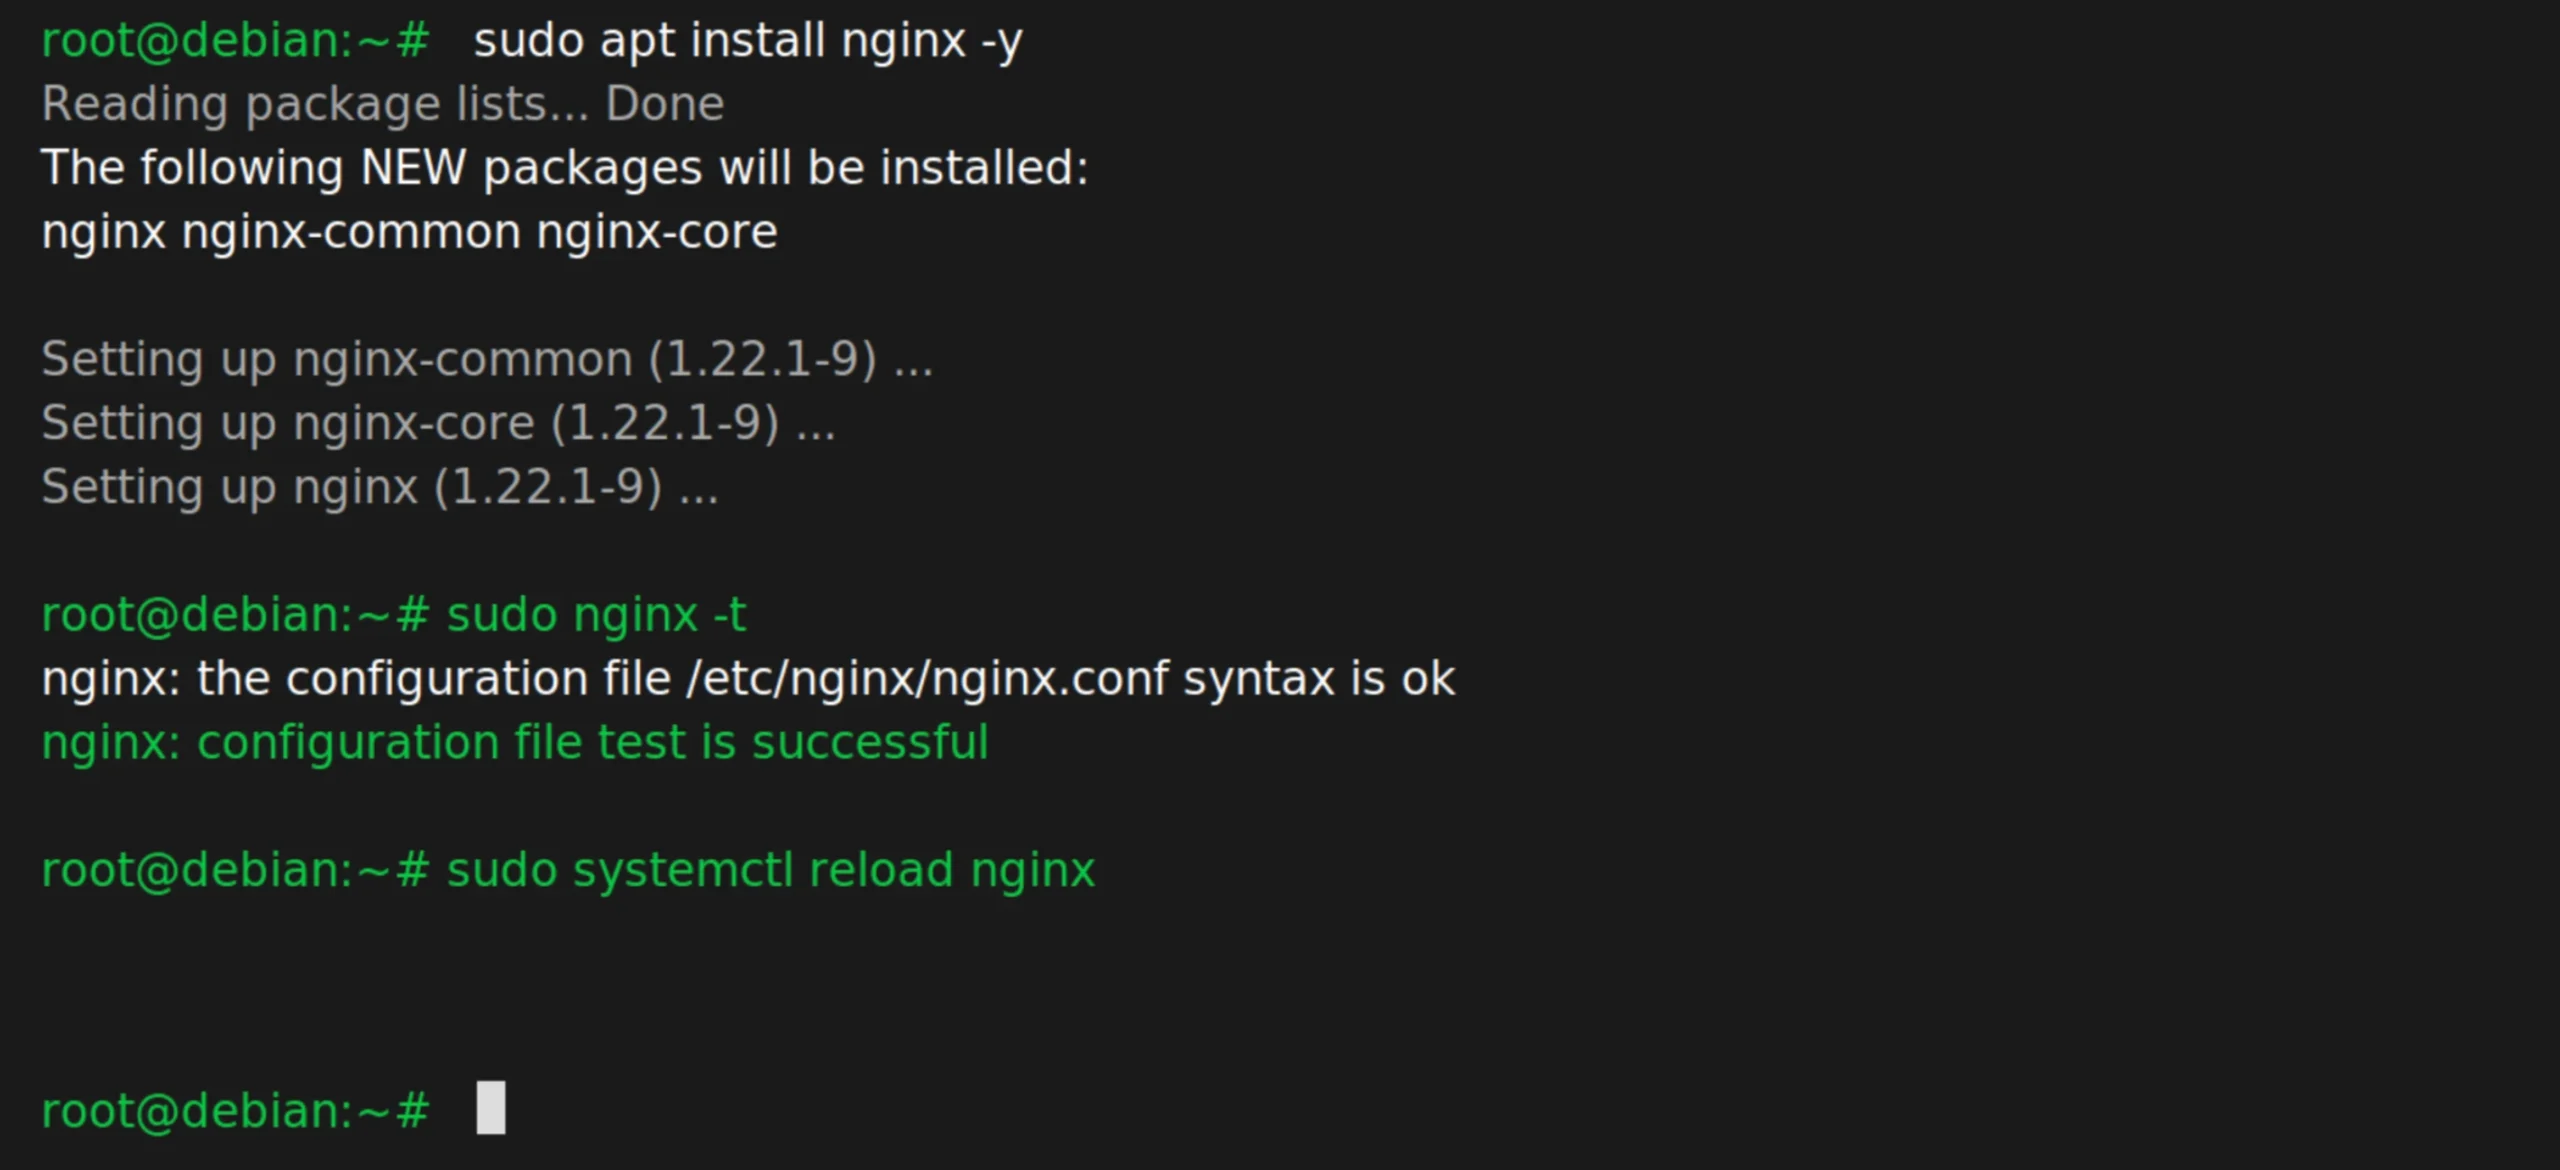
Install Nginx
sudo apt install -y nginxCreate a server configuration for your domain, then configure it to proxy requests to the OpenClaw Gateway on localhost:18789.
Once Nginx is working, add an SSL certificate using Certbot and Let’s Encrypt:
sudo apt install -y certbot python3-certbot-nginxThen request a certificate for your domain:
sudo certbot --nginx -d yourdomain.comWith HTTPS in place, tighten the server firewall. Allow the ports you really need, such as SSH and HTTPS, while keeping port 18789 inaccessible from the public internet.
For example:
sudo ufw allow ssh
sudo ufw allow 443/tcp
sudo ufw deny 18789/tcp
sudo ufw enable
If you’re using HTTP for the initial Nginx setup or certificate issuance, you can also allow port 80:
sudo ufw allow 80/tcpFinally, configure log rotation so OpenClaw’s logs don’t keep growing until they consume your available disk space. Debian’s logrotate utility can automatically compress older logs and remove them after a defined retention period.
At this point, you have the pieces needed for a production deployment: a persistent service, secure environment variables, Nginx, HTTPS, firewall protection, and log rotation.
Step 4: Connect a Channel (WhatsApp or Telegram)
With the core OpenClaw setup ready, you can connect the channel where you want your agent to interact with people.
Telegram is usually the quickest option to get started. You’ll need to create a bot through Telegram’s @BotFather and obtain the bot token.
Add that information to your OpenClaw channel configuration, and your agent can start receiving and responding to Telegram messages.
WhatsApp requires a WhatsApp Business API connection. Once the connection is configured, OpenClaw can receive customer messages and automate responses through the channel.
You don’t need to repeat the entire onboarding process every time you want to change your channels. Run:
openclaw configureThis lets you return to the configuration and add or modify channels and other settings from the terminal.
OpenClaw on Debian FAQs
Can I install OpenClaw on Debian 10?
Debian 10 is no longer a suitable choice for a new OpenClaw deployment because it has reached the end of its regular security support. Use a currently supported Debian release instead, and make sure it meets OpenClaw’s Node.js requirements.
What if OpenClaw is not found after installation?
If the installation completes but your shell says openclaw: command not found, the OpenClaw executable may not be included in your current PATH.
First, check where npm installs global packages:
npm prefix -gThen check the corresponding bin directory and make sure it is included in your shell’s PATH. After updating your shell configuration, reload it and try:
openclaw --versionWhich AI provider works best with OpenClaw on a Nigerian VPS?
There isn’t one provider that’s best for every OpenClaw setup. Anthropic, OpenAI, and Google are all options, and the right choice depends on the type of work you want the agent to handle, the models you prefer, and your API budget.
Your VPS mainly runs the OpenClaw Gateway and automation logic when you’re using a hosted model provider. The model’s heavy computation happens on the provider’s infrastructure rather than on your VPS.
The Easier Path: Truehost OpenClaw VPS Hosting
Manual installation gives you control over every part of the deployment, but you don’t have to handle the Node.js installation, Nginx configuration, systemd setup, and server hardening yourself.
At Truehost, our OpenClaw Hosting plans come with a pre-configured Debian/Ubuntu environment and OpenClaw already installed. That gives you a shorter path from ordering a VPS to working on your automation.
Our Nigerian plans are available in three configurations:
| Plan | vCPU | RAM | Storage | Bandwidth | Monthly Billed Triennially |
|---|---|---|---|---|---|
| Starter | 1 | 2 GB | 50 GB NVMe | 4 TB | NGN 10,500 |
| Pro | 2 | 4 GB | 100 GB NVMe | 6 TB | NGN 22,750 |
| Business | 4 | 8 GB | 200 GB NVMe | 8 TB | NGN 56,000 |
You get Naira billing, Nigerian support, root SSH access, and no hidden currency conversion fees.
If you want to manage the server yourself, you still have the access to do so. If you’d rather skip the initial setup and get straight to building your OpenClaw automation, the pre-configured option removes much of the infrastructure work.