 Domain NamesFind and register your ideal domain name instantly.
 Web HostingEasy-to-use hosting powered by cPanel — ideal for managing websites in Nigeria.
 Windows HostingRun .NET apps with Windows-optimized hosting
 Affiliate ProgramMake money promoting our services
 Reseller HostingMake money by reselling our hosting products under your own brand
 .COM Domains
 All DomainsExplore all supported tld domains in Nigeria
 WhoisFind out who owns any domain, as well as verify your registration details
 VPS Hosting in Nigeria
 Dedicated ServersReimagine your site speed with your own complete server
 AI Website BuilderDesign your site with drag-and-drop tools
 Online Store BuilderStart your online shop without code
 SSLs
SSLs Support PortalFind answers or get expert help
 Contact UsReach our team via chat or email
 BlogRead our extensive guides on web hosting and more
OpenClaw can only work around the clock if it’s running on a system that’s always online. While you can install it on your computer, your assistant stops working whenever your laptop is turned off, goes to sleep, or loses its internet connection.
A VPS keeps OpenClaw running 24/7, giving it dedicated resources, a reliable internet connection, and a permanent address for integrations with services like Telegram, WhatsApp, and other automation tools.
There are two ways to get started. If you want the quickest option, you can use a one-click deployment that sets everything up for you in just a few minutes. If you prefer complete control, you can install OpenClaw manually, choosing your operating system and configuring every part of the server yourself.
This guide walks you through both methods so you can pick the one that best suits your needs.
Prerequisites
Before starting, have the following ready:
- An API key from a supported AI provider: Anthropic, OpenAI, Groq, or another compatible provider.
- A VPS running Ubuntu 22.04 or 24.04 LTS, with at least 1–2 vCPUs and 2 GB RAM. 4 GB is more comfortable in practice; OpenClaw’s Node.js runtime and any browser-automation tooling it drives can push a 2 GB instance close to its limit under load.
- A Truehost account, if you’re going the one-click route, or SSH access to a VPS, if you’re installing manually.
- A domain name (optional). Useful if you want a custom URL and HTTPS on the Control UI rather than SSH-tunneling into it every time.
- Basic comfort with a terminal, for the manual path.
Option 1: One-Click / Managed Deployment (Recommended for Most Users)
The appeal here is what you skip: no server hardening, no Node.js version juggling, no CLI onboarding from a blank Ubuntu box. The provider pre-installs OpenClaw on an isolated VPS and hands you root access; you’re configuring the assistant itself within minutes rather than debugging a runtime install.
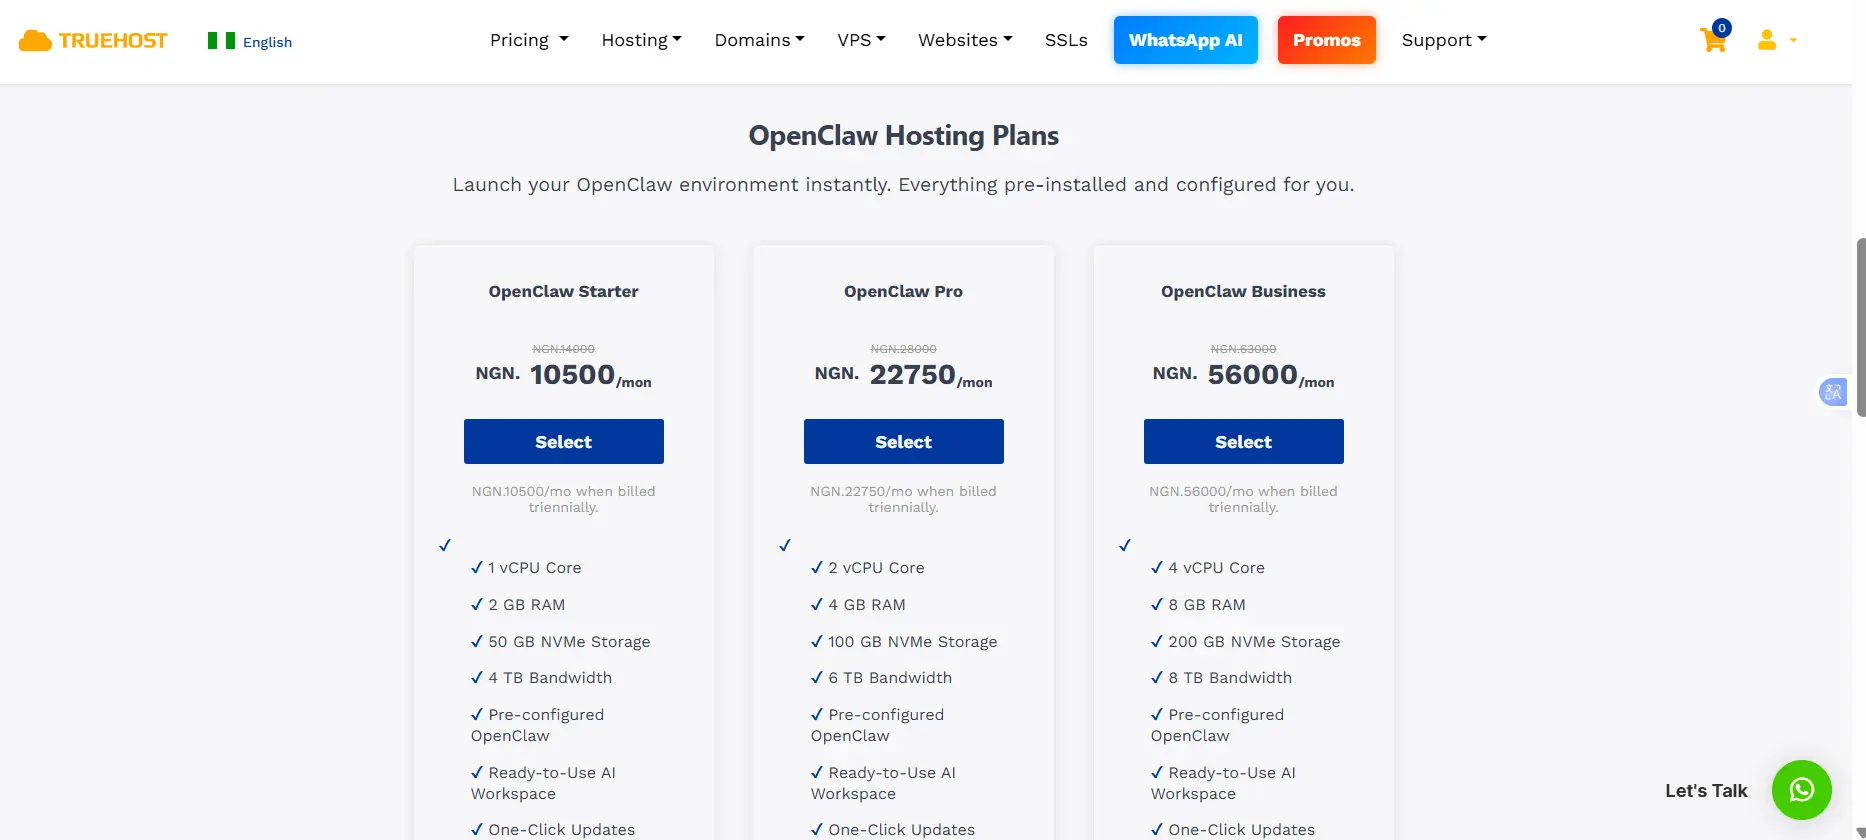
What Truehost’s OpenClaw hosting includes:
- Fast provisioning, with the environment ready shortly after checkout
- A pre-installed stack: Ubuntu, OpenClaw, Playwright for headless browser automation, and a Python runtime; useful if your use case goes beyond chat into browser-driven tasks
- Dedicated, non-shared resources rather than oversold shared CPU
- Firewalls, DDoS protection, and automated daily SSD backups built into the hosting layer
- Full root SSH access; this is not a locked-down black box; anything you’d install on a bare VPS, you can still install here
- Naira billing with no hidden conversion fees, and support based in Ibadan, Nigeria, rather than a generic global queue
Plans:
| Plan | vCPU | RAM | Storage | Bandwidth | Price (billed triennially) |
| Starter | 1 | 2 GB | 50 GB NVMe | 4 TB | ₦10,500/mo |
| Pro | 2 | 4 GB | 100 GB NVMe | 6 TB | ₦22,750/mo |
| Business | 4 | 8 GB | 200 GB NVMe | 8 TB | ₦56,000/mo |
Setup steps:
Go to Truehost’s OpenClaw hosting page and pick a plan based on expected load: Starter for testing or light personal use, Pro or above for automation-heavy or multi-channel setups.
Check out in Naira. The environment provisions automatically; there’s no manual server setup on your end.
Receive root SSH credentials and dashboard/console access.
Log in, add your LLM provider API key, and connect your first channel; Telegram is the fastest, set up through BotFather.
Send a test message to confirm the assistant responds, then start using it.
Worth knowing:
- You can upgrade vCPU, RAM, and storage later without reinstalling OpenClaw.
- Root access means you can layer on your own security later; SSH keys, UFW, Fail2Ban; whenever you’re ready, rather than being forced to configure it all up front.
- This path suits beginners and anyone who wants a reliable setup without owning the server configuration themselves.
Option 2: Manual Setup on Any VPS (Full Control)
Choose this if you want a provider other than a managed OpenClaw host, need custom infrastructure; a specific region, an existing server you’re consolidating onto, particular storage or networking; or you’re doing this to actually learn the stack rather than just use it. Budget 15–30 minutes, more if it’s your first time setting up Node.
Step 1: Provision the VPS
Spin up a fresh Ubuntu LTS instance; 22.04 or 24.04; from any provider (Hetzner, DigitalOcean, Contabo, Vultr, Linode, and similar all work) with SSH access. LTS counts: it gets security patches for years and is what OpenClaw’s own documentation assumes. Avoid non-LTS releases, which reach end-of-life quickly.
2 vCPU / 4 GB RAM is a comfortable baseline. Go lower only for light, single-channel testing; OpenClaw is memory-hungry enough in practice that instances under roughly 1 GB RAM are prone to crashing outright, and swap space doesn’t reliably fix that.
Step 2: Update the System and Install Dependencies
sudo apt update && sudo apt upgrade -y
sudo apt install curl git build-essential -y
Updating first avoids version conflicts later. build-essential isn’t strictly required by OpenClaw in most cases, but it prevents cryptic failures if any dependency needs to compile native modules.
Install Node.js. OpenClaw’s official installer will detect and provision Node automatically if it’s missing, but if you’d rather manage the version yourself, use nvm so you can pin and switch versions cleanly instead of being stuck on whatever your distro’s package manager ships (often several versions behind):
curl -o- https://raw.githubusercontent.com/nvm-sh/nvm/v0.40.1/install.sh | bash
source ~/.bashrc
nvm install 24
Current requirements: Node 22.22.3+, 24.15+, or 25.9+ are all supported; Node 23 is explicitly unsupported. Node 24 is the default target for fresh installs, with Node 26 emerging as the recommended runtime for its faster Gateway startup and lower memory footprint. If you need to stay on an LTS line, Node 22 remains supported.
Step 3: Install OpenClaw
Use the official installer; this is the supported path for deploying OpenClaw, and there’s little reason to deviate from it:
curl -fsSL https://openclaw.ai/install.sh | bashThis installs the CLI, verifies your Node version (installing a suitable one automatically if needed), and sets up OpenClaw’s expected config and state directories.
Building from source instead;
git clone https://github.com/openclaw/openclaw.git
cd openclaw
npm install
npm run build
; is a separate path meant for contributing to OpenClaw itself or running an unreleased or modified version. It is not the standard way to deploy it. Unless you have a specific reason to build from source, the installer script gets you the same running application with far less that can go wrong.
Step 4: Configuration and Onboarding
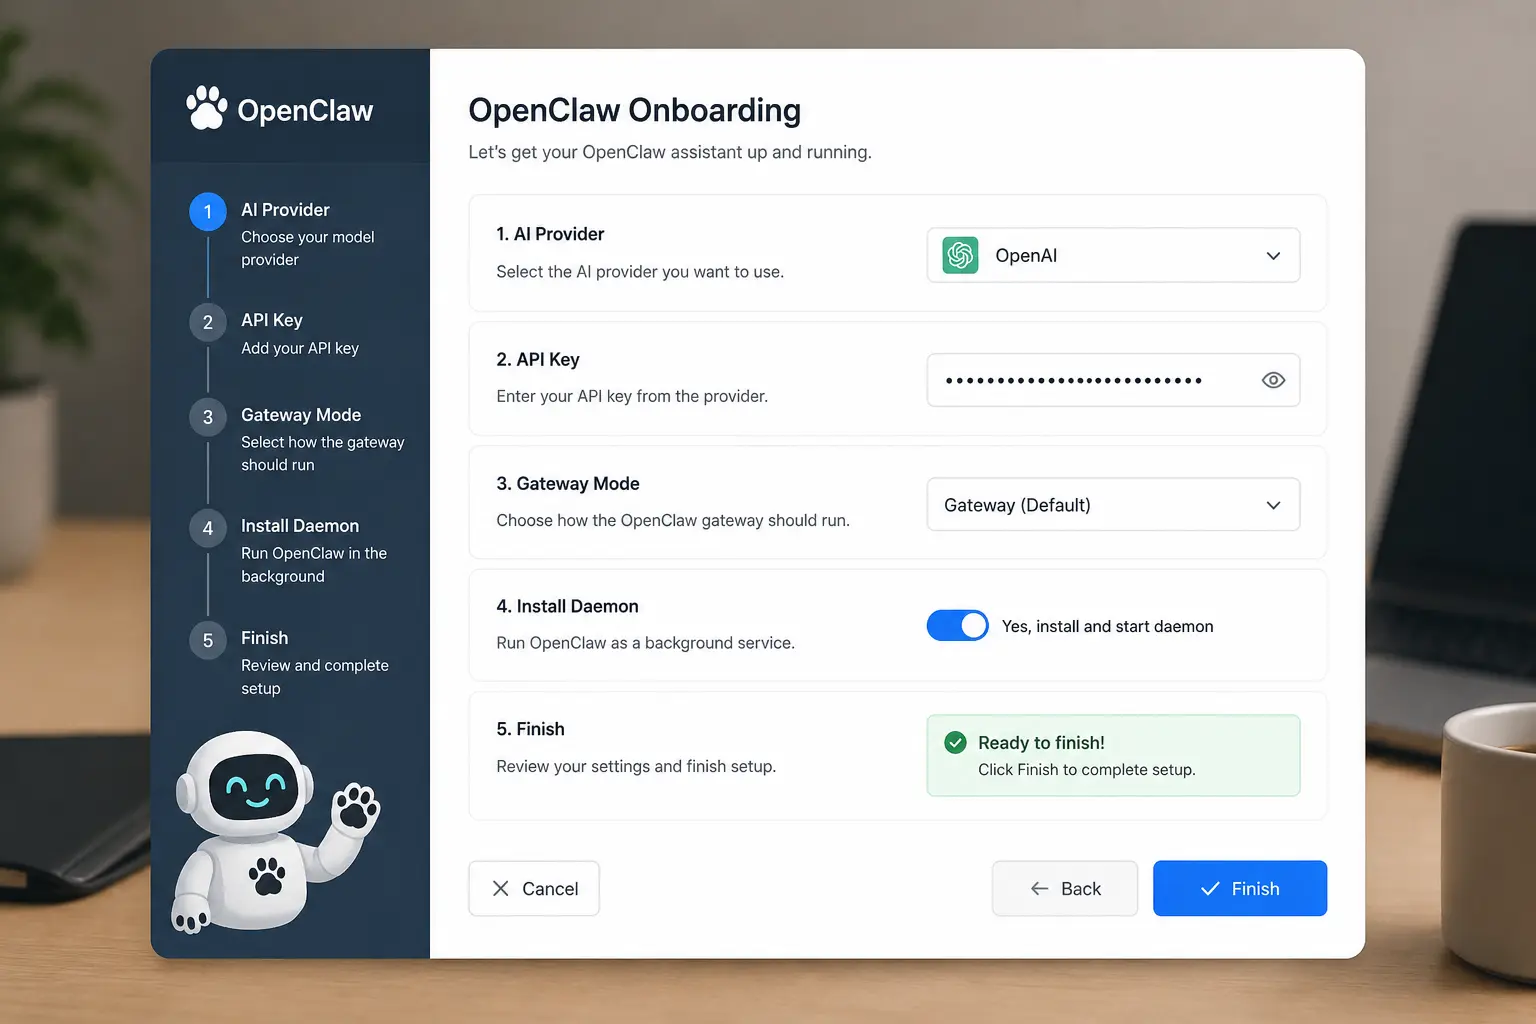
Rather than hand-editing a .env.example, run the built-in onboarding wizard; the officially supported way to configure OpenClaw:
openclaw onboard --install-daemonThe wizard walks you through your model provider (Anthropic, OpenAI, Gemini, or another), your auth method, and Gateway mode, then writes the config and stores credentials separately. Lock down permissions immediately afterward:
chmod 700 ~/.openclaw
chmod 600 ~/.openclaw/openclaw.json
chmod 700 ~/.openclaw/credentials
The --install-daemon flag counts: it handles the startup service for you in the next step, automatically.
Step 5: Startup Service (Auto-Start and Restart on Boot)
If you used --install-daemon in Step 4, this is already done; OpenClaw writes the appropriate managed service (a systemd user service on Linux) so the Gateway restarts on boot and after crashes. Confirm it:
openclaw gateway statusOnly hand-roll your own systemd unit file if you deliberately skipped the daemon flag, or you built from source and need a custom ExecStart, working directory, and Restart=always policy. If you do write one, verify it points at the correct binary path; this counts especially if Node was installed via nvm, since the binary won’t sit at a system-wide path; and that it runs as a non-root user before calling it production-ready.
Step 6: Connect Channels
- Telegram (easiest starting point): create a bot via BotFather and get a token in under two minutes.
- WhatsApp: requires a Meta Business API account and app review. Budget significantly more time, and expect Meta’s policies to shift.
- Other supported channels: Slack, Discord, Signal, iMessage/BlueBubbles, Teams, Google Chat; each need their own token or credential, added the same way.
Tokens go into your OpenClaw config through the onboarding flow or config file, not a generic .env. After adding a channel, restart the Gateway so the change takes effect.
Step 7: Verify Everything Works
openclaw doctor
openclaw dashboard
openclaw doctor runs a full health check: Node version, Gateway status, config validity, and whether your selected provider is actually reachable. openclaw dashboard opens the Control UI. On a headless VPS, forward the port over SSH rather than exposing it publicly; the Gateway’s default port should never be opened to the public internet directly:
ssh -L 18789:127.0.0.1:18789 user@your-vps-ipIf you’re running a reverse proxy for public HTTPS access, put it in front of Nginx (or similar) rather than exposing the Gateway port directly.
Send a test message through your connected channel, then a follow-up referencing the first one, to confirm multi-turn context is actually being retained rather than returning isolated replies.
Post-Installation: Security Hardening (Essential)
- Firewall (UFW): allow SSH (or Tailscale) and any port your reverse proxy needs; deny everything else by default.
- SSL/HTTPS: use Certbot for free certificates if you’re exposing a domain.
- Fail2ban: brute-force protection on SSH.
- Tailscale or SSH tunneling: for reaching the Control UI remotely, instead of public exposure.
- Dedicated non-root user: run OpenClaw as its own user, keep secrets out of version control, and update regularly.
- API key hygiene: scope and rotate keys, and use permission allowlists where the provider supports them.
Configuration, Optimization & Maintenance
Storage: the default setup is fine for testing. For long-term or production use, switch to SQLite or PostgreSQL and update the database settings accordingly.
Performance: monitor CPU and RAM usage; upgrade the VPS or switch to a lighter model if things slow down.
Multiple integrations: OpenClaw can stay connected to several messaging platforms and services simultaneously without additional infrastructure.
Updates: install new releases as they ship and restart the service afterward.
Monitoring: check logs and system resources regularly rather than assuming the daemon is healthy indefinitely.
Troubleshooting Common Issues
| Problem | Cause | Fix |
| OpenClaw won’t start | Installation or Node.js issue | Check the logs, verify your Node.js version, reinstall dependencies if needed |
| Service doesn’t stay running | Service isn’t enabled | Enable the systemd service and restart it |
| Can’t connect to OpenClaw | Firewall or network issue | Check your firewall rules, IP address, and open ports |
| API errors | Invalid or missing API key | Verify your API key and configuration |
| Slow performance | VPS resources too low | Upgrade CPU, RAM, or storage |
| Permission errors | Incorrect file permissions | Fix file ownership and permissions |
Get OpenClaw Running on a Truehost VPS
Between the two paths in this guide, the manual route buys you control; the managed route buys you time. If Node versions, systemd units, and firewall rules aren’t what you want to spend your afternoon on, Truehost’s OpenClaw hosting skips straight to a configured environment, root access included, in Naira, with support in Ibadan.
Get your OpenClaw VPS on Truehost →
How to Set Up OpenClaw on a VPS FAQs
Can I run OpenClaw on a server?
Yes; that’s the primary way to get 24/7 uptime out of it. OpenClaw runs as a Node. js-based Gateway process that can be deployed on any VPS, dedicated server, or even single-board hardware, not just a local machine.
Do you need a VPS for OpenClaw?
No. OpenClaw can run locally on a laptop or desktop. A VPS is recommended if you want the assistant reachable at all times, independent of whether your own machine is powered on, asleep, or offline.
Can I run multiple agents on one VPS?
Yes, within the limits of the server’s resources. Each additional agent or channel connection adds CPU and memory overhead, so sizing the VPS up (more vCPU and RAM) counts more as you add concurrent agents or channels.
Is self-hosting OpenClaw secure?
It can be, with the same discipline as any self-hosted service handling API keys and system access: an isolated VPS separate from sensitive infrastructure, a non-root user, a firewall, and credentials that are never committed to version control. OpenClaw needs broad permissions to act autonomously, which raises the stakes on isolating it properly rather than running it alongside production systems.
Does OpenClaw work without a VPS?
Yes. It runs on any machine with a supported Node.js version; a personal computer, a Raspberry Pi, or a VPS. The tradeoff is uptime: a VPS stays on; most other setups don’t.