 Domain NamesFind and register your ideal domain name instantly.
 Web HostingEasy-to-use hosting powered by cPanel — ideal for managing websites in Nigeria.
 Windows HostingRun .NET apps with Windows-optimized hosting
 Affiliate ProgramMake money promoting our services
 Reseller HostingMake money by reselling our hosting products under your own brand
 .COM Domains
 All DomainsExplore all supported tld domains in Nigeria
 WhoisFind out who owns any domain, as well as verify your registration details
 VPS Hosting in Nigeria
 Dedicated ServersReimagine your site speed with your own complete server
 AI Website BuilderDesign your site with drag-and-drop tools
 Online Store BuilderStart your online shop without code
 SSLs
SSLs Support PortalFind answers or get expert help
 Contact UsReach our team via chat or email
 BlogRead our extensive guides on web hosting and more
Your OpenClaw agent works perfectly, right up until you close your laptop. The Telegram messages pile up unanswered, the cron jobs skip, and the browser automation you spent two days configuring goes completely silent.
Running OpenClaw on a local machine is fine for testing. Keeping it running for business is a different story.
That requires a VPS that stays online even when you are sleeping, stuck in traffic, or on a flight with no Wi-Fi.
So, a hardened, production-grade OpenClaw agent running on Ubuntu VPS is just what you need. It connects to your first channel, restarts itself after crashes, and runs around the clock without anyone watching it.
What you need before you start:
Get these four things sorted before you touch a server. Most failed deployments trace back to skipping one of them.
- Node.js version: It must be Node 22.22.3+, 24.15+, or 25.9+ or higher (24 is recommended).
- Server specs: 2 GB RAM minimum, 4 GB recommended; 2 vCPUs; 20 GB SSD with at least 5 GB free at all times for logs and conversation history. The core process uses 200 – 400 MB at idle; browser automation can spike to 1 – 1.5 GB.
- External APIs over local models: If you connect OpenClaw to Claude, GPT-4o, or OpenRouter, the heavy AI processing happens on the provider’s infrastructure, and the VPS spec above is fine.
- A clean Ubuntu install: Reusing a server already running other services introduces package conflicts and permission issues that are disproportionately time-consuming to debug. Start clean on a fresh 22.04 or 24.04 instance.
Steps to Deploy OpenClaw on Ubuntu
Step 1: Get Your Ubuntu VPS
The actual cost of picking the wrong provider shows up later, in lost hours chasing a support team that takes three days to reply while your agent sits offline. A cheap VPS with no documentation will cost more than a quality one at a slightly higher price point.
For Nigerian businesses, Naira billing and local support are important. Our OpenClaw VPS Hosting plans are built specifically for this:
| Plan | vCPU | RAM | Storage | Bandwidth | Price (Billed Triennially) |
|---|---|---|---|---|---|
| OpenClaw Starter | 1 core | 2 GB | 50 GB NVMe | 4 TB | NGN 10,500/mo |
| OpenClaw Pro | 2 cores | 4 GB | 100 GB NVMe | 6 TB | NGN 22,750/mo |
| OpenClaw Business | 4 cores | 8 GB | 200 GB NVMe | 8 TB | NGN 56,000/mo |
What makes these different from a generic VPS:
- OpenClaw comes pre-installed and pre-configured
- Your environment is live in seconds after selecting a plan
- All plans are billed in Nigerian Naira
- DDoS protection and automated daily SSD backups are included
- Dedicated support that understands the Nigerian business context, not an automated reply queue
If you go with Truehost OpenClaw Hosting, skip ahead to Step 4. The server is already set up; you just configure the agent.
If you prefer to do everything manually on any Ubuntu 22.04 or 24.04 VPS, the next two sections cover the full process.
Step 2: Security Hardening
This step comes before the OpenClaw install deliberately. A freshly provisioned Ubuntu VPS accepts password-based SSH logins from any IP on the internet, runs everything as root, and has no firewall in place.
Spend 15 minutes here and you will not regret it.
1. Create a non-root sudo user: if a skill misbehaves or gets compromised while running as root, the blast radius is the entire server.
Create a regular user with sudo access:
adduser deployer && usermod -aG sudo deployer2. Create a dedicated service user for OpenClaw: This is the account OpenClaw will run as, not root, and not your personal account:
sudo adduser --system --group --no-create-home openclawops3. Switch to SSH keys and disable password login: Generate an ed25519 key on your local machine, copy it to the server with ssh-copy-id, then open /etc/ssh/sshd_config and set:
PermitRootLogin no
PasswordAuthentication no
Restart SSH, but test from a second terminal before closing your current session. Locking yourself out here is fixable, but it wastes an hour you could spend on something else.
4. UFW firewall: Ubuntu includes UFW (Uncomplicated Firewall), making it easy to restrict unnecessary network access.
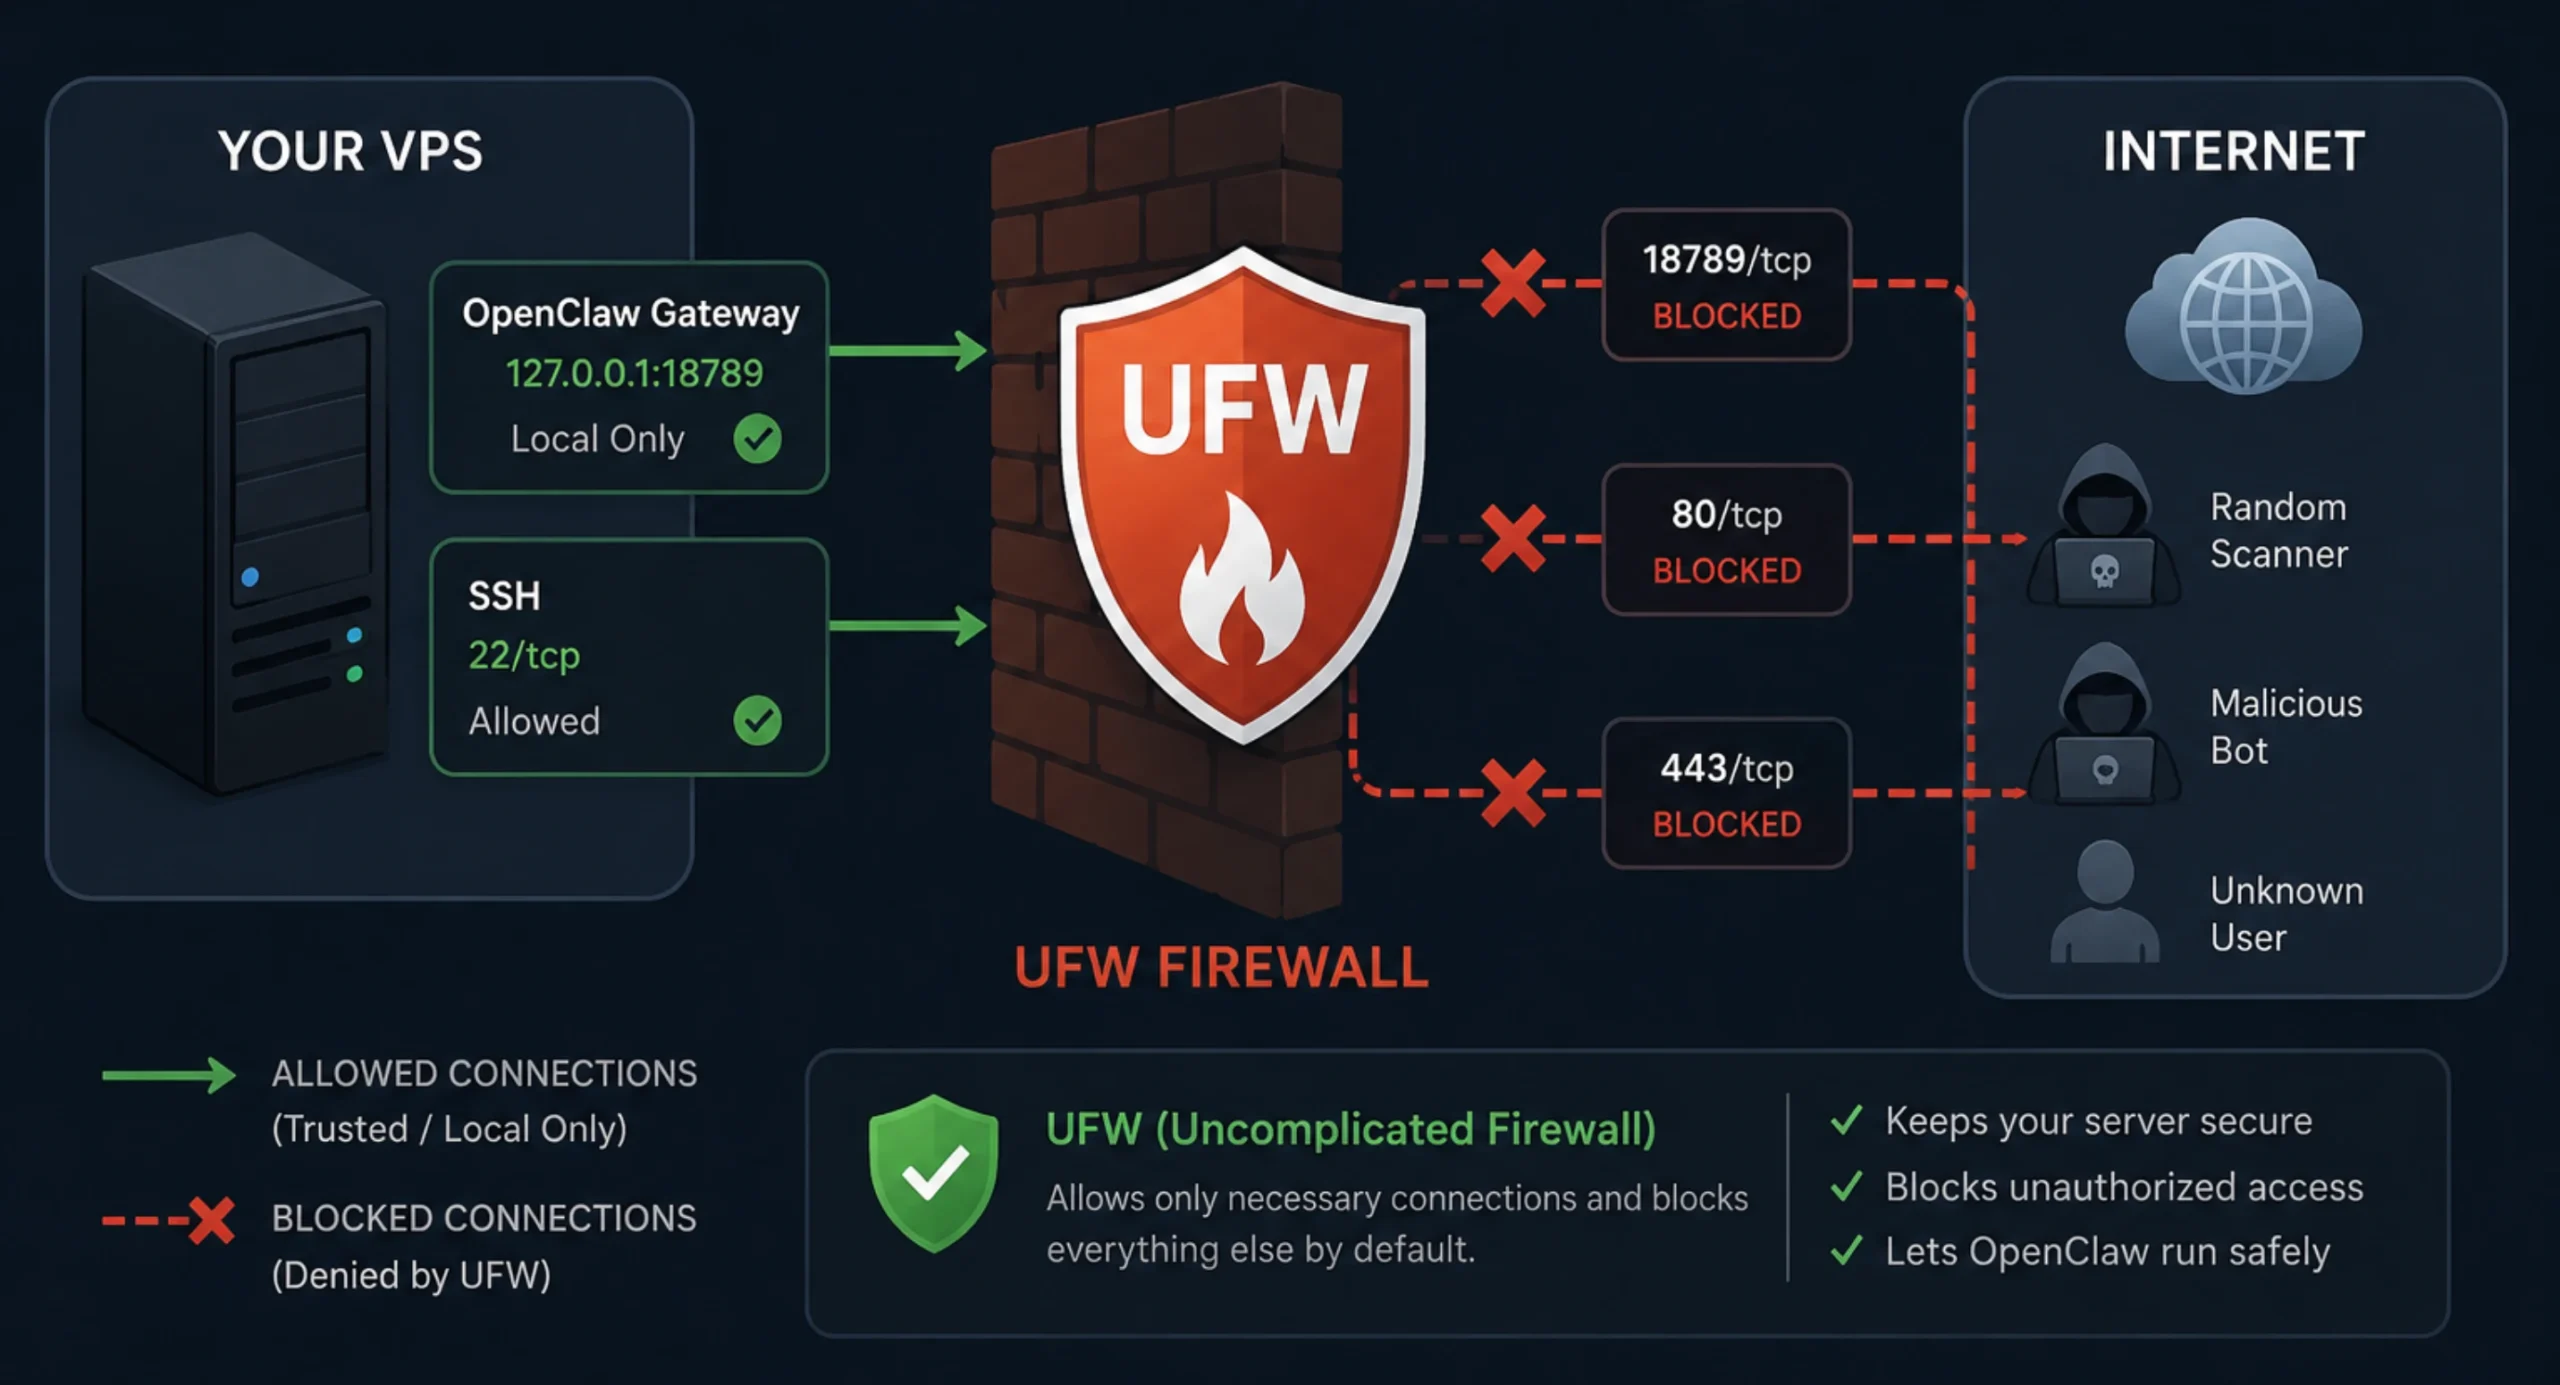
Start by denying all incoming connections, then allow only the services your server needs.
sudo ufw default deny incoming
sudo ufw limit ssh
sudo ufw allow 80/tcp
sudo ufw allow 443/tcp
sudo ufw enable
Notice that port 18789, which OpenClaw uses internally, is not opened to the public internet. Later, Nginx will securely proxy traffic to the gateway instead.
5. Install fail2ban: It automatically blocks repeated failed login attempts, making brute-force attacks much less effective.
Installation only takes a moment:
sudo apt install fail2ban -y
sudo systemctl enable --now fail2ban
Security note: In early 2026, over 135,000 exposed OpenClaw instances were identified across 82 countries, with a critical vulnerability (CVE-2026-25253, CVSS 8.8) allowing remote code execution even on instances believed to be localhost-bound.
This step is the baseline for a safe deployment.
Step 3: Install OpenClaw on Ubuntu
1) Add Swap Space (if RAM < 4 GB)
Installing npm packages can temporarily use a significant amount of memory. On VPS plans with less than 4 GB RAM, the installation may fail with an out-of-memory error before it finishes.
Adding a 2 GB swap file gives the installer enough breathing room and helps prevent those failures.
sudo fallocate -l 2G /swapfile
sudo chmod 600 /swapfile
sudo mkswap /swapfile
sudo swapon /swapfile
echo '/swapfile none swap sw 0 0' | sudo tee -a /etc/fstab
If your server already has 4 GB RAM or more, you can skip this step.
2) Install Node.js 22+ from NodeSource
OpenClaw requires a supported version of Node.js. Ubuntu’s default repositories typically include an older release, so install Node.js directly from the NodeSource repository instead.
First, install the required packages:
sudo apt update
sudo apt install -y git curl build-essential
Next, add the NodeSource repository and install Node.js 22.
curl -fsSL https://deb.nodesource.com/setup_22.x | sudo -E bash -
sudo apt install -y nodejs
Verify the installation:
node --versionThe output should show Node.js v22.x or a newer supported version. If it doesn’t, stop here and resolve the issue before continuing, as OpenClaw will not install correctly with an unsupported Node.js version.
3) Set Up the Project Directory
Create a dedicated directory for OpenClaw and assign ownership to the service account you created earlier.
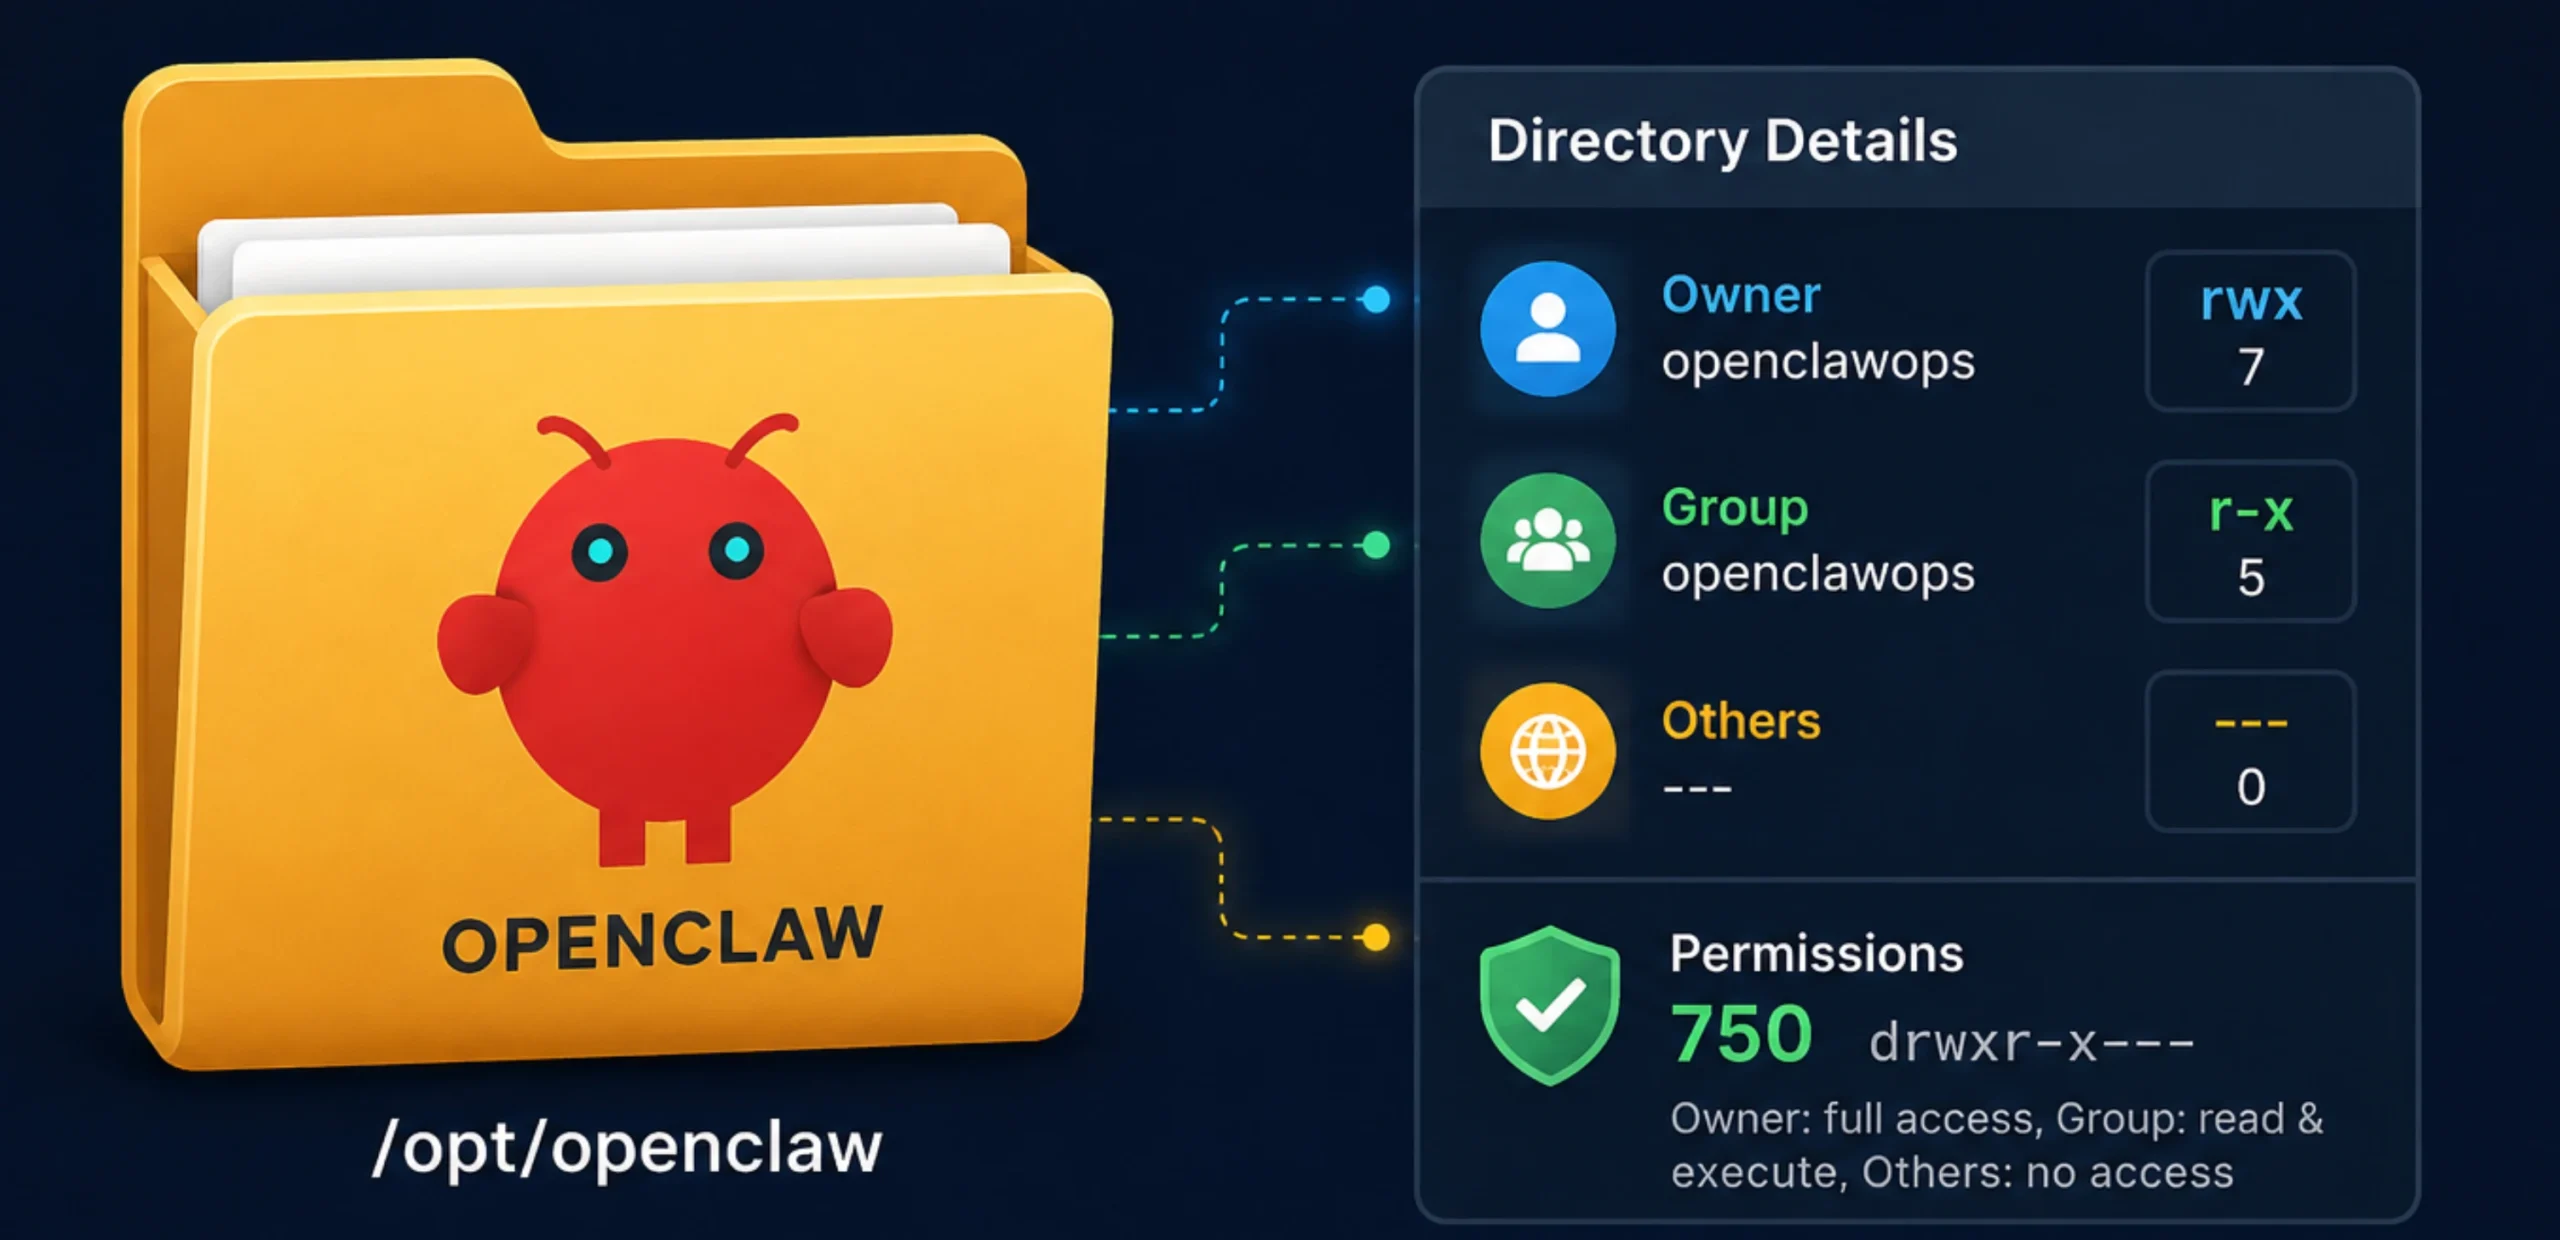
sudo mkdir -p /opt/openclaw
sudo chown openclawops:openclawops /opt/openclaw
sudo chmod 750 /opt/openclaw
This keeps the installation organized while ensuring only the appropriate user can access the application files.
4) Run the Official OpenClaw Installer
Switch to the OpenClaw service user and move into the project directory.
sudo -u openclawops bash
cd /opt/openclaw
Now run the official installation script.
curl -fsSL https://openclaw.ai/install.sh | bashThe installer automatically:
- Detects your operating system.
- Verifies your Node.js version.
- Downloads and installs OpenClaw.
- Starts the onboarding wizard.
5) Complete the Onboarding Wizard
When the installer finishes, register OpenClaw as a background system service immediately by running:
openclaw onboard --install-daemonDuring onboarding, you’ll be asked to make several configuration choices. For a typical production deployment, use the following options.
| Setting | Recommended Choice |
|---|---|
| Risk acknowledgment | Yes |
| Onboarding mode | QuickStart |
| AI provider | Anthropic or OpenRouter |
| API key | Paste your API key |
| Install skills | No (add them after confirming the deployment works) |
| Shell completion | Yes |
Keeping the initial installation simple makes it much easier to verify that everything is working before adding extra skills or integrations.
6) Configure the Environment File
Open the environment file located at:
/opt/openclaw/.envAdd your API key along with the following setting:
GATEWAY_HOST=127.0.0.1Binding the gateway to 127.0.0.1 keeps it accessible only from the local server instead of exposing it directly to the internet.
After saving the file, tighten its permissions.
chmod 600 /opt/openclaw/.envOnly the OpenClaw service account should be able to read this file, as it contains sensitive information such as API keys and other configuration values.
7) Test OpenClaw Manually Before Running It as a Service
Before handing control over to systemd, start OpenClaw manually while logged in as the service user.
openclaw startWatch the output carefully.
If there’s an invalid API key, a missing dependency, or a configuration error, you’ll see it immediately in the terminal. Fixing these issues now is much easier than trying to diagnose them after OpenClaw is running in the background.
Once the agent starts successfully and everything looks healthy, you’re ready for the next step.
Step 4: Configure OpenClaw as a systemd Service
systemd is the right tool for turning OpenClaw into a proper background service, and it is a better choice than pm2 because security hardening, user context, filesystem restrictions, and resource limits live directly in the unit file, managed by the OS.
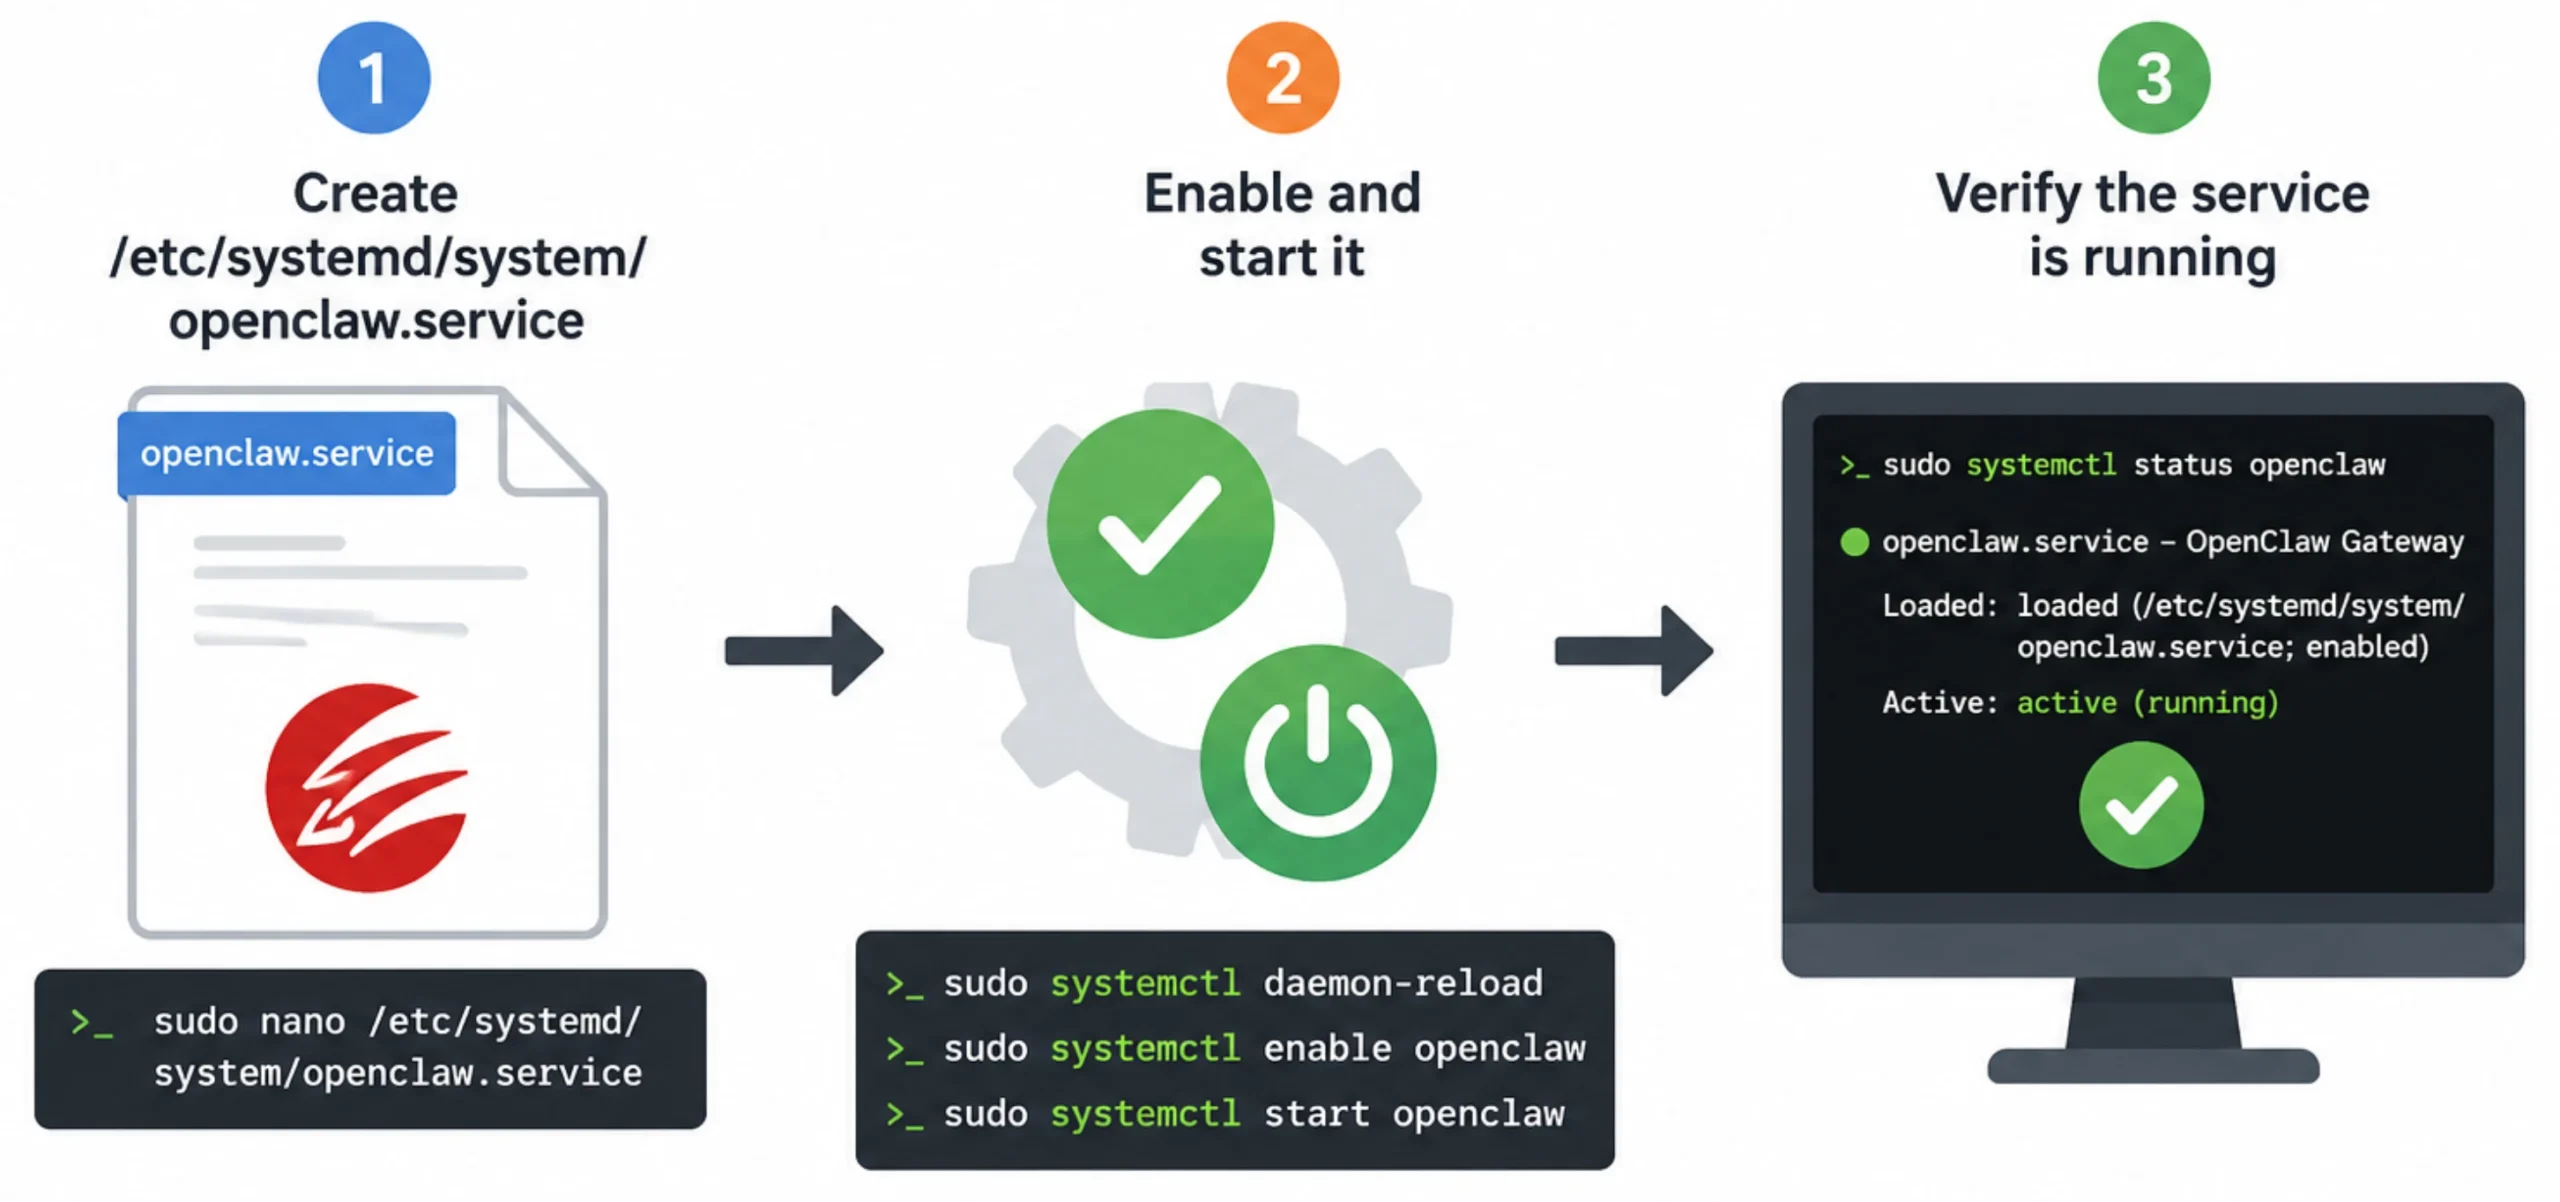
1. Create /etc/systemd/system/openclaw.service with the following:
[Unit]
Description=OpenClaw AI Agent Gateway
After=network-online.target

[Service]
User=openclawops
WorkingDirectory=/opt/openclaw
EnvironmentFile=/opt/openclaw/.env
ExecStart=/usr/local/bin/openclaw start
Restart=always
RestartSec=10
NoNewPrivileges=true
ProtectSystem=strict
ReadWritePaths=/opt/openclaw

[Install]
WantedBy=multi-user.target
This configuration tells Ubuntu to:
- Run OpenClaw as the dedicated openclawops service account.
- Load environment variables from your
.envfile. - Automatically restart the service if it exits unexpectedly.
- Restrict unnecessary filesystem access for better security.
- Start OpenClaw automatically every time the server boots.
2. Enable and start it:
Once you’ve saved the unit file, reload systemd so it recognizes the new service.
sudo systemctl daemon-reload
sudo systemctl enable --now openclaw
The enable command ensures OpenClaw starts automatically whenever the VPS reboots, while --now starts it immediately without waiting for the next restart.
3. Verify the service is running:
Check the current service status.
sudo systemctl status openclawYou should see the service listed as active (running).
Next, verify that the gateway is listening on the correct interface.
ss -tlnp | grep 18789The output must show 127.0.0.1:18789, not 0.0.0.0. If it shows the latter, fix GATEWAY_HOST in your .env and restart the service before continuing.
Step 5: Connect Your First Channel
Telegram is the recommended first channel for a VPS deployment because it uses long polling.
Instead of Telegram sending requests to your VPS, OpenClaw periodically checks Telegram for new messages. All communication is outbound, so you don’t need to expose additional ports or configure a reverse proxy just to get started.
This makes Telegram the quickest way to confirm that your deployment is working before adding more advanced integrations.
1. Open Telegram, search @BotFather, send /newbot, follow the prompts, and copy the bot token.
2. Add the token to /opt/openclaw/.env:
TELEGRAM_BOT_TOKEN=your_token_here3. Register the channel and restart:
openclaw channels add --channel telegram --use-env
sudo systemctl restart openclaw
4. Open the bot in Telegram and send /start. If it responds, the deployment is working.
WhatsApp, Discord, Slack, and Signal are all supported as additional channels. The official OpenClaw channels documentation covers the setup for each one.
Step 6: HTTPS and Your Domain (Optional but Recommended)
If you want to access the OpenClaw dashboard from a browser rather than only through Telegram, this step puts it online properly.
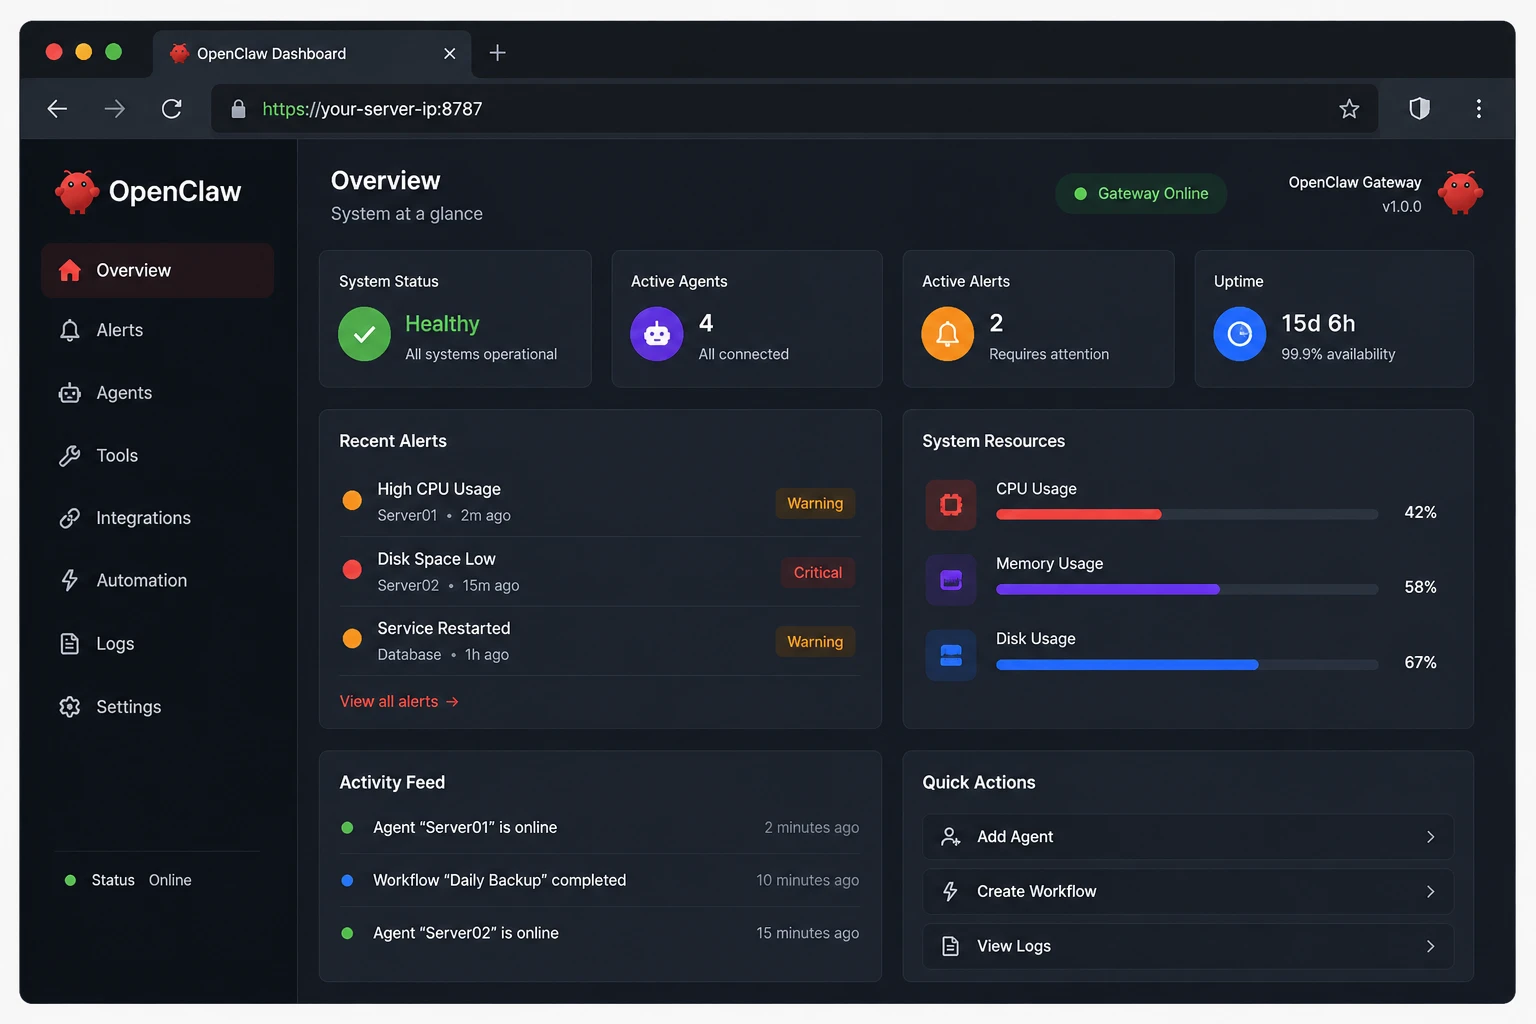
The safest production approach is to keep the OpenClaw gateway listening on 127.0.0.1 and let Nginx handle incoming web traffic. This way, the gateway remains private while Nginx manages HTTPS, SSL certificates, and incoming connections.
- Start by creating an A record for your domain that points to your VPS’s public IP address.
For example:
openclaw.yourdomain.com → Your VPS IP- Install Nginx if it isn’t already available on your server.
sudo apt update
sudo apt install nginx -y- Configure Nginx to reverse proxy requests from your domain to:
http://127.0.0.1:18789This allows users to access the dashboard through your domain while the OpenClaw gateway remains inaccessible from the public internet.
- Install Certbot and request a free SSL certificate from Let’s Encrypt.
sudo certbot --nginx -d openclaw.yourdomain.comCertbot automatically configures HTTPS and installs the certificate for your Nginx site.
- Before calling the setup complete, verify that certificate renewal works correctly.
sudo certbot renew --dry-runFinding a renewal problem now is much better than discovering it months later after your certificate has expired.
- Open your
.envfile and add the following settings:
GATEWAY_TRUSTED_PROXIES=127.0.0.1
GATEWAY_PASSWORD=your_strong_password
Then restart OpenClaw.
sudo systemctl restart openclawYour dashboard is now protected by HTTPS while the gateway continues listening only on the local interface.
Telegram-only deployments don’t require this step.
Step 7: Maintenance Basics
The agent is running. This is what ongoing ownership looks like.
a. Updates:
Always check the OpenClaw changelog for breaking changes before upgrading, particularly around .env variable names or SOUL.md format changes.
Then run npm install -g @openclaw/openclaw@latest as the service user and restart.
After major version bumps, run openclaw start manually once so migration errors surface in your terminal rather than silently in the journal.
b. Log rotation:
Ubuntu’s journald manages its own logs, but skill output and conversation history written to disk can grow without a ceiling.
A cron job that removes logs older than 30 days prevents a full disk, and a full disk in some configurations causes OpenClaw to stop writing history entirely and crash.
c. Backups:
Four things are crucial: SOUL.md, your .env (stored encrypted and separately from everything else), the skills/ config folder, and the data/ directory if you need conversation continuity after a restore.
Daily rsync to a remote destination covers all four. Never store .env in the same unencrypted location as your other files.
d. Uptime monitoring:
UptimeRobot’s free tier checks your HTTPS endpoint every five minutes and alerts you by email or Telegram if it goes down. Set it up the same day you deploy.
Troubleshooting the Most Common Problems
openclawnot found after install: Almost always a PATH issue. npm’s global bin directory is not on the shell’s PATH. Runnpm prefix -gand confirm that directory appears inecho $PATH.
- Node version error: If
node --versionshows anything below v22, the NodeSource setup did not complete correctly. Remove the existing Node package and reinstall from NodeSource using the setup script in Step 3.
- Gateway shows
0.0.0.0instead of127.0.0.1:GATEWAY_HOSTis missing from.env. Add it and restart the service.
- Service fails via systemd but works in manual mode: The problem is almost always a wrong path in the unit file. Double-check both
WorkingDirectoryandEnvironmentFile, both need absolute paths.
- Out-of-memory errors during installation: Add a 2 GB swapfile as covered in Step 3 and retry.
- Bot does not respond on Telegram: Verify the token in
.envis correct, confirm the service is running withsudo systemctl status openclaw, and checkjournalctl -u openclaw -ffor the actual error message.
OpenClaw on Ubuntu FAQs
How much RAM does OpenClaw use?
The core process uses 200-400 MB at idle. Browser automation can push that to 1-2 GB while Chromium is active. 4 GB gives comfortable headroom; 2 GB works but is tight for browser-heavy workflows.
Does OpenClaw work on Ubuntu 25.04 and above?
Yes. The guide works without changes on 25.04. One thing to check: Ubuntu 24.04 and later ship with Python 3.12, which is newer than some skill dependencies expect. If you hit Python errors during skill installation, check the skill’s README for its version requirements.
Do I need a GPU?
Not if you are using external AI providers like Claude, GPT-4o, or OpenRouter. A GPU is only required for running local models like Mistral or LLaMA directly on the server, which is a completely different hardware setup.
Can I run OpenClaw without a desktop or GUI?
Yes. OpenClaw runs entirely from the command line. Ubuntu Server is the correct choice for a VPS deployment. Less RAM usage, smaller attack surface.
How do I check if my OpenClaw agent is running?
Run sudo systemctl status openclaw for a quick status check, or journalctl -u openclaw -f to watch live logs. Use ss -tlnp to confirm what is listening on which ports.
Can I upgrade my plan later?
Yes. CPU, RAM, and storage can be scaled up at any time as your automation workload grows.
Get Pre-Installed 1-Click Deploy Hosting and Skip This Entire Setup
If you want to skip the setup entirely, and start using OpenClaw as quickly as possible, you don’t have to go through the manual installation process.
Our Truehost OpenClaw Hosting plans come with OpenClaw pre-installed and pre-configured on Ubuntu.
With 1-click deployment, your environment is ready in minutes, giving you more time to build workflows instead of managing infrastructure. All our plans are billed in Naira, and our support team understands the Nigerian business context well.
The Starter plan at NGN 10,500/month (billed triennially) gives you 1 vCPU, 2 GB RAM, and 50 GB NVMe storage, which is everything you need to run your first agent around the clock.
The Pro plan at NGN 22,750/month (billed triennially) doubles the resources for teams running browser automation and the Business plan is even better for multiple active workflows.