 Domain NamesFind and register your ideal domain name instantly.
 Web HostingEasy-to-use hosting powered by cPanel — ideal for managing websites in Nigeria.
 Windows HostingRun .NET apps with Windows-optimized hosting
 Affiliate ProgramMake money promoting our services
 Reseller HostingMake money by reselling our hosting products under your own brand
 .COM Domains
 All DomainsExplore all supported tld domains in Nigeria
 WhoisFind out who owns any domain, as well as verify your registration details
 VPS Hosting in Nigeria
 Dedicated ServersReimagine your site speed with your own complete server
 AI Website BuilderDesign your site with drag-and-drop tools
 Online Store BuilderStart your online shop without code
 SSLs
SSLs Support PortalFind answers or get expert help
 Contact UsReach our team via chat or email
 BlogRead our extensive guides on web hosting and more
If you’ve just installed OpenClaw and you’re staring at the configuration options wondering if you should use an OpenAI API key or your ChatGPT subscription, this guide is for you.
OpenClaw provides the framework that runs your AI agent on your own server, while OpenAI supplies the intelligence behind every response.
Once connected, your agent can answer questions, automate workflows, write and review code, generate content, and interact with users across platforms such as WhatsApp, Telegram, and Slack using OpenAI’s latest models.
This setup gives you far more flexibility than using ChatGPT on its own.
Instead of opening a chat whenever you need help, OpenClaw keeps your AI agent running continuously. It can respond to incoming messages, execute tasks automatically, and connect with the tools and services you already use, all while remaining under your control.
Before you start the OpenClaw OpenAI integration, there are a few things you’ll need to have ready.
- A running OpenClaw instance (Node 24 recommended, or a pre-configured VPS)
- An OpenAI account, either a Platform API key or a ChatGPT Plus/Pro subscription
- Terminal/CLI or dashboard access
If you’re installing OpenClaw from scratch on your own server, expect to spend around 30 to 60 minutes getting the operating system, Node.js, dependencies, and OpenClaw itself ready before you even begin the OpenAI integration.
With our pre-installed OpenClaw VPS, that preparation is already done for you, so you can move straight to connecting your OpenAI account instead of spending time configuring the server.
Now, let’s look at the two ways OpenClaw integrates to OpenAI and how to choose the one that’s right for your setup.
The Two Ways OpenClaw Connects to OpenAI
OpenClaw gives you two ways to connect to OpenAI. Both use the same provider ID, openai, and every OpenAI model uses the openai/* prefix regardless of which authentication method you choose.
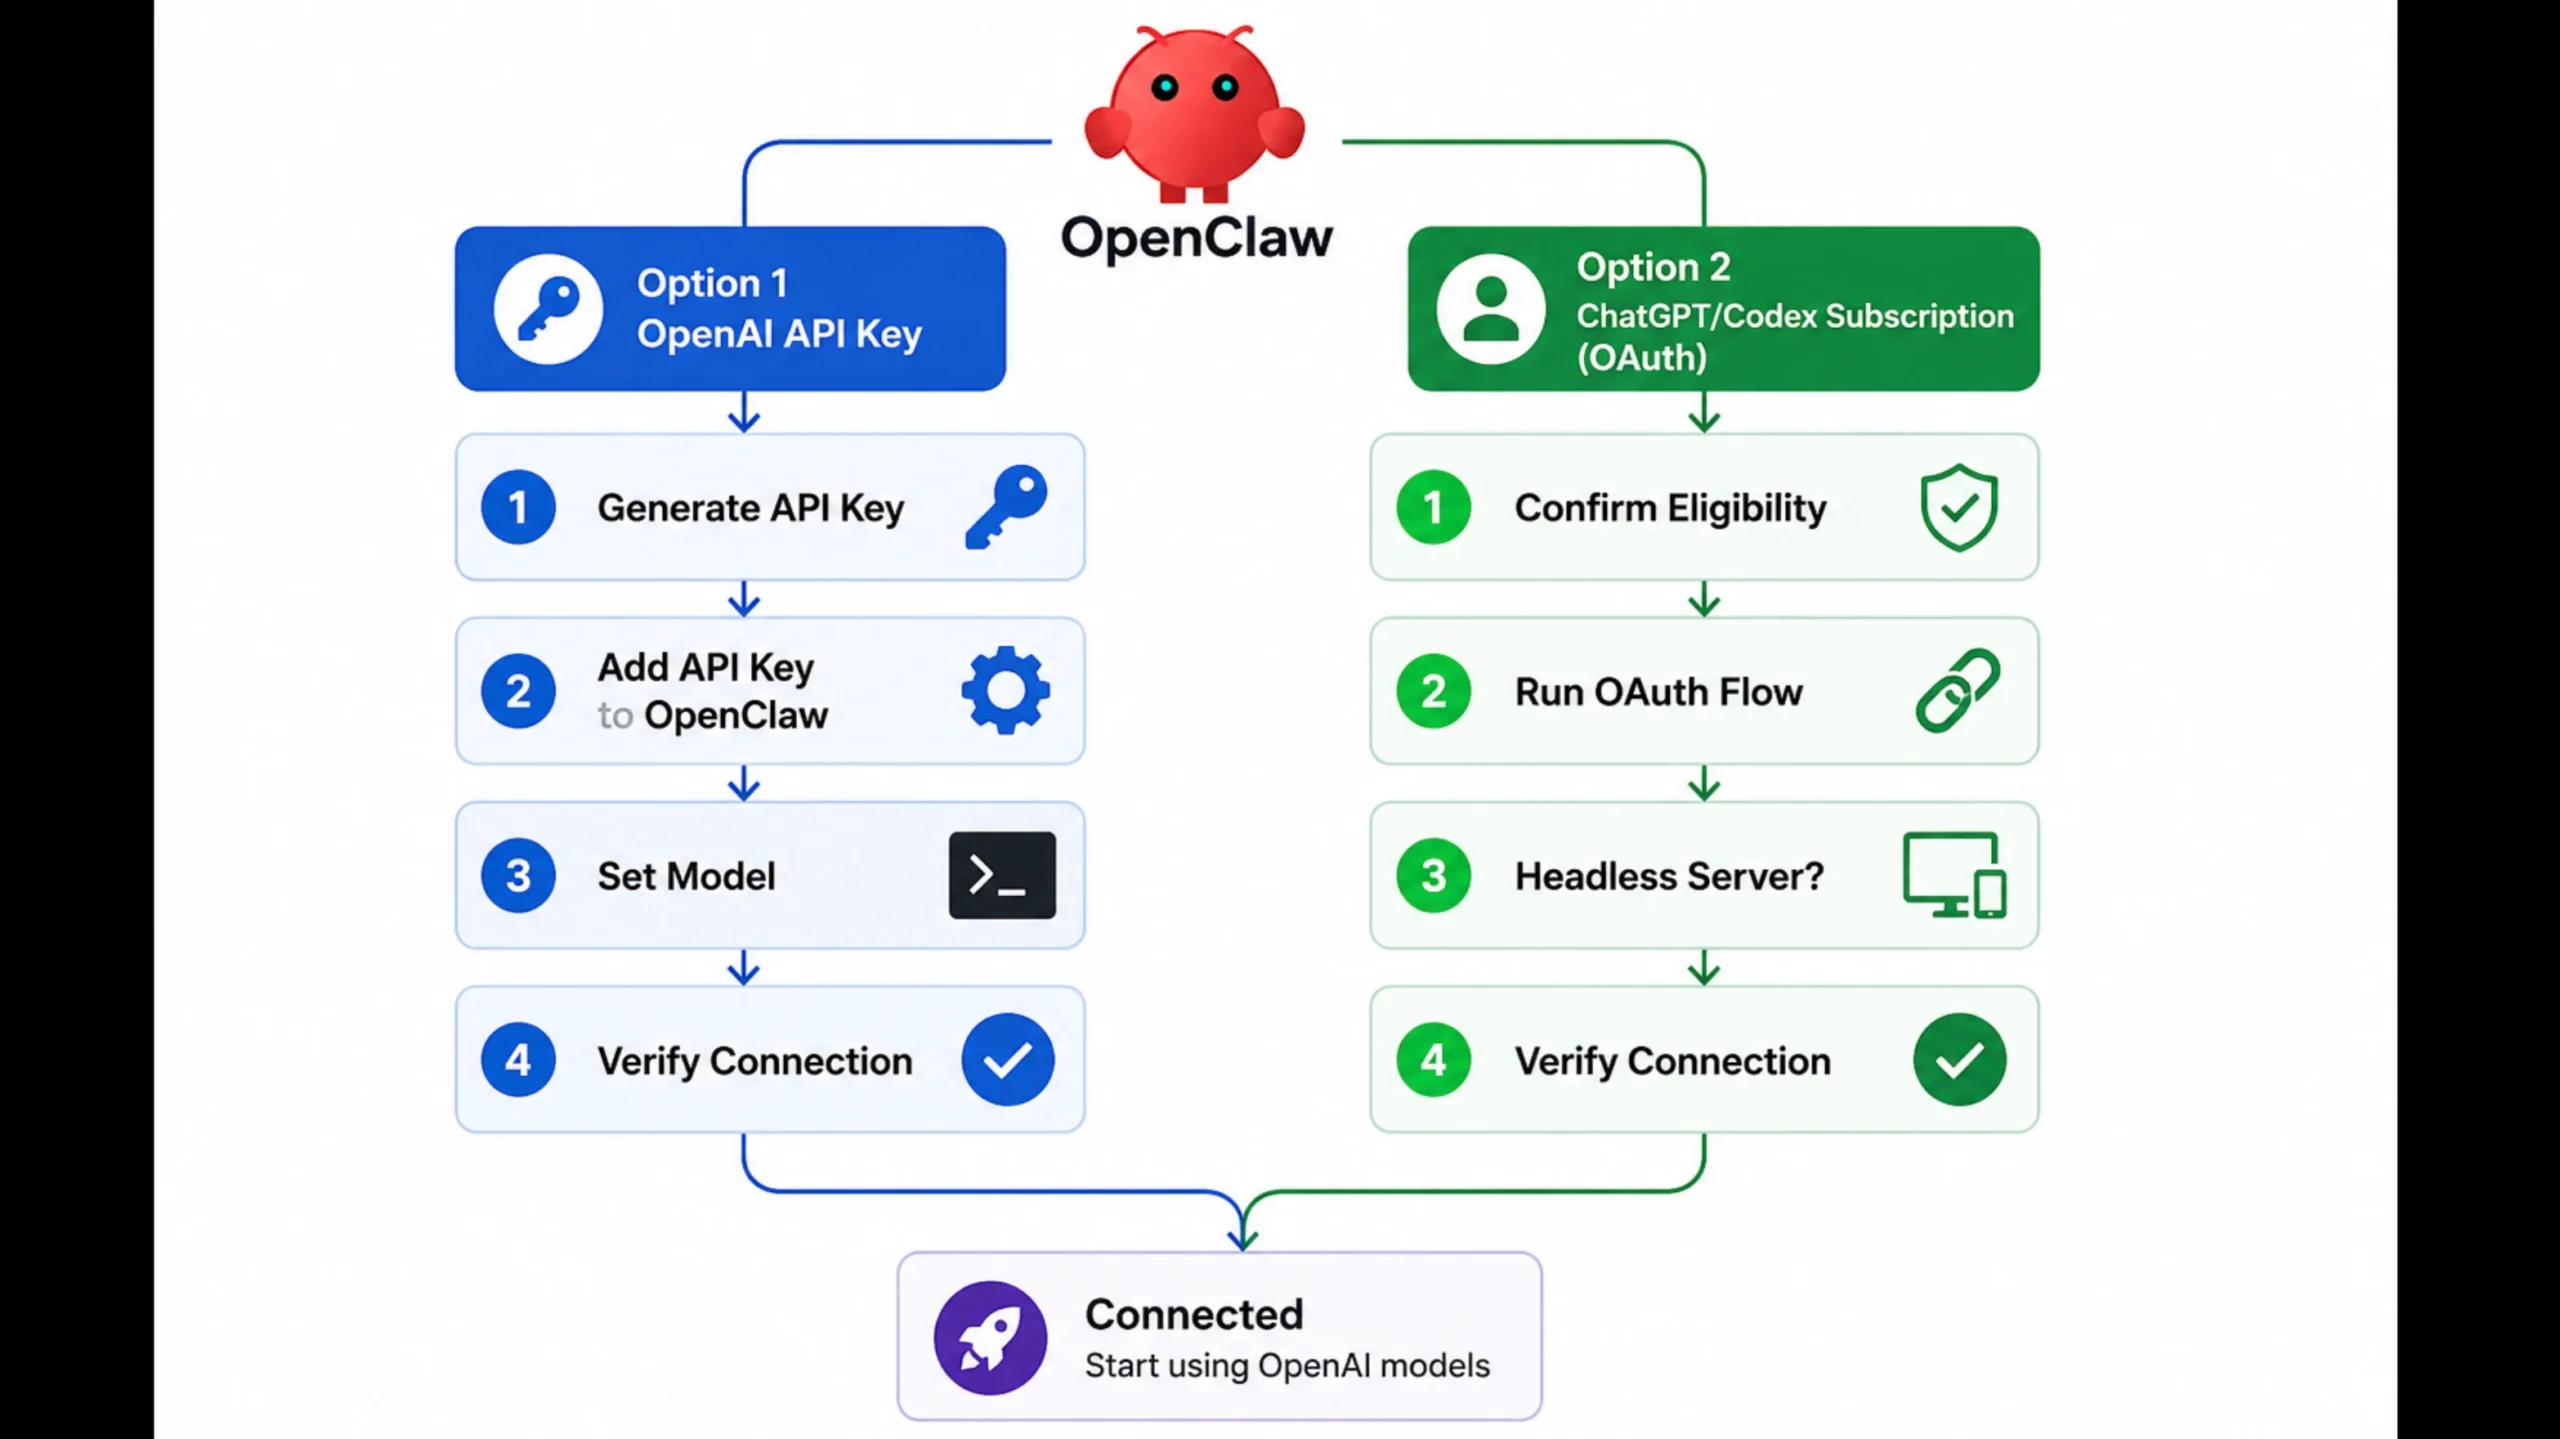
The difference is how you authenticate and how your OpenAI usage is billed.
The first option is an OpenAI Platform API key. It uses pay-per-token billing, has no usage ceiling beyond your account limits, and works with every OpenAI model available to your account. This is the recommended option for production and high-volume workloads.
The second option is a ChatGPT Plus or Pro subscription using OAuth authentication. It has a fixed monthly cost based on your subscription, is subject to your plan’s usage limits, and unlocks OpenClaw’s native Codex app-server runtime.
It’s a good choice for development and moderate day-to-day use.
Older OpenClaw setups sometimes used
openai-codex/*model references for the subscription path. That is a legacy prefix. New setups should useopenai/*with OAuth instead. Theopenai-codex/*prefix is kept only for backward compatibility and may be deprecated.
a) Connect via OpenAI API Key
Using an OpenAI API key is the most flexible way to connect OpenClaw. It’s ideal for production deployments and workloads that need consistent access to OpenAI models.
1) Generate the key
Start by creating an API key from your OpenAI Platform account.
- Go to platform.openai.com/api-keys.
- Click Create new secret key.
- Give the key a descriptive name, such as “OpenClaw Production”, so it’s easy to identify later.
- Copy the key immediately. OpenAI only displays it once, so you won’t be able to retrieve it later.
2) Add the key to OpenClaw
You can add your API key in one of two ways:
Option A: Interactive onboarding
Run:
openclaw onboard --auth-choice openai-api-keyThen follow the prompts to complete the setup.
Option B: Environment variable
Export the key for the current session:
export OPENAI_API_KEY="sk-..."To keep it available after restarting your server, add it to:
~/.openclaw/.envIf this is your first OpenClaw deployment, the onboarding wizard is the easiest option. If you’re automating deployments, using an environment variable is the better choice.
3) Set the Model
Set your model to:
openai/gpt-5.5OpenClaw won’t automatically switch to another model, so make sure you set one your account can access.
4) Verify the Connection
Run:
openclaw models list --provider openaiIf the setup is successful, the command returns a list of available models. An empty list or an authentication error usually means the API key or configuration needs to be checked.
For a final verification, send a test message through one of your connected channels and confirm that your agent responds successfully.
b) Connect via ChatGPT/Codex Subscription (OAuth)
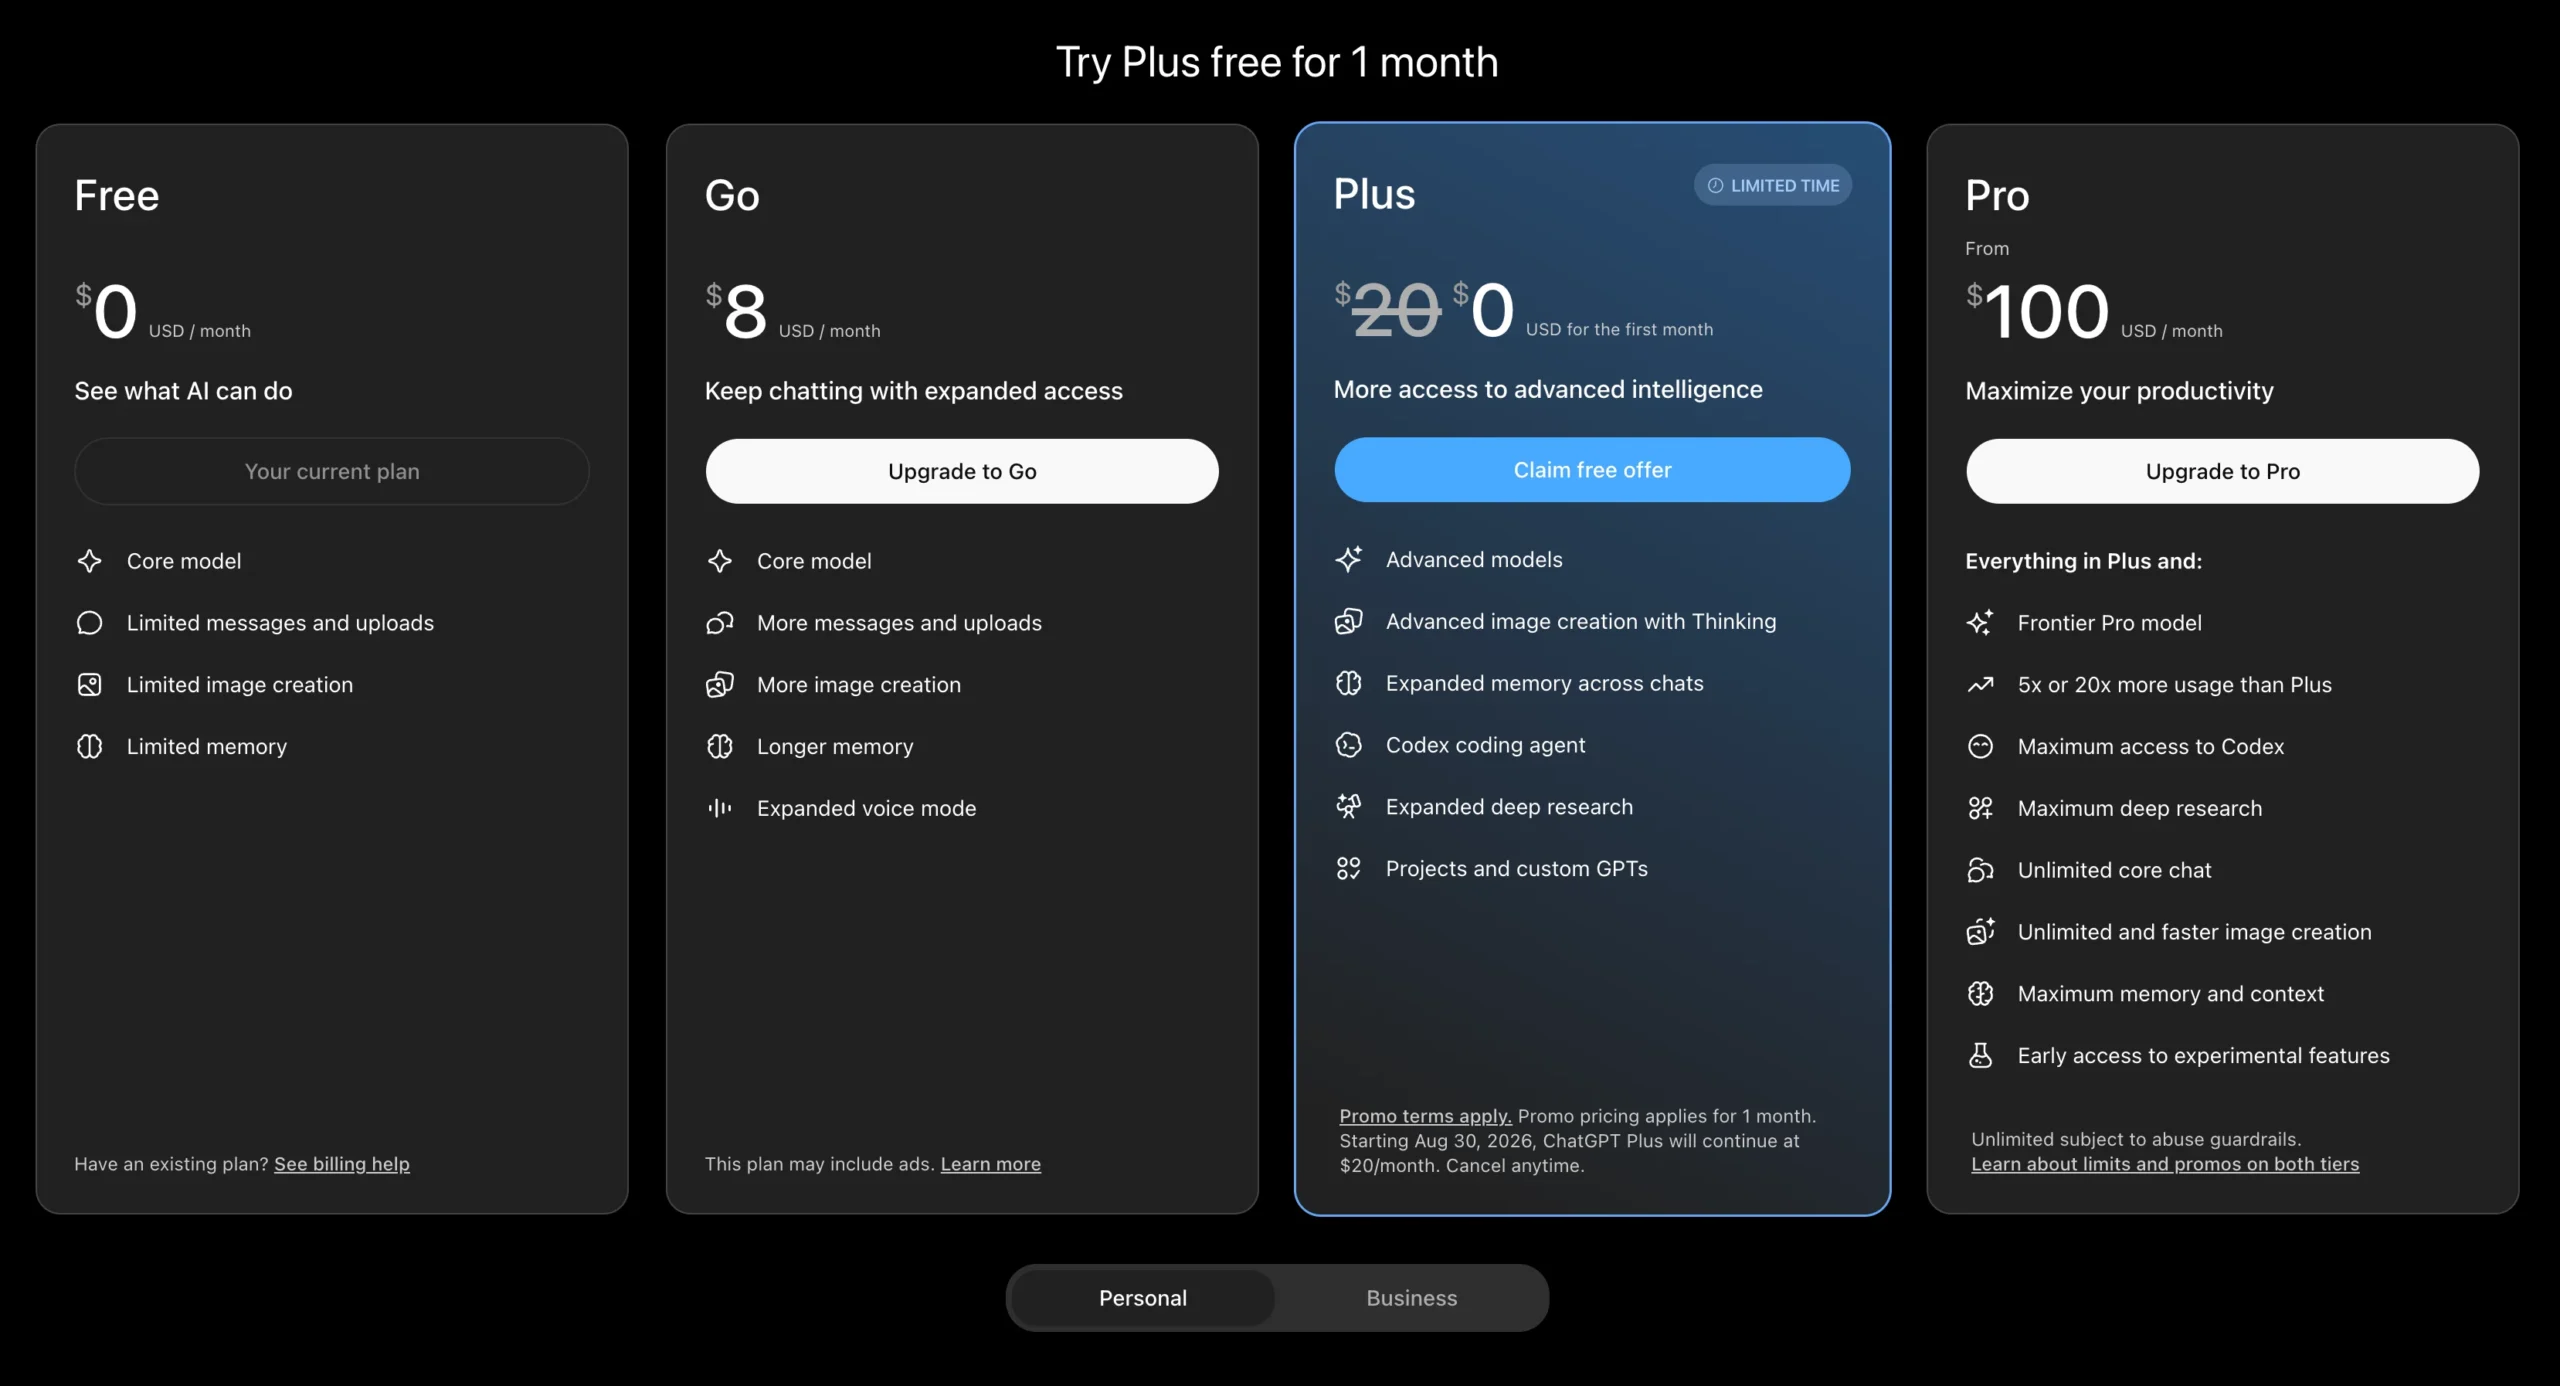
If you already have a ChatGPT Plus or Pro subscription, you can connect OpenClaw without creating an API key.
1) Confirm Eligibility
Before you begin, make sure you have an active ChatGPT Plus or ChatGPT Pro subscription. This authentication method isn’t available on the free ChatGPT plan.
2) Run the OAuth Flow
Start the onboarding process by running:
openclaw onboard --auth-choice openaiA browser window opens automatically. Sign in with your ChatGPT account and click Authorize to complete the connection.
3) Handle the Headless Server Case
If you’re running OpenClaw on a remote server without a browser, use the device code flow instead:
openclaw onboard --auth-choice openai --device-codeOpenClaw displays a verification code in the terminal. Open the URL shown using your phone or another computer, enter the code, and approve the sign-in request.
4) Verify the Connection
Check that your authentication profile is active by running:
openclaw models statusThen send the following command through a connected chat channel:
/codex statusThis confirms that the native Codex runtime is running, not just authenticated.
To see the models currently available through your subscription, run:
/codex modelsOnce you’ve signed in with OAuth, you can also generate and edit images using models such as
openai/gpt-image-2andopenai/gpt-image-1.5without creating a separate OpenAI Platform API key.
Choosing the Right Model Reference
| Goal | Model reference | Works with | When to use it |
|---|---|---|---|
| Flagship quality | openai/gpt-5.6-sol | API key + OAuth | Default choice for a fresh setup |
| Balanced cost/quality | openai/gpt-5.6-terra | API key + OAuth | Strong output without Sol’s cost |
| Fastest, lowest cost | openai/gpt-5.6-luna | API key + OAuth | Lightweight tasks like quick replies, simple lookups |
| No GPT-5.6 access | openai/gpt-5.5 | API key + OAuth | Explicit fallback when your account lacks 5.6 |
| Latest ChatGPT Instant alias | openai/chat-latest | API key only | Avoid pinning production to this. It’s a moving target |
| Image generation | openai/gpt-image-2 | API key + OAuth | Standard text-to-image and edits |
| Transparent-background images | openai/gpt-image-1.5 | API key + OAuth | Set output format to png/webp with background=transparent |
| Unsure what’s available | Run openclaw models list --provider openai | – | Confirms your account’s actual model access |
Avoid openai/chat-latest unless you’re actively watching it. It’s a moving alias, not a fixed model, so a setup that works today could point somewhere different next month.
Fixing the Most Common Setup Errors
- “Model not allowed” error: This usually means the model you’re trying to use isn’t included in your allowlist. Add the model specifically to your configuration, then try again.
- OAuth window won’t open: This happens on headless servers that don’t have a graphical browser. Instead of the standard OAuth flow, rerun the command using the
--device-codeflag to complete authentication from another device. - Legacy
openai-codex/*references failing: Runopenclaw doctor --fixto migrate these to the currentopenai/*format automatically. - API key not recognized: Verify that your
OPENAI_API_KEYis correctly saved as an environment variable or in your~/.openclaw/.envfile. If the key was only entered in a terminal session, it may not persist after restarting your shell or server. - Wrong auth profile being picked: If you’ve configured both an API key and a ChatGPT subscription, OpenClaw may not use the one you intended. Set the authentication profile explicitly instead of relying on the default selection order.
Where to Run It: Local Machine vs. VPS
You can run OpenClaw on your local computer or on a VPS. The setup steps are the same, but the experience is very different.
A local installation is great for testing, but your agent stops running as soon as you shut down or close your computer.
A self-managed VPS keeps your agent online around the clock, although you’ll be responsible for managing the server, updates, and troubleshooting when issues arise.
Our pre-configured OpenClaw VPS removes that extra setup work. OpenClaw and Node.js are already installed, giving you a faster path to deployment while still providing full root SSH access.
Our plans start from NGN 10,500/month (Starter: 1 vCPU, 2 GB RAM, 50 GB NVMe) and scale up to NGN 56,000/month (Business: 4 vCPU, 8 GB RAM, 200 GB NVMe) when billed triennially.
Whichever option you choose, you’ll run the same openclaw onboard commands covered in this guide. The difference is that with our OpenClaw VPS, you can focus on configuring your AI agent instead of preparing the server.