 Domain NamesFind and register your ideal domain name instantly.
 Web HostingEasy-to-use hosting powered by cPanel — ideal for managing websites in Nigeria.
 Windows HostingRun .NET apps with Windows-optimized hosting
 Affiliate ProgramMake money promoting our services
 Reseller HostingMake money by reselling our hosting products under your own brand
 .COM Domains
 All DomainsExplore all supported tld domains in Nigeria
 WhoisFind out who owns any domain, as well as verify your registration details
 VPS Hosting in Nigeria
 Dedicated ServersReimagine your site speed with your own complete server
 AI Website BuilderDesign your site with drag-and-drop tools
 Online Store BuilderStart your online shop without code
 SSLs
SSLs Support PortalFind answers or get expert help
 Contact UsReach our team via chat or email
 BlogRead our extensive guides on web hosting and more
You just signed up for a VPS. There is no Softaculous button. No one-click WordPress install waiting for you. Just a blank terminal and a blinking cursor.
Every WordPress installation on a VPS runs on a software stack. Two options dominate: LAMP and LEMP. The difference sits mainly in the web server layer.
LAMP stands for Linux, Apache, MySQL, and PHP. Apache handles requests and plays well with .htaccess files, which shared hosting users already know about.
LEMP swaps Apache for Nginx and MariaDB for MySQL. Nginx serves static files like images and CSS faster than Apache and uses less memory.
That memory difference counts most on a smaller VPS plan. A 1GB or 2GB server benefits from every megabyte Nginx frees up.
This guide walks through LEMP, using Nginx and MariaDB. If your VPS already runs Apache for other sites, the same WordPress steps still apply. Only the web server and configuration commands change.
What You Need Before You Start
A manual install goes faster when the basics are settled first. Check these off before you touch a single command.
- RAM. Treat 1GB as a floor, not a target. Pick 2GB if you plan to run a few plugins alongside a theme.
- SSH access. You need a working SSH connection with root access or a sudo-enabled user account.
- Operating system. This guide uses Ubuntu 24.04 LTS. Long-term support means fewer surprise breaking changes over the life of your site.
- Domain name. You can install WordPress against your raw IP address first. Point a domain at it once the install works.
None of these needs to be perfect on day one. They need to be in place before you connect.
Step 1: Connect to Your VPS and Update the System
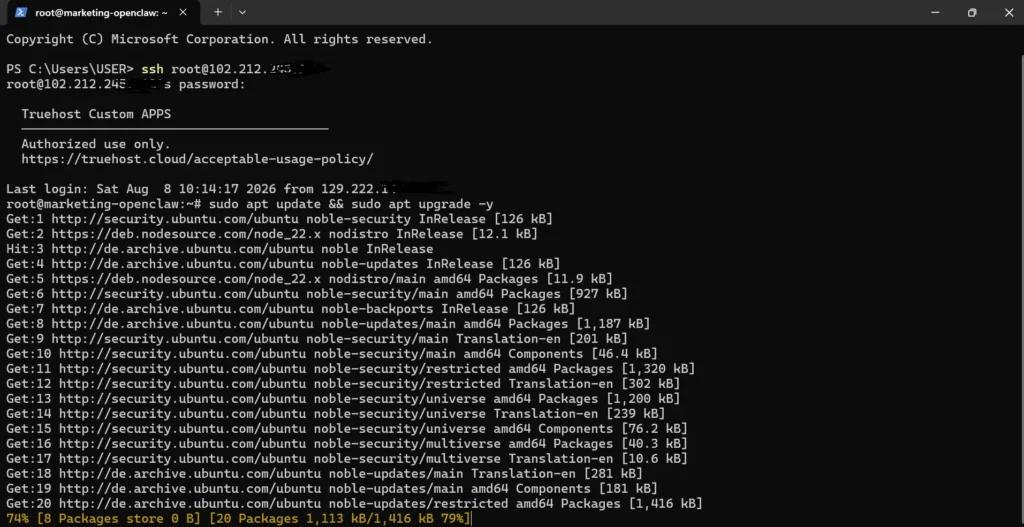
Start every install the same way: connect, then update.
Open a terminal and connect over SSH using your server’s IP address:
ssh root@your_server_ipOnce connected, refresh the package list and apply available updates:
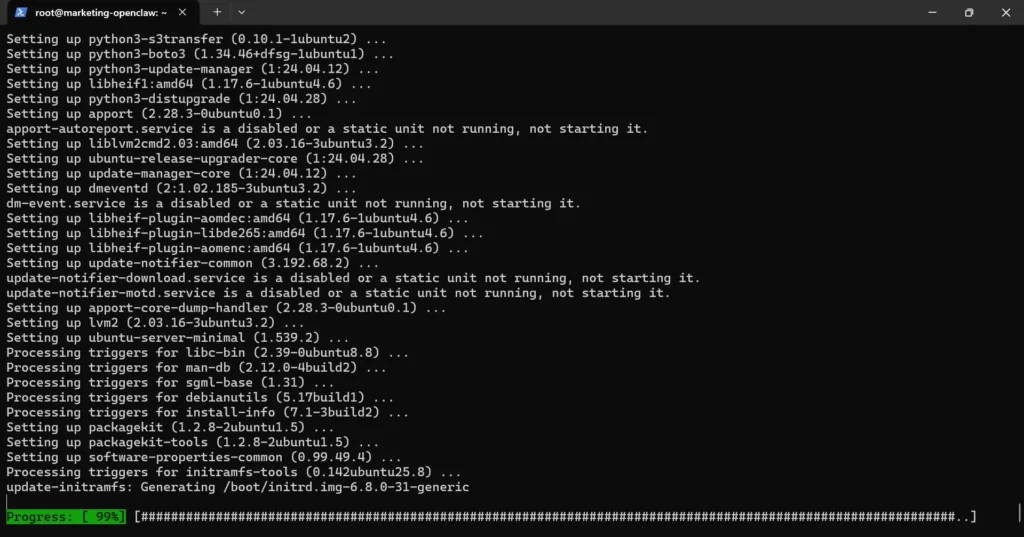
sudo apt update && sudo apt upgrade -yRunning everything as root works, but it carries risk. A single mistyped command as root can damage the whole server. Create a separate user with sudo privileges instead:
adduser your_usernameusermod -aG sudo your_usernameLog out and reconnect as that new user for the rest of this guide.
Step 2: Install and Configure Nginx
With the system updated, install the web server next.
sudo apt install nginx -y

sudo systemctl enable nginx

sudo systemctl start nginx
Nginx cannot serve traffic if the firewall blocks it. Allow web traffic and SSH access through UFW:
sudo ufw allow 'Nginx Full'

sudo ufw allow OpenSSH

sudo ufw enable
Load your server’s IP address in a browser now. A default Nginx welcome page confirms the web server is running and reachable from outside the VPS.
Step 3: Install and Secure MariaDB
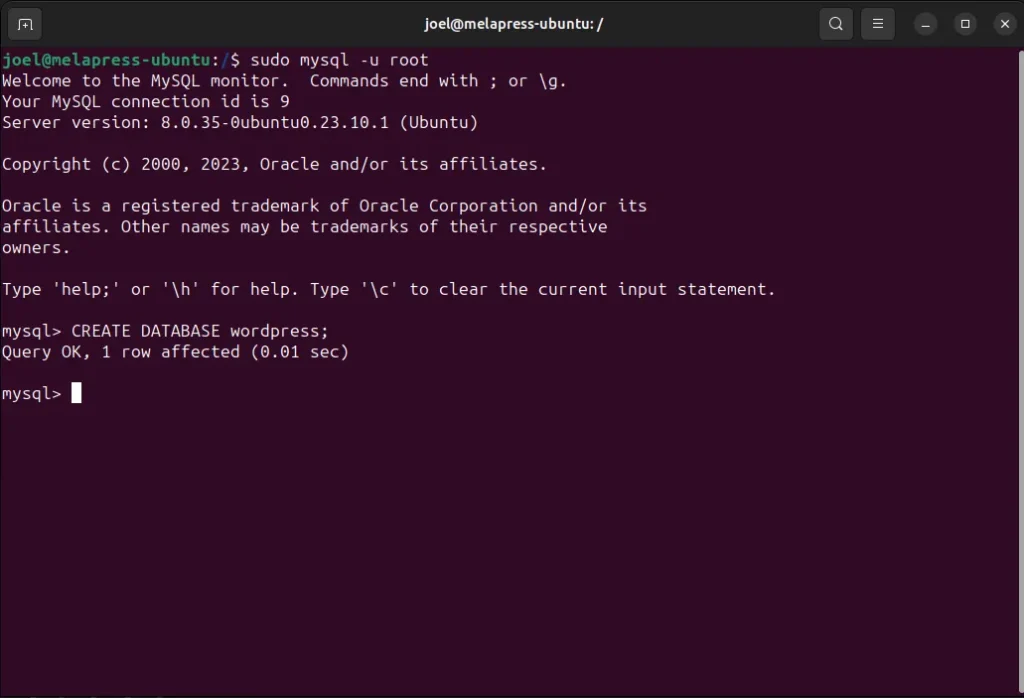
WordPress stores content in a database, so this step sets up the database engine correctly.
sudo apt install mariadb-server -y

sudo systemctl enable mariadb

sudo mysql_secure_installation
The secure installation script walks through a set of prompts. Set a strong root password, remove anonymous users, disable remote root login, and drop the test database. Confirm each prompt as it comes up.
Next, create a database and a dedicated user for WordPress. Do not reuse the MariaDB root account for this. Log in and run the following:
CREATE DATABASE wordpress_db;

CREATE USER 'wordpress_user'@'localhost' IDENTIFIED BY 'your_strong_password';

GRANT ALL PRIVILEGES ON wordpress_db.* TO 'wordpress_user'@'localhost';

FLUSH PRIVILEGES;

EXIT;
Write these credentials down now. You will need them again in Step 5.
Step 4: Install PHP and Required Extensions
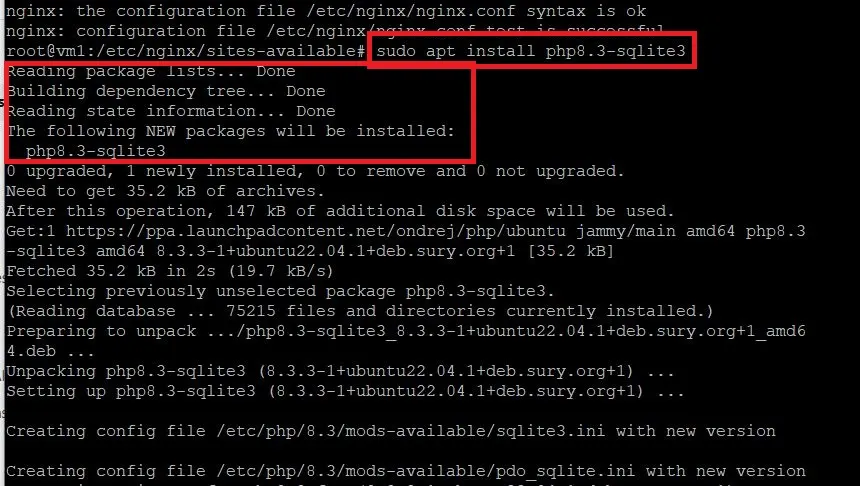
WordPress runs on PHP, and the version you install directly affects speed and security.
Install PHP 8.3 along with the extensions WordPress needs to function correctly:
sudo apt install php8.3-fpm php8.3-mysql php8.3-curl php8.3-gd php8.3-xml php8.3-mbstring php8.3-zip -yEach extension serves a purpose. Curl handles outgoing requests; GD processes images; XML and mbstring handle text and content parsing, and zip supports plugin installs.
Start and enable the PHP-FPM service so Nginx can hand requests off to it:
sudo systemctl enable php8.3-fpm

sudo systemctl start php8.3-fpm
Step 5: Download and Configure the WordPress Core Files
With the stack ready, pull down the actual WordPress software.
Fetch the latest release directly from WordPress rather than an older cached copy:
cd /tmp

wget https://wordpress.org/latest.tar.gz

tar -xzvf latest.tar.gz

Move the extracted files into your web root:

sudo mv wordpress/* /var/www/html/
Ownership counts more here than most guides admit. WordPress needs to write files for uploads, plugins, and updates, so the web server user needs to own them:
sudo chown -R www-data:www-data /var/www/html

sudo find /var/www/html -type d -exec chmod 755 {} \;

sudo find /var/www/html -type f -exec chmod 644 {} \;
Skip this step, and you will likely see “not writable” errors later. It shows up almost every time ownership gets left on the wrong user.
Now connect WordPress to the database you created earlier. Copy the sample config file and edit it:
cd /var/www/html

sudo cp wp-config-sample.php wp-config.php

sudo nano wp-config.php
Update the DB_NAME, DB_USER, and DB_PASSWORD fields with the values from Step 3. While the file is open, add unique authentication salts. Pull a fresh set from the WordPress secret key generator and paste them in.
Step 6: Configure Your Web Server for WordPress
Nginx needs its own instructions for how to serve WordPress correctly.
Create a new server block file for your site:
sudo nano /etc/nginx/sites-available/wordpressAdd a configuration like this one, adjusting the domain and root path to match your setup:
server {

    listen 80;

    server_name yourdomain.com;

    root /var/www/html;

    index index.php index.html;

    location / {

        try_files $uri $uri/ /index.php?$args;

    }

    location ~ \.php$ {

        include snippets/fastcgi-php.conf;

        fastcgi_pass unix:/var/run/php/php8.3-fpm.sock;

    }

    location ~ /\.ht {

        deny all;

    }

}
That try_files line does more work than it looks. Without it, every post and page beyond the homepage returns a 404 error later.
Enable the site and test the configuration before restarting:
sudo ln -s /etc/nginx/sites-available/wordpress /etc/nginx/sites-enabled/

sudo nginx -t

sudo systemctl restart nginx
The nginx -t command catches syntax mistakes before they take your site down. Run it after any config change from here forward.
Step 7: Finish the Installation in Your Browser
The command line work is done. The rest happens in a browser.
Visit your server’s IP address or domain. WordPress detects the database connection and automatically displays its setup screen.
Fill in the requested fields:
- Site title
- Admin username (choose something other than “admin”)
- A strong admin password
- Your email address
Click Install WordPress, then log in to /wp-admin with the credentials you just set. From here, the dashboard looks exactly like any other WordPress install.
Step 8: Secure and Harden Your WordPress VPS
An install that works is only half finished. Lock it down before you consider it production-ready.
1)Add free SSL through Let’s Encrypt. Certbot handles the certificate and the Nginx configuration for you:
sudo apt install certbot python3-certbot-nginx -y

sudo certbot --nginx -d yourdomain.com
Choose the redirect option when Certbot prompts you, so every visitor automatically lands on the secure version of the site.
II) Review your firewall rules. Confirm that UFW allows only the ports the site actually needs, typically SSH, HTTP, and HTTPS.
III) Limit login attempts. wp-login.php is a common target for automated attacks. A plugin such as Limit Login Attempts Reloaded blocks repeated failed logins.
IV) Disable XML-RPC if you don’t use it. Many sites never use this feature, and it remains a frequent target of brute-force attacks.
V) Turn off directory listing. Add autoindex off inside your Nginx server block so visitors cannot browse your file structure directly.
Troubleshooting Common Installation Errors
Even a careful install can hit a snag somewhere along the way. Here is what to check for each common error, in the order these problems tend to appear.
1) “This Site Can’t Be Reached,” or Connection Refused
Start with the web server itself:
sudo systemctl status nginxA stopped service produces this exact message. If Nginx shows as running, check whether ports 80 and 443 are open in UFW.
A blocked port can make a working server look offline. Also, confirm your domain resolves to the VPS IP address with a DNS lookup tool.
Propagation after pointing a domain can take a few hours. If the raw IP address loads fine but the domain does not, the problem lies with DNS, not the server.
2) “Error Establishing a Database Connection”
Open wp-config.php and check the DB_NAME, DB_USER, DB_PASSWORD, and DB_HOST values against what you created in Step 3. A single typo here is the most common cause on a fresh install.
Next, confirm the database service is actually running:
sudo systemctl status mariadbIf credentials and the service both check out, log into MariaDB and confirm the WordPress user actually holds GRANT privileges on the right database.
A missing or incorrect GRANT statement during setup is a frequent culprit. On a new install, this error usually traces back to credentials or a stopped service, not real corruption.
3) 502 Bad Gateway
A 502 error means Nginx is running, but cannot get a response from PHP-FPM. Check the PHP-FPM service first:
sudo systemctl status php8.3-fpmIf it shows as running, check that your Nginx server block points to the correct PHP-FPM socket path.
A version mismatch, like pointing to php8.1-fpm.sock After installing PHP 8.3, this exact error occurs.
The Nginx error log usually confirms the cause directly:
sudo tail -f /var/log/nginx/error.logOn a small VPS, low memory can also trigger this. Check for out-of-memory kills with dmesg if the error only appears under load.
The kernel may be killing PHP-FPM workers to protect itself.
4) Posts and Pages Return 404, But the Homepage Works
This points to the Nginx configuration, not WordPress itself. Nginx does not read .htaccess files the way Apache does, so rewrite rules need to sit inside the server block.
Confirm your config includes the try_files line from Step 6:
location / {

    try_files $uri $uri/ /index.php?$args;

}
Reload Nginx after any change, since the new rule only takes effect once the service picks it up:
sudo systemctl reload nginxThen, in wp-admin, go to Settings > Permalinks and click Save Changes once.
This forces WordPress to refresh its own internal rewrite rules, even without editing anything.
5) “Destination Folder Is Not Writable” or Upload Failures
This error almost always traces back to file ownership, not a broken install. Check who owns your WordPress files:
ls -la /var/www/htmlIf ownership does not show www-data, reset it and reapply the correct permissions:
sudo chown -R www-data:www-data /var/www/html

sudo find /var/www/html -type d -exec chmod 755 {} \;

sudo find /var/www/html -type f -exec chmod 644 {} \;
If updates work but media uploads fail on their own, check the uploads folder by itself.
It sometimes gets skipped during the first pass. Resist the urge to run chmod 777 as a shortcut. It fixes the symptom while opening a real security gap.
6) White Screen With No Error Message
A blank white page, often called the White Screen of Death, usually signals a PHP memory limit issue. A hidden script error can also cause it.
Turn on debug logging wp-config.php to see what is actually happening:
define('WP_DEBUG', true);

define('WP_DEBUG_LOG', true);

define('WP_DEBUG_DISPLAY', false);
Check wp-content/debug.log after reloading the site. A line mentioning “allowed memory size exhausted” points to a memory limit problem. Add this line above the line that reads “That's all, stop editing” in wp-config.php:
define('WP_MEMORY_LIMIT', '256M');On a fresh install, a low default PHP memory limit is more likely to be the cause than a plugin conflict, since you have not installed many plugins yet.
7) Redirect Loop or Mixed Content Warning After Enabling SSL
Start by checking Settings > General in wp-admin. Confirm that both the WordPress Address and Site Address use https. A mismatch here is the single most common trigger for a redirect loop.
Only add define('FORCE_SSL_ADMIN', true); to wp-config.php After confirming your certificate is active, and Nginx serves it correctly. Adding it too early can create a loop rather than fix it.
If the loop continues, trace the redirect chain to see which layer issues it. That could be Nginx, WordPress, or a caching plugin.
Fixing the wrong layer wastes time and rarely solves the real problem. Old hardcoded HTTP links in existing content will not cause a redirect loop on their own. They will still trigger mixed content warnings once HTTPS goes live.
FAQs
Is a VPS Better Than Shared Hosting for WordPress?
A VPS gives you dedicated resources instead of a shared pool split across many accounts on the same physical server.
That means more consistent performance under traffic spikes. It also means you handle setup, updates, and security yourself, which shared hosting typically manages for you.
Can I install WordPress on a VPS without cPanel?
Yes. This entire guide installs WordPress through the command line, with no control panel involved at any step. cPanel and similar panels add a visual layer on top. Neither one is required to run WordPress on a VPS.
How Long Does the Manual Installation Actually Take?
With a working VPS and the commands above ready to copy, the technical setup takes about 30-45 minutes. Add extra time on your first attempt, since checking each step slows things down a little.
Can I Use a One-Click Installer Instead of Doing This Manually?
Some VPS providers offer WordPress as a pre-built image or marketplace app. That route skips the manual steps above, at the cost of full visibility into how your stack is configured. Manual installation gives you a clearer picture of every layer, which pays off the first time something breaks.
Set Up WordPress on VPS
Manual installation trades a shortcut for something more useful: a stack you actually understand.
You know where the database credentials live, which config file controls permalinks, and where to look first when something breaks.
That knowledge saves real time down the road. You are not waiting on a support ticket to diagnose a problem you can already see.
The steps above turned a bare VPS into a secure, working WordPress site without a single one-click installer.
From here, the next move is scaling that setup. That could mean adding caching, tuning PHP-FPM, or moving to a larger plan as traffic grows.
If you have not yet settled on the VPS itself, start there. Everything in this guide assumes a correctly sized server as the starting point.