 Domain NamesFind and register your ideal domain name instantly.
 Web HostingEasy-to-use hosting powered by cPanel — ideal for managing websites in Nigeria.
 Windows HostingRun .NET apps with Windows-optimized hosting
 Affiliate ProgramMake money promoting our services
 Reseller HostingMake money by reselling our hosting products under your own brand
 .COM Domains
 All DomainsExplore all supported tld domains in Nigeria
 WhoisFind out who owns any domain, as well as verify your registration details
 VPS Hosting
 Dedicated ServersReimagine your site speed with your own complete server
 AI Website BuilderDesign your site with drag-and-drop tools
 Online Store BuilderStart your online shop without code
 Support PortalFind answers or get expert help
 Contact UsReach our team via chat or email
 BlogRead our extensive guides on web hosting and more
You bought a Truehost VPS, and now it’s sitting idle. No website, no server running, just a blank IP address and a login you’re not sure how to use yet.
Most guides online skip straight past this part. They assume you already have a working server, or they leave out the Nigeria-specific steps entirely, so you end up stuck between your client area and a terminal window.
Nginx is a web server that handles requests from browsers and delivers your website’s files back to them. It also works as a reverse proxy and load balancer for larger setups.
A few reasons nginx tends to be the better pick on a VPS:
- It handles static files like images, CSS, and JavaScript with less strain on server memory.
- It manages a large number of connections at once without slowing down.
- It runs lighter than Apache, so a small VPS can serve more visitors before you need to upgrade.
- Apache still works well for sites that rely heavily on .htaccess rules, so it’s not always the wrong choice.
- If you plan to run WordPress later, nginx paired with PHP-FPM forms the backbone of a LEMP stack setup.
This guide fixes that. It walks you through the full path, from ordering your VPS to running a live, secured website on nginx.
Follow each step in order, and by the end, your server will be ready for real traffic.
Before You Start: What You Need
Gather these items before you touch the terminal. Having them ready saves you from stopping halfway through.
- An active Truehost VPS running Ubuntu 24.04 LTS.
- Root or sudo access over SSH.
- Your VPS IP address is found in the Truehost client area.
- A registered domain name, if you want the site reachable by name instead of IP.
- A terminal app such as PuTTY for Windows, or the built-in terminal on Mac and Linux.
Step 1: Order and Provision Your Truehost VPS with Ubuntu 24.04
Log in to your Truehost client area and head to the VPS section. If you’re ordering a new server, pick a plan that fits your traffic expectations, then select Ubuntu 24.04 LTS as the operating system during setup.
If you already have a VPS running a different OS, you can switch it through Virtualizor.
Go to your VPS management panel, find the OS reinstall option, and choose Ubuntu 24.04 from the list. This wipes the existing server, so back up anything you need first.
Provisioning usually finishes within a few minutes. Once it’s done, open the client area again and locate the root password and IP address for your server. You’ll need both in the next step.
Step 2: Connect to Your VPS via SSH
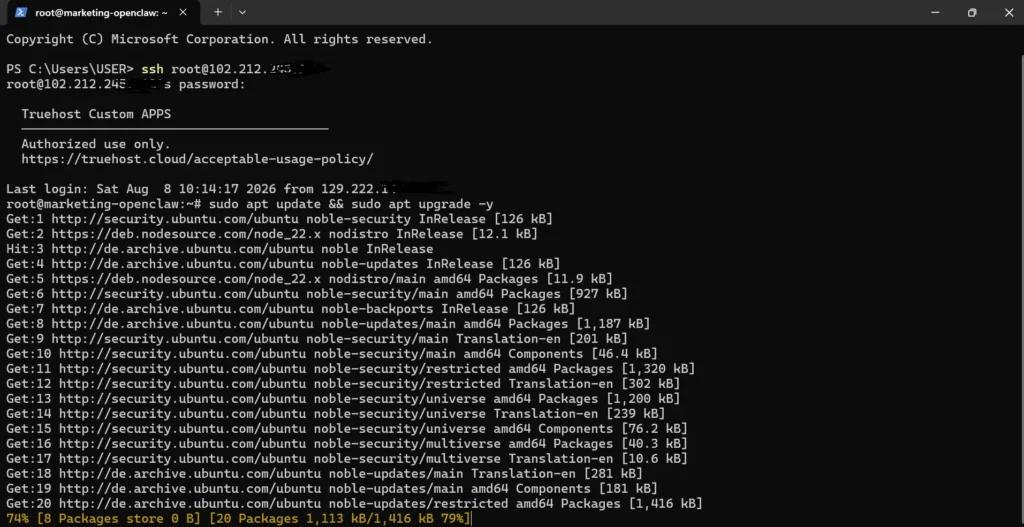
With your IP address and root password ready, open your terminal and connect.
ssh root@your_server_ipWindows users without a native SSH client can use PuTTY instead. Enter the IP address as the host, keep the port at 22, and click Open.
The first connection triggers a host key confirmation prompt. Type yes and press Enter to continue.
Enter the root password when asked, and you should land inside your server’s command line.
Once logged in, create a non-root user with sudo privileges. Running everything as root works, but it raises your risk if a command goes wrong later.
adduser yourusername

usermod -aG sudo yourusername
Log out and back in as that new user before moving forward.
Step 3: Update the Server and Install Nginx
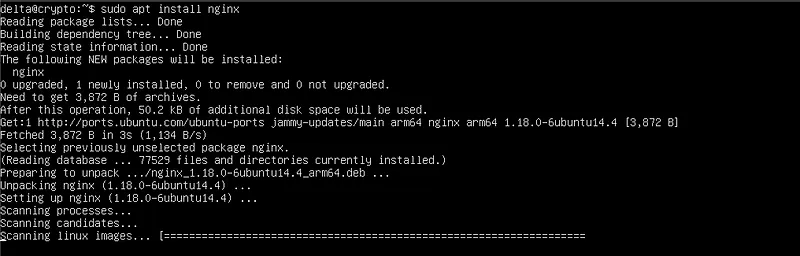
Before installing anything, update the package list and upgrade existing software. This keeps your server up to date and avoids conflicts during installation.
sudo apt update && sudo apt upgrade -y

Once that finishes, install nginx.

sudo apt install nginx -y

Check that the service started correctly.

sudo systemctl status nginx
You should see “active (running)” in the output. Next, enable nginx so it starts automatically after any reboot.
sudo systemctl enable nginxConfirm the installed version with this command.
nginx -vStep 4: Configure the Firewall for Nginx Traffic
An open server without firewall rules is a risk you don’t need to take. UFW makes this simple on Ubuntu.
Check whether UFW is active first.
sudo ufw statusIf it’s inactive, allow SSH before turning it on, so you don’t lock yourself out.
sudo ufw allow OpenSSHNow allow nginx traffic. If you plan to add SSL later, which this guide covers in Step 8, allow both HTTP and HTTPS at once.
sudo ufw allow 'Nginx Full'Enable the firewall and confirm the rules.
sudo ufw enable

sudo ufw status
If your Truehost VPS ships with CSF instead of UFW, the same logic applies. Allow ports 22, 80, and 443 through the CSF configuration file before restarting the service.
Step 5: Verify the Default Nginx Page
Open your Truehost client area and copy your VPS public IP address. Paste it into a browser and load the page.
You should see the default “Welcome to nginx!” page. This file lives at /var/www/html/index.nginx-debian.html, and you’ll replace it once your own site is ready.
If the page doesn’t load, check a few likely causes. Confirm the firewall rule for nginx is applied correctly, and check that the nginx service is still running with sudo systemctl status nginx.
A connection refused error usually points to a blocked port rather than a broken install.
Step 6: Point Your Domain to Your Truehost VPS
If you’re using only an IP address, you can skip this step for now. Most site owners want a domain name attached, though, so here’s how that works.
Log in to the domain’s DNS manager, whether it’s registered through Truehost or another registrar. Find the DNS records section and update two entries:
- Point the A record for your root domain to your VPS IP address.
- Point the www record to the same IP address.
DNS changes don’t apply instantly. Propagation can take anywhere from a few minutes to several hours, depending on the registrar and your location.
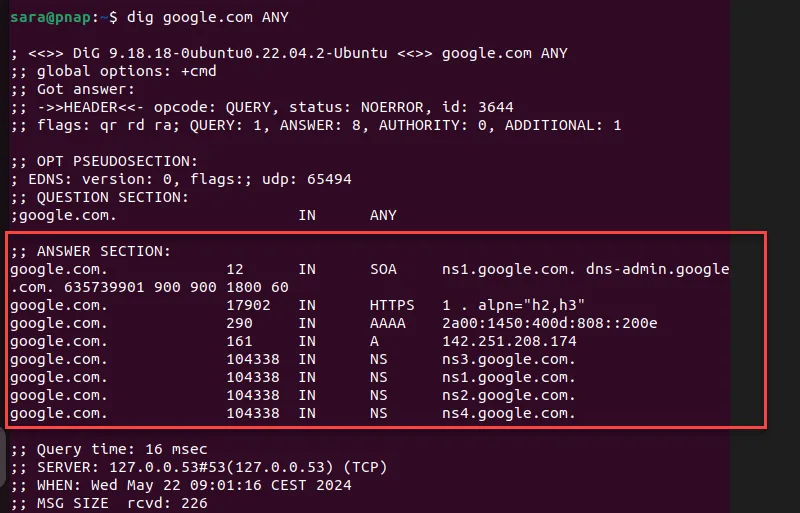
Check progress with a command like this from your local machine.
dig yourdomain.comOr use an online DNS checker to confirm the new records show up correctly.
Step 7: Create an Nginx Server Block for Your Website
A server block tells nginx which files to serve for a given domain. Start by creating a directory for your site’s files.
sudo mkdir -p /var/www/yourdomain.com/htmlSet the correct ownership so your user can add files without permission errors.
sudo chown -R $USER:$USER /var/www/yourdomain.com/htmlCreate a new server block configuration file.
sudo nano /etc/nginx/sites-available/yourdomain.comAdd this content, swapping in your actual domain name.
server {

    listen 80;

    server_name yourdomain.com www.yourdomain.com;

    root /var/www/yourdomain.com/html;

    index index.html index.htm;

    location / {

        try_files $uri $uri/ =404;

    }

}
Save the file, then link it into the sites-enabled directory so nginx picks it up.
sudo ln -s /etc/nginx/sites-available/yourdomain.com /etc/nginx/sites-enabled/Test the configuration for syntax errors before reloading.
sudo nginx -tIf the test passes, reload nginx to apply the changes.
sudo systemctl reload nginxVisit your domain in a browser. You should now see your own site instead of the default nginx page.
Step 8: Secure the Site with a Free SSL Certificate
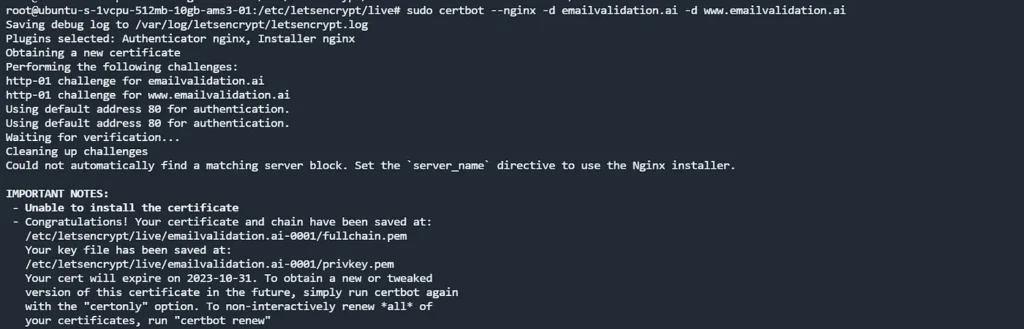
A site without HTTPS looks unfinished and quickly loses visitors’ trust. Certbot makes SSL setup straightforward.
Install Certbot along with the nginx plugin.
sudo apt install certbot python3-certbot-nginx -yRun Certbot against your domain.
sudo certbot --nginx -d yourdomain.com -d www.yourdomain.comCertbot will ask for an email address and prompt you a few times, then it will install the certificate automatically.
It also configures the HTTPS redirect for you, so visitors land on the secure version of your site by default.
Certbot sets up automatic renewal through a systemd timer, so you don’t need to repeat this process. Confirm the timer is active with this command.
sudo systemctl status certbot.timerVisit your site again and check for the padlock icon in the browser bar. That confirms the certificate was installed correctly.
Step 9: Test, Troubleshoot, and Confirm Everything Works
Before calling the setup finished, run through a few common problems and how to resolve them.
502 Bad Gateway. This usually points to a backend service, like PHP-FPM, that isn’t running or isn’t connected correctly to nginx.
Connection refused. Check that nginx is running and that the firewall allows traffic on the correct port.
DNS is not resolving. Give propagation more time and double-check the A record values in your DNS manager.
Nginx error logs are your fastest way to find the real cause of a problem.
sudo tail -f /var/log/nginx/error.logAfter editing any configuration file, always test it before reloading.
sudo nginx -t

sudo systemctl restart nginx
Run through this short checklist before you consider the site production-ready:
- Domain loads your site over HTTPS without warnings.
- Firewall allows ports 80 and 443.
- Server block file has no syntax errors.
- Certbot renewal timer is active.
- The default nginx page no longer shows on your domain.
FAQs
Why isn’t my website showing after installing nginx?
This usually comes down to one of three things. Either DNS hasn’t propagated yet, the firewall is blocking the connection, or the server block file has a typo. Check sudo nginx -t first, since it catches most configuration mistakes right away.
Is nginx better than Apache for a Truehost VPS?
Nginx generally handles static content and concurrent connections with less server strain, which suits most VPS plans well. Apache still fits sites that depend on .htaccess rules or specific modules. Your choice depends on what your site needs to run.
How do I restart nginx after changing a configuration file?
Test the file first with sudo nginx -t to catch errors before they take your site down. Once the test passes, run sudo systemctl restart nginx to apply the changes.
Your Nginx Server Is Live
You started with a blank Truehost VPS, and now you have a working, secured website running on nginx with a valid SSL certificate. That’s real progress, and the hardest part is behind you.
From here, the next logical move is putting something on that server worth visiting.
If you’re planning to run WordPress, your nginx setup already gives you the web server half of a LEMP stack, so the WordPress installation guide is a natural next read.
If you’d rather have someone else handle the technical side, Truehost’s managed VPS support team can take over server management while you focus on the site itself.