 Domain NamesFind and register your ideal domain name instantly.
 Web HostingEasy-to-use hosting powered by cPanel — ideal for managing websites in Nigeria.
 Windows HostingRun .NET apps with Windows-optimized hosting
 Affiliate ProgramMake money promoting our services
 Reseller HostingMake money by reselling our hosting products under your own brand
 .COM Domains
 All DomainsExplore all supported tld domains in Nigeria
 WhoisFind out who owns any domain, as well as verify your registration details
 VPS Hosting
 Dedicated ServersReimagine your site speed with your own complete server
 AI Website BuilderDesign your site with drag-and-drop tools
 Online Store BuilderStart your online shop without code
 Support PortalFind answers or get expert help
 Contact UsReach our team via chat or email
 BlogRead our extensive guides on web hosting and more
If you are running a web hosting business in Nigeria, at some point you are going to outgrow manually sending invoices and chasing clients for payments.
That is where WHMCS comes in.
It is the industry-standard billing and automation platform for hosting companies worldwide, and for good reason.
It handles everything from invoice generation and payment processing to account provisioning and domain registration, all from one dashboard.
For Nigerian hosting businesses specifically, WHMCS is worth setting up properly from the start.
Done right, you get Naira billing, local payment gateways like Paystack and Flutterwave, .ng domain support, and VAT compliance baked in.
Done badly, you end up with a system that charges clients in dollars, misses automation runs, and creates more work than it saves.
This guide walks you through the complete setup process step by step.
What You Need Before You Start
Before touching anything, have these ready:
- A valid WHMCS license: Starter licenses begin at approximately $15.95 per month
- A web hosting account with PHP and MySQL support
- A domain name for your hosting business
- cPanel/WHM access, recommended for hosting integration
Step 1: Install WHMCS
You have two options here depending on your comfort level with server administration.
Option A: Install via Softaculous (Recommended)
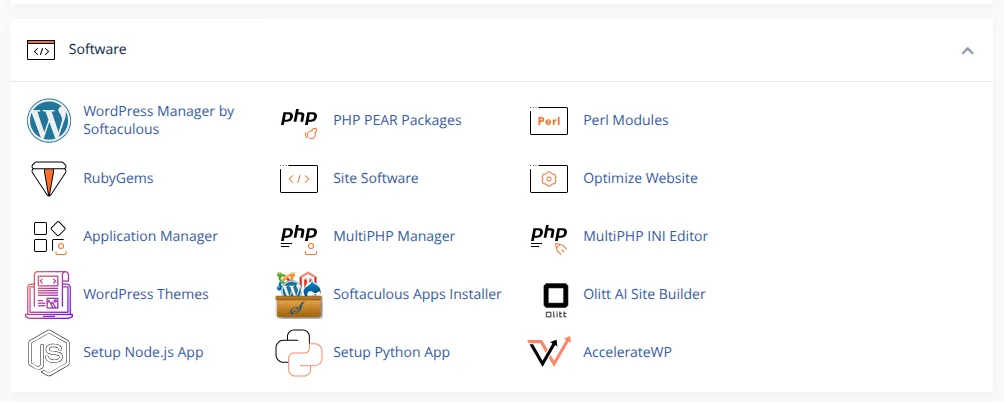
This is the faster route and the one most hosting business owners will prefer.
- Log in to your cPanel at
https://yourdomain.com/cpanel. - Scroll to the Software section and click Softaculous Apps Installer.
- Search for WHMCS, select it, and click Install Now.
- Choose your domain, configure your admin username, password, and email, then click Install.
Softaculous handles the rest. Once done, access your WHMCS admin area at https://yourdomain.com/admin.
Option B: Manual Installation
- Download WHMCS from the official members’ area.
- Unzip the contents and rename configuration.php.new to configuration.php.
- Upload the entire folder to your server, then visit
http://yourdomain.com/whmcs/install/install.phpand follow the on-screen instructions to enter your license key and set up your admin account.
Once installation is complete, delete the install folder immediately for security.
Step 2: Complete the Setup Wizard
The first time you log into the Admin Area, the Setup Wizard will appear automatically. Do not skip it, it covers the essentials in one flow.
Work through each screen to enter your company information including business name, address, and contact details.
Configure your general settings covering timezone, currency, and language.
Set up payment gateways, configure domain registration settings, and create your first hosting products.
Click Next through each step until you see the Setup Complete message.
Step 3: Configure Nigerian Naira as Default Currency
Out of the box, WHMCS defaults to USD. That is not going to work for a Nigerian hosting business, so this step needs to happen before anything else goes live.
Go to WHMCS Admin, then Setup, then Currencies. Delete or deactivate USD as the default currency. Add Nigerian Naira with the following settings:
- Currency: Nigerian Naira
- Code: NGN
- Prefix: ₦
- Suffix: Leave blank
- Rate: 1.00, this sets NGN as the base currency
Set NGN as the default and save. Every product price, invoice, and payment notification from this point forward will be in Naira.
Step 4: Set Up Nigerian Payment Gateways
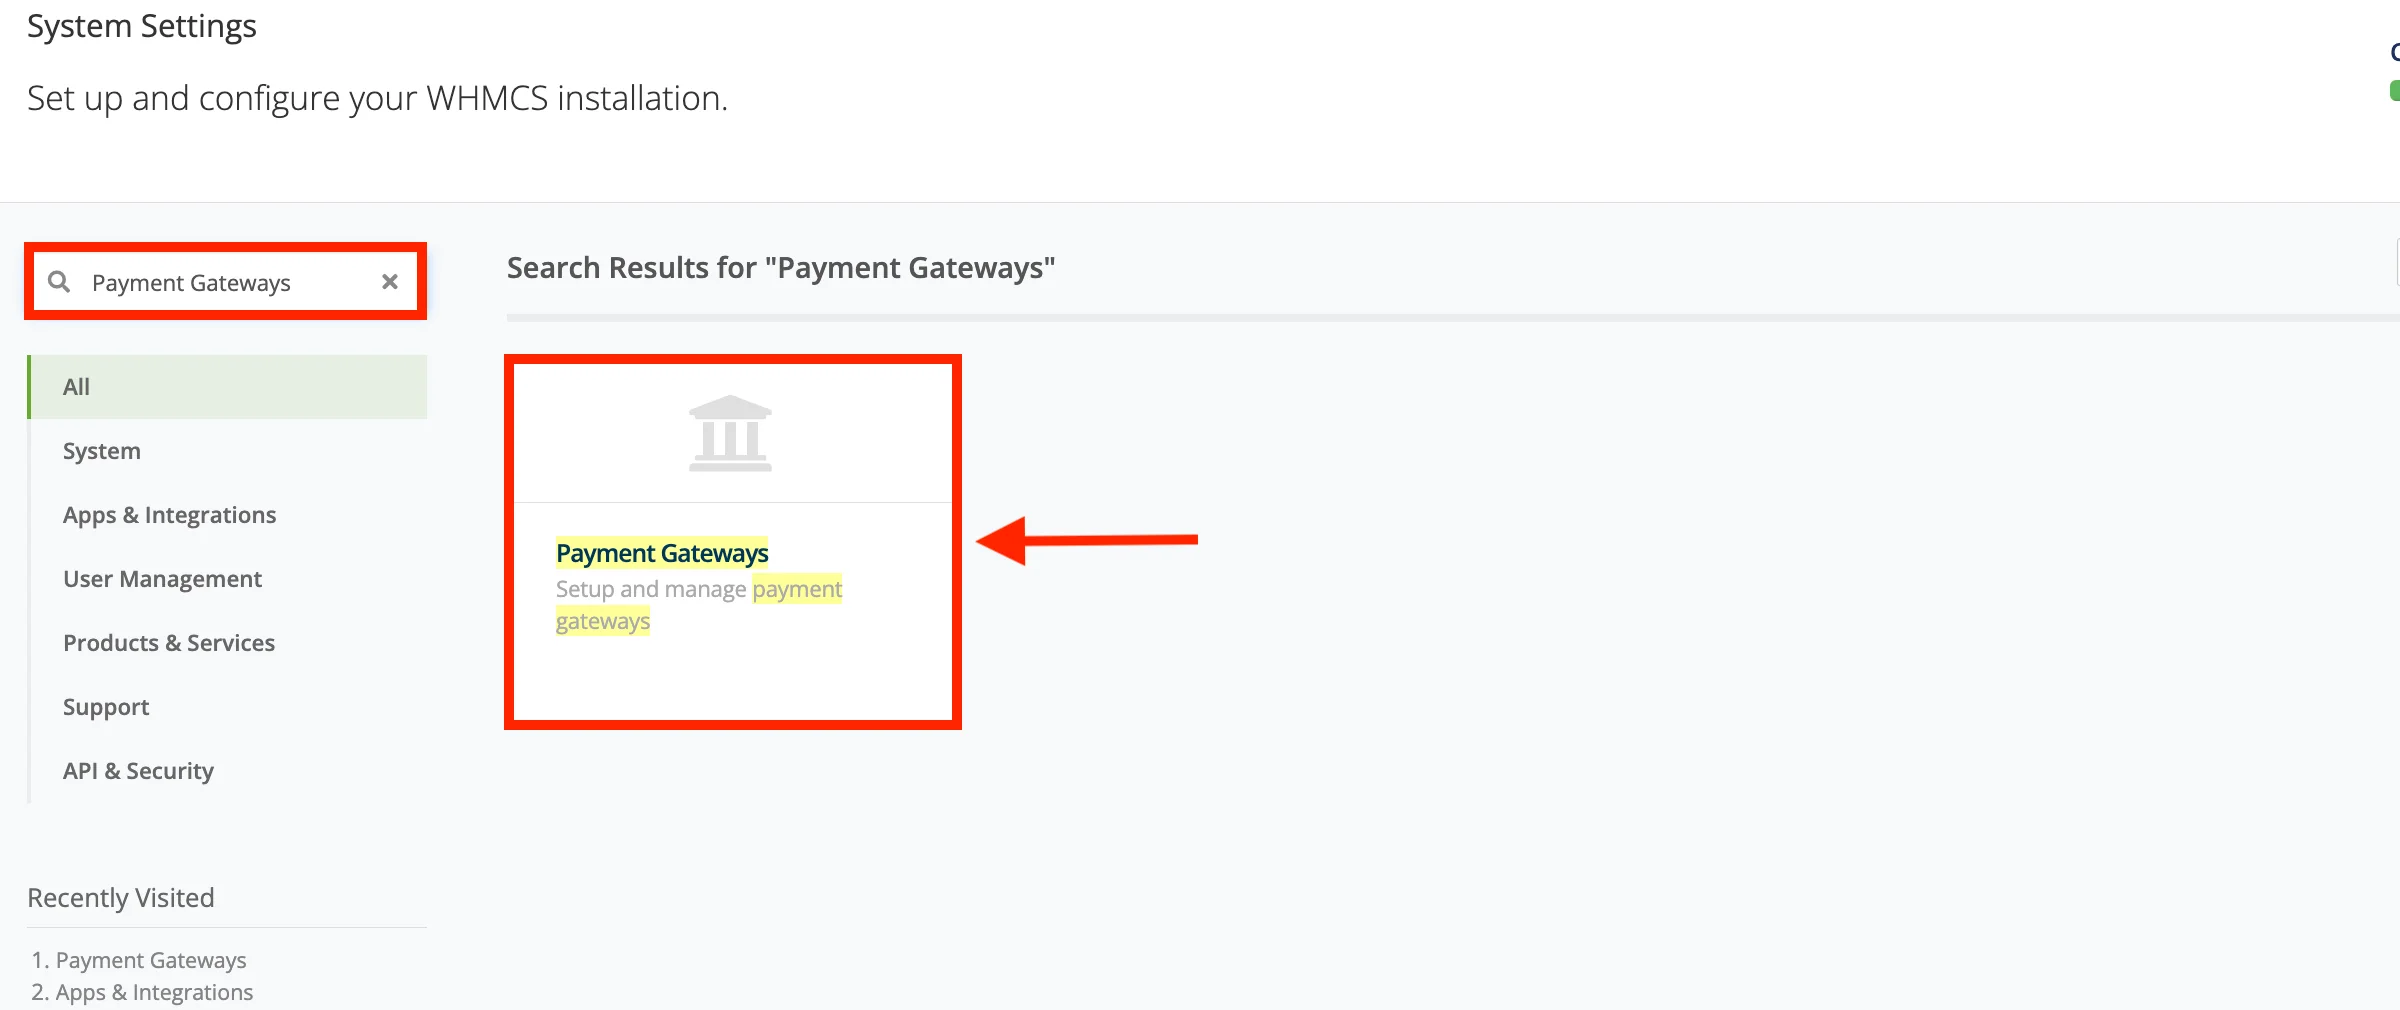
This is arguably the most important step for a Nigerian hosting business.
Your clients need to be able to pay through channels they actually use, cards, bank transfers, USSD, without friction. WHMCS supports the major Nigerian gateways, and here is how to set up each one.
- Paystack
Paystack is the leading payment gateway in Nigeria, supporting cards, bank transfers, USSD, QR payments, mobile money, and more.
- Download the WHMCS Paystack module from GitHub and upload it to /modules/gateways/ on your server.
- In WHMCS Admin, go to Setup, then Payments, then Payment Gateways.
- Find Paystack and click Activate.
- Enter your Live Secret Key and Public Key from your Paystack dashboard.
- Then configure the webhook in your Paystack dashboard by going to Settings, then API Keys and Webhooks, and setting the webhook URL to:
https://yourdomain.com/modules/gateways/callback/paystack.php
- Flutterwave
Flutterwave supports payments via cards, bank transfers, mobile money, and USSD across Africa.
Go to WHMCS Admin, then Apps and Integrations, then Browse.
Navigate to Payments, find Flutterwave, click Activate, and configure with your API keys from your Flutterwave dashboard.
- Monnify
Monnify accepts payments via card, USSD, and bank transfers from all Nigerian banks.
Extract monnify-whmcs-gateway.zip, copy monnify.php to /modules/gateways/, and copy the callback file to /modules/gateways/callback/.
Activate it under Setup, then Payments, then Payment Gateways. Enter your API Key, Secret Key, and Contract Code from your Monnify dashboard, then paste the webhook URL from the module into your Monnify settings.
- Other Nigerian Payment Options
Other gateways worth considering include SeerBit, which accepts cards, bank transfers, USSD, and mobile money including Opay, Kuda, and Palmpay; ALatPay by Wema Bank; and Squadco by HabariPay and GTBank.
Step 5: Add Your Hosting Server
To automatically provision hosting accounts when a client pays, you need to connect WHMCS to your server.
Without this, you are manually creating accounts every time someone orders, which defeats the purpose of automation entirely.
- Go to Configuration, then System Settings, then Servers.
- Click Add New Server.
- Select the appropriate module, cPanel is the most common choice.
- Enter your server details: a descriptive name, your server’s hostname or IP address, and your WHM or reseller credentials.
- Click Save Changes.
Step 6: Create Your Hosting Products
- Create a Product Group First
Go to Configuration, then System Settings, then Products and Services. Click Create a New Group and name it, something like Shared Hosting or Business Hosting works fine.
- Create Your Products
Click Create a New Product and choose the Product Type that fits: Shared Hosting for standard accounts, Reseller Hosting for reseller accounts, or Server/VPS for dedicated or VPS servers.
Configure the product details including the product name, the description your customers will see, the module, select cPanel or your chosen control panel, and enable Require Domain for hosting products.
Under the Pricing tab, select Recurring as the Payment Type and enter your prices in NGN for each billing cycle.
For example: ₦3,000 per month or ₦30,000 per year.
Under Module Settings, select the WHM package to use, configure resource limits, and select a Welcome Email template to send automatically on provisioning. Click Save Changes when done.
Step 7: Configure .NG Domain Registration
WHMCS does not include .ng TLD support by default, which is a gap you need to fill if you plan to offer Nigerian domain registration alongside hosting.
Option A: Install a .NG Domain Registrar Module
Download a .ng registrar module such as the DOT NG Domain Reseller WHMCS Module.
Upload and extract it to your WHMCS directory.
Go to Setup, then Products/Services, then Domain Registrars. Activate the module and enter your API credentials.
Option B: Configure WHOIS for .NG Domains
To enable domain availability checking for .ng domains, locate the WHOIS configuration file in your WHMCS installation and add the following configuration for .NG TLDs:
json
{
  "extensions": ".ng,.com.ng,.net.ng,.org.ng,.i.ng,.edu.ng,.sch.ng,.name.ng,.gov.ng",
  "uri": "https://whois.nic.net.ng/domain/",
  "available": "404"
}
Note that NiRA, the .ng registry, uses a 404 response to indicate that a domain is available. This configuration ensures WHMCS correctly interprets that response during availability checks.
Step 8: Configure Email (SMTP)
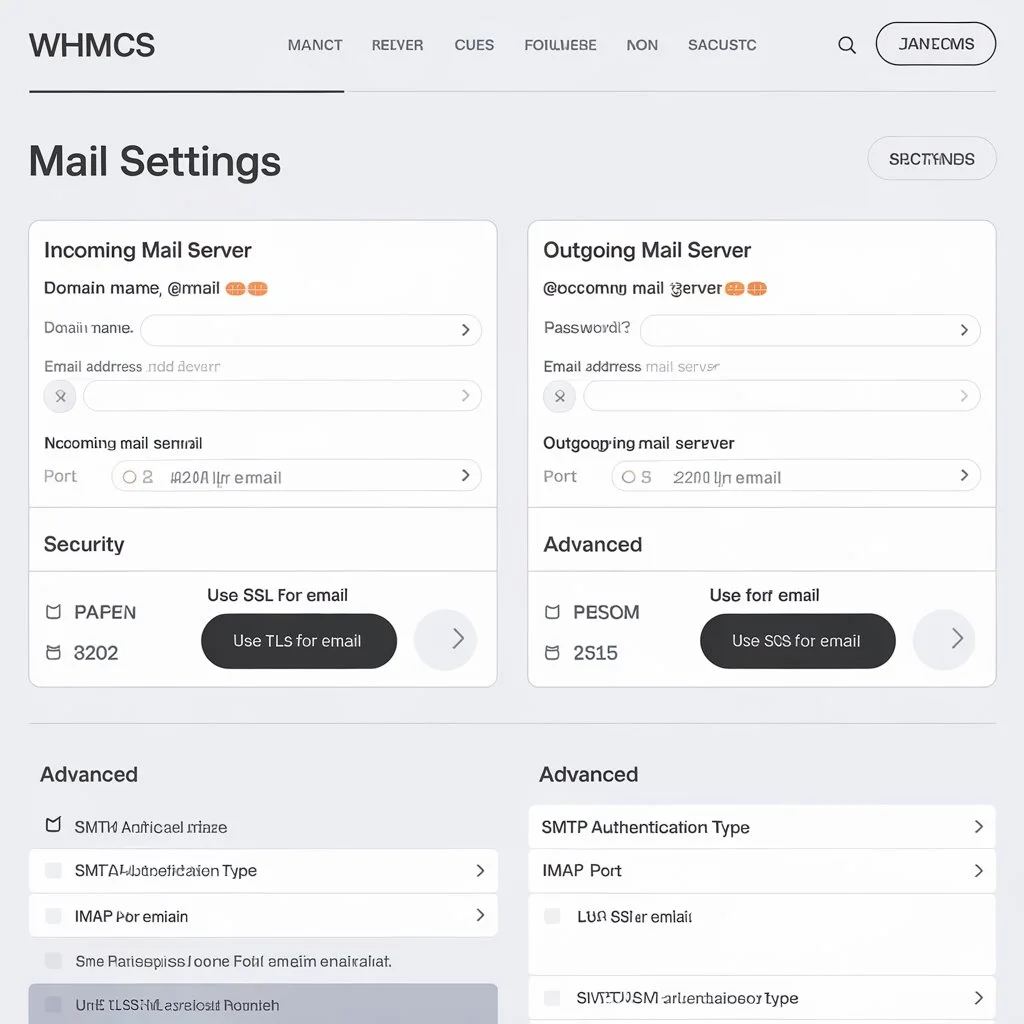
Proper email delivery is not optional, it is how your clients receive invoices, welcome emails, payment confirmations, and support notifications.
A misconfigured mail setup means those emails go nowhere, and clients assume something is wrong with your business.
Go to Configuration, then System Settings, then General Settings. Click the Mail tab.
Next to Mail Provider, click Configure Mail Provider. Select SMTP and enter your credentials with the following settings:
- SMTP Host: Your mail server hostname
- SMTP Port: 25 or 26 without SSL; 465 or 587 with SSL; 587 for TLS
- SMTP SSL Type: None, SSL, or TLS depending on your setup
- Username/Password: Your email account credentials
Click Test Configuration to verify it is working before saving.
If you are on cPanel, create the email account in cPanel first, then pull the SMTP settings from the Connect Devices section in email account management.
Step 9: Configure Nigerian VAT at 7.5%
Nigeria requires a 7.5% VAT on taxable goods and services. Skipping this step means your invoices are not compliant, which becomes a problem as your business grows.
Go to Configuration, then System Settings, then Tax Configuration. Toggle Tax Support to On. Go to the Tax Rules tab and click Add New Tax Rule. Enter the following:
- Tax Name: VAT
- Rate: 7.5
- Apply to: All taxable products, or specific countries if you prefer
Choose whether prices should be inclusive or exclusive of tax, then click Save.
Step 10: Set Up Automation via Cron Job
The cron job is what makes WHMCS actually work as a business tool.
Without it, there is no automatic invoice generation, no payment reminders, no overdue notices, and no service suspensions.
You would be doing all of that manually, which is exactly what WHMCS is supposed to eliminate.
- Go to Configuration, then System Settings, then Automation Settings.
- Copy the cron command displayed at the top of the page.
- Set up the cron job in your hosting control panel, in cPanel, go to Cron Jobs and add a new job set to run every five minutes.
The command looks like this:
*/5 * * * * php -q /home/username/crons/cron.phpConfigure the automation settings to specify when to generate invoices, when to send payment reminders, when to send overdue warnings, and when to suspend accounts that have not paid.
Do not skip this step. The cron job is not optional, it is the engine that keeps the whole system running.
Next Steps After Setup
Once WHMCS is fully configured, test the entire customer journey before opening to the public.
Create a test account, place an order, and verify that the account gets provisioned, the invoice is generated in NGN, the payment goes through your chosen gateway, and the welcome email arrives correctly.
Customise the client area to match your brand colours and style. Set up automated backups for your billing data, and check system logs regularly for payment failures or automation errors.
A properly configured WHMCS setup with NGN currency, local payment gateways, .ng domain support, and VAT compliance is what separates a professional Nigerian hosting business from one that is still running on spreadsheets and manual bank transfers.
And if you are just getting started and need reliable infrastructure to build on, Truehost’s reseller hosting plans are designed exactly for this.
You get WHM access, a solid server environment, and the foundation your WHMCS setup needs to provision accounts automatically from day one.
Check out Truehost Reseller Hosting and get your hosting business running the right way.