 DomainsFind and register your ideal domain name instantly.
 Web HostingEasy-to-use hosting powered by cPanel — ideal for managing websites in Nigeria.
 Windows HostingRun .NET apps with Windows-optimized hosting
 Affiliate ProgramMake money promoting our services
 Reseller HostingMake money by reselling our hosting products under your own brand
 .COM Domains
 All DomainsExplore all supported tld domains in Nigeria
 WhoisFind out who owns any domain, as well as verify your registration details
 Dedicated ServersReimagine your site speed with your own complete server
 AI Website BuilderDesign your site with drag-and-drop tools
 Online Shop BuilderStart your online shop without code
 Support PortalFind answers or get expert help
 Contact UsReach our team via chat or email
 BlogRead our extensive guides on web hosting and more
Yes, you can run multiple websites under one shared hosting account, provided the specific plan you choose actually allows it.
Some entry-level shared hosting plans support only a single website.
Higher-tier plans can support several, sometimes ten, sometimes dozens, depending on the provider and plan.
For freelancers, agencies, and anyone managing more than one project, this can genuinely simplify both cost and administration compared to buying a separate hosting account for every single site.
It’s worth being clear about one common misconception upfront.
Owning multiple domains doesn’t automatically mean you can host all of them on one hosting plan.
Your domains and your hosting are separate things.
Whether they can all live together on one account comes down entirely to what that specific plan allows.
How Does Hosting Multiple Websites on One Account Work?
Here’s a simple example to picture how this actually looks in practice.
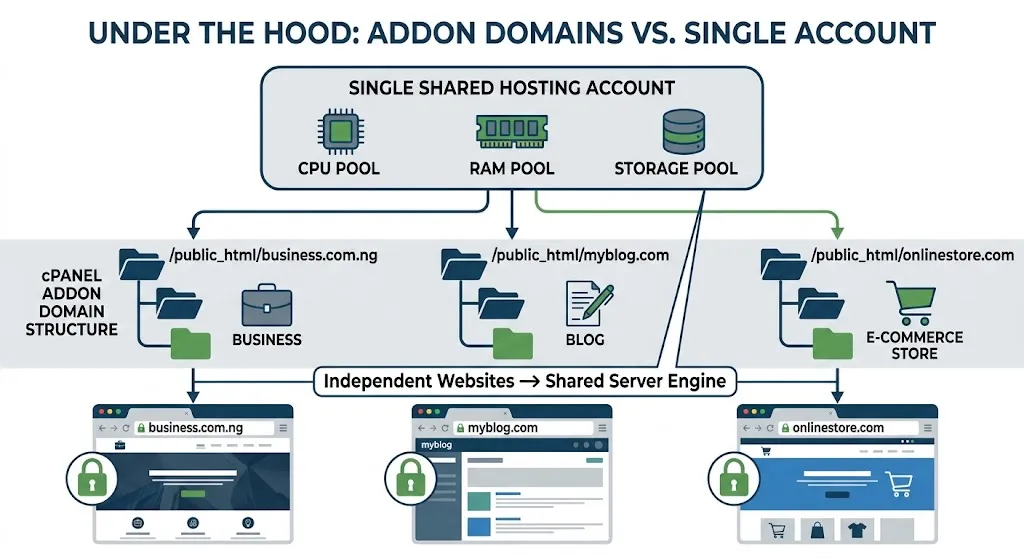
One hosting account could run business.com.ng as Website 1, myblog.com as Website 2, and onlinestore.com as Website 3, all from the same shared hosting plan.
Each of these websites can have its own files, its own database, its own WordPress installation, its own SSL certificate, and its own set of email addresses.
From a visitor’s perspective, each site looks and behaves completely independently.
But underneath, all of them draw from the same shared hosting resources, storage, CPU, RAM, and bandwidth allocated to that one account.
This works through a feature usually called addon domains, or an equivalent multi-site option depending on your control panel.
In cPanel specifically, addon domains let you attach additional domain names to your hosting account.
Each one points to its own separate folder, functioning as an independent website while still technically living under one hosting plan.
This is different from a subdomain, which is a section of your main domain.
An addon domain is a completely separate, fully independent website that just happens to share the same underlying hosting account.
How to Host Multiple Websites on One Shared Hosting Account
1) Choose a Shared Hosting Plan That Supports Multiple Websites
Before anything else, check the plan’s actual website or domain limit, not just the price.
Also check the storage allocation, since multiple sites will share it.
Check the bandwidth allowance too, even if it’s advertised as unlimited, since fair-use policies still apply.
Check how many databases the plan allows, since most CMS-driven sites need at least one each.
And check CPU and RAM resources, since running several active sites places more demand on these than running just one.
2) Register Your Additional Domains
Each website you plan to host needs its own registered domain.
These domains can be registered with Truehost directly, or with another registrar entirely, it doesn’t need to match your hosting provider.
The key thing is having access to manage each domain’s DNS settings once you’re ready to connect it to your hosting.
Before registering, choose domains that are relevant to each website and keep track of their renewal dates.
You’ll also need the correct nameservers or DNS records when connecting them to your hosting account.
3) Point Your Domains to Your Hosting Account
This step connects your domain to your hosting server through DNS.
In most cases, this means updating the domain’s nameservers to match your hosting provider’s nameservers.
If a domain is already using your host’s nameservers for another purpose, you may only need to add specific DNS records instead, rather than changing nameservers entirely.
This part can feel technical at first.
But it’s really just telling the internet which server holds each domain’s files.
4) Add Each Domain to Your Hosting Account
Once DNS is pointed correctly, log into your hosting control panel and add the domain as an addon domain.
This step tells your hosting account that this new domain exists and should be treated as a separate site living on the same account.
Your control panel will typically ask you to confirm the domain name and where its files should live.
Choose a separate folder for each domain to keep your websites organized and prevent files from different sites from getting mixed up.
You can then upload or install the website files for that specific domain in its assigned directory.
5) Create a Separate Directory for Each Website
Each website should have its own dedicated folder on the server.
Keeping sites in separate directories prevents files from one site accidentally mixing with another.
It also makes management, backups, and troubleshooting considerably more straightforward down the line.
Most control panels handle this automatically when you add an addon domain, creating the folder structure for you.
6) Install or Upload Each Website
With the directory in place, install or upload the actual website.
For a WordPress site, this usually means using a one-click installer like Softaculous, pointed at the correct addon domain’s folder.
For a custom-built site, this means uploading your files directly via FTP or a file manager.
Either way, you’ll also need to create or connect a database specific to that site, keeping each website’s data properly separated from the others.
7) Configure SSL for Each Domain
Every website you host needs its own working SSL certificate.
Make sure HTTPS is active on each individual domain rather than assuming SSL from one site carries over to another.
Most modern hosting providers issue free SSL certificates automatically once a domain is properly added and pointed correctly.
But it’s worth confirming each one activated successfully rather than assuming.
8) Test Each Website
Once everything’s set up, test each site individually.
Check that the domain loads correctly. Confirm HTTPS works without warnings.
Click through several pages. Check that images display properly.
Test any forms on the site.
And check that email tied to that specific domain is sending and receiving correctly.
Don’t assume that because one site works, they all do, test each one on its own.
What Resources Do Multiple Websites Share?
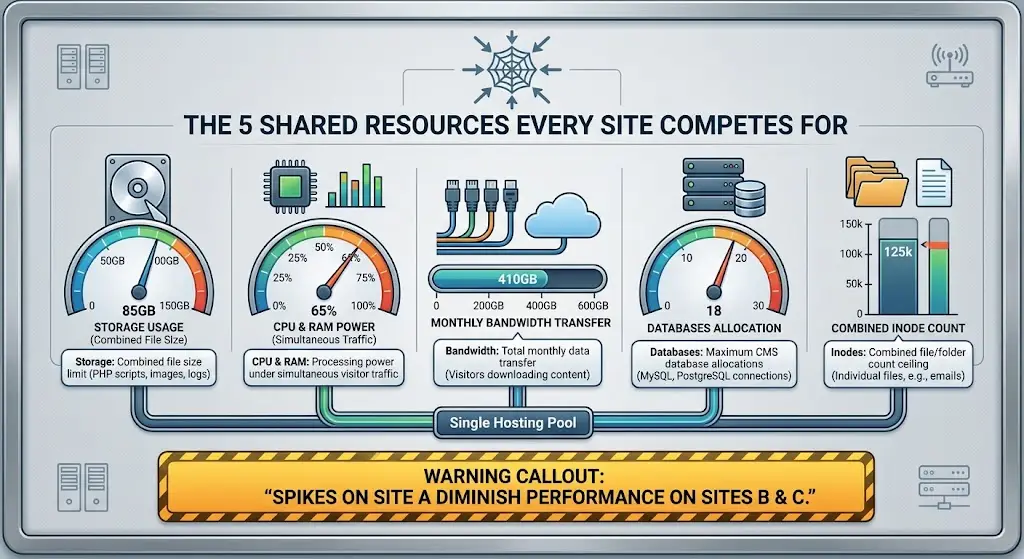
This is worth knowing clearly, since multiple websites doesn’t mean multiple independent servers.
It means multiple sites drawing from one shared pool.
1) Storage
All websites on the account consume storage from the same overall allocation.
A large media library on one site leaves less room for the others.
It’s worth budgeting storage across your whole portfolio rather than per site in isolation.
2) CPU and RAM
Every website hosted on the account shares the CPU and RAM allocated to that hosting plan, not to each individual site.
A traffic spike on one website can slow down the others sharing the same account, since they’re all drawing from the same limited processing power at the same time.
3) Bandwidth
Traffic across all hosted websites contributes to the account’s overall data transfer.
Even on a plan advertising unlimited bandwidth, combined traffic from several active sites adds up.
Unusually heavy combined usage can still trigger a fair-use review.
This means a sudden increase in visitors across multiple websites can affect your account’s resource usage.
If you expect several high-traffic websites, review the hosting provider’s bandwidth and fair-use policies beforehand to avoid unexpected limitations or performance issues.
4) Databases
Each website can, and generally should, have its own separate database.
But the hosting account as a whole can still have a limit on the total number of databases allowed, or overall database resource constraints.
It’s worth checking this figure specifically if you’re planning to run several database-driven sites.
For example, WordPress websites typically require a database, so hosting ten WordPress sites could mean needing ten separate databases.
Check whether your plan supports enough databases and whether there are limits on database size or server resources.
5) Inodes
Every file, every image, every email, and every other stored item on the account contributes to inode usage, the total count of individual files allowed.
Running several websites multiplies this quickly, since each site brings its own set of files, cached data, and emails into the same shared inode limit.
Plugins, themes, backups, logs, and cached files can increase inode usage even when your overall storage space is still low.
Regularly removing unnecessary files and old backups can help keep inode usage under control when managing multiple websites.
How to Manage Multiple Websites on One Hosting Account
- Keep each website separate. Use distinct directories and databases for every site. Avoid letting files from different websites mix together in the same folder.
- Keep WordPress and plugins updated. Outdated software on even one site can create a security risk that potentially affects the whole account. Treat updates as a routine task across every site, not just your main one.
- Back up each website. Confirm backups are actually running for every site individually, not just the one you check most often.
- Monitor hosting resources. Keep an eye on overall CPU, RAM, and storage usage across the account. A resource spike on one site can be easy to miss if you’re only watching a single website’s dashboard.
- Use SSL on every domain. Don’t let one site slip through without HTTPS properly configured.
- Remove unused websites and files. Old test sites, abandoned projects, and leftover files quietly consume storage and inodes without adding any value.
- Use strong, unique login credentials. Each website’s admin area, and its associated email accounts, should have distinct, strong passwords. That way a compromise on one site doesn’t easily cascade into the others.
- Monitor each website individually. Check uptime, performance, and security for every site on its own terms. Don’t assume that because your main site is healthy, the others sharing the account are too.
What to Look for in a Hosting Plan for Multiple Websites
Don’t focus purely on the number of websites a plan allows.
That figure alone doesn’t tell you whether the plan can actually support them well.
Compare the website limit alongside storage, CPU, RAM, bandwidth, inodes, number of databases allowed, email account limits, SSL inclusion, backup policy, control panel quality, migration support, security features, upgrade options, and customer support quality.
Here’s the key point worth remembering: a hosting plan that allows 20 websites isn’t necessarily a better choice than one allowing 10, if that 20-site plan doesn’t provide enough CPU, RAM, or storage to actually run those websites comfortably.
A generous website limit paired with thin resources just means more sites competing for the same limited pool.
That tends to produce slower performance across the board rather than genuine flexibility.
For Nigerian website owners specifically, Truehost’s current shared hosting lineup gives a useful reference point.
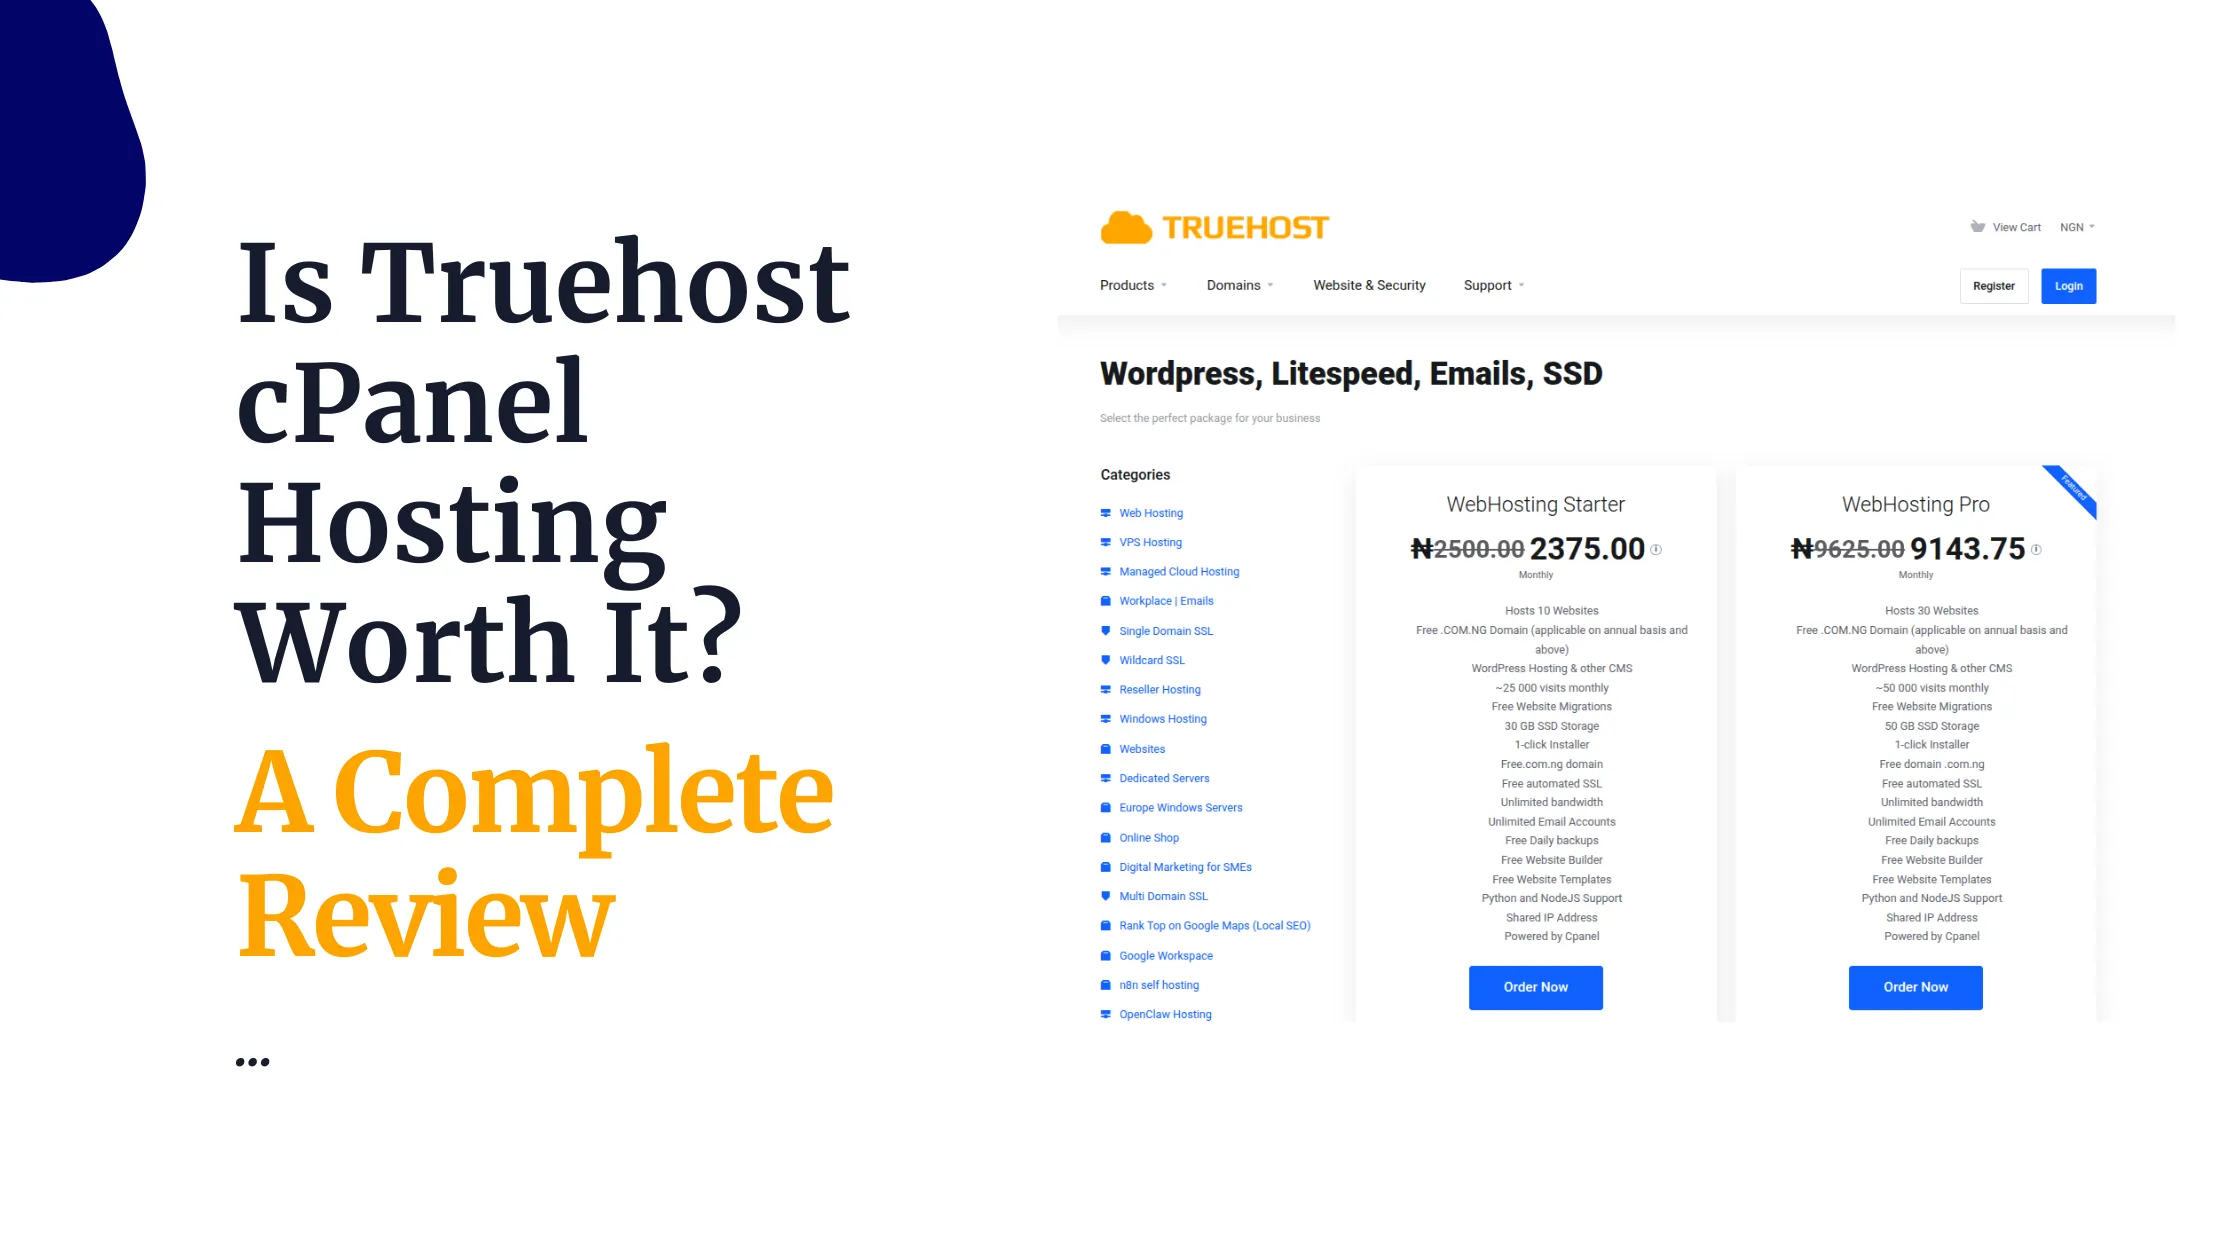
The Starter plan, priced from around product_price slug=”/hosting/webhosting-starterr” cycle=”annually”] display=”per_month”] a month, includes 30 GB of SSD storage and supports up to 10 websites.
That’s a solid fit for a small portfolio of personal or small business sites without heavy traffic.
The Pro tier steps up to 50 GB of SSD storage and is built to comfortably handle a higher combined visitor count across its hosted sites, better suited to a growing portfolio or sites with more consistent daily traffic.
For anyone managing a larger number of client or business sites, Truehost’s higher shared tiers extend both storage and website limits further.
Explore Truehost’s shared hosting plans and find the right fit for your growing collection of websites.